<?xml version="1.0" encoding="utf-8"?><?xml-stylesheet type="text/xsl" href="atom.xsl"?>
<feed xmlns="http://www.w3.org/2005/Atom">
    <id>https://hp60.com/blog/</id>
    <title>HP60 Studio Blog</title>
    <updated>2026-10-09T14:00:00.000Z</updated>
    <generator>https://github.com/jpmonette/feed</generator>
    <link rel="alternate" href="https://hp60.com/blog/"/>
    <subtitle>HP60 Studio Blog</subtitle>
    <icon>https://hp60.com/img/favicon.ico</icon>
    <entry>
        <title type="html"><![CDATA[JPEG XL Browser Support Is Growing: Get Started with Image2JXL on Mac]]></title>
        <id>https://hp60.com/blog/jpeg-xl-browser-support-image2jxl-mac/</id>
        <link href="https://hp60.com/blog/jpeg-xl-browser-support-image2jxl-mac/"/>
        <updated>2026-10-09T14:00:00.000Z</updated>
        <summary type="html"><![CDATA[Chrome 155 and Edge 155 announce JPEG XL decoding, while Firefox plans default support in 158. Explore local batch conversion and reversible JPEG workflows with Image2JXL for Mac.]]></summary>
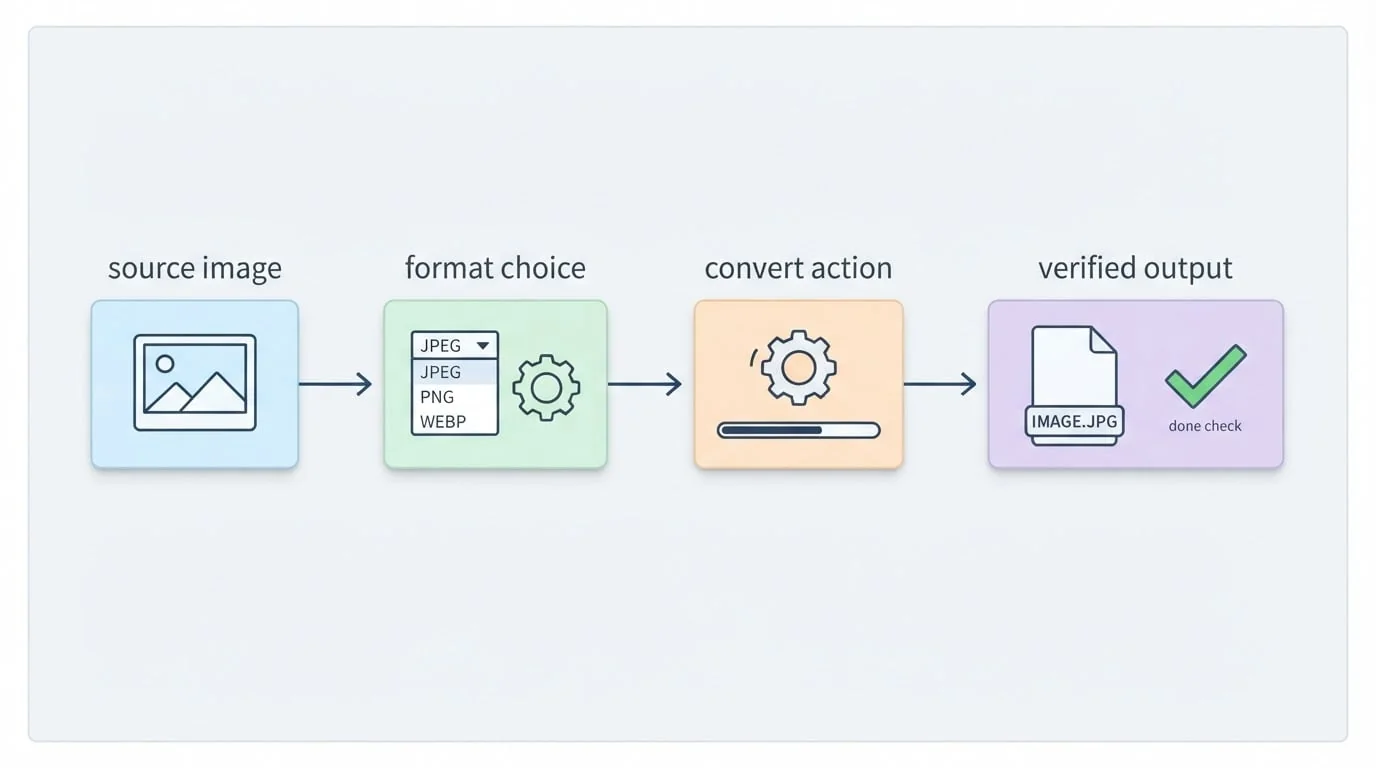
        <content type="html"><![CDATA[<p>An image format becomes useful when your tools can open it. In October 2026, JPEG XL received significant browser announcements, making this a good time to explore it with your own images.</p>
<p><strong>Image2JXL</strong> is our native macOS app for local JPEG XL conversion. Import images or folders, process files in batches, and export JXL to familiar formats when needed.</p>
<p><img decoding="async" loading="lazy" alt="Image2JXL for Mac" src="https://hp60.com/assets/images/image2jxl-bb56b7dd4baae14b7092d034f842ae21.webp" width="1024" height="1024" class="img_z23Z"></p>
<h2 class="anchor anchorTargetStickyNavbar_Xe5F" id="what-the-browser-announcements-say">What the browser announcements say<a href="https://hp60.com/blog/jpeg-xl-browser-support-image2jxl-mac/#what-the-browser-announcements-say" class="hash-link" aria-label="Direct link to What the browser announcements say" title="Direct link to What the browser announcements say" translate="no">​</a></h2>
<p>As of <strong>October 9, 2026</strong>:</p>
<table><thead><tr><th>Browser</th><th>Official update</th></tr></thead><tbody><tr><td>Chrome</td><td>Google announced decoding support starting with Chrome 155 on October 6.</td></tr><tr><td>Edge</td><td>Microsoft's October 8 Edge 155 web platform notes confirm JXL decoding, including progressive decoding.</td></tr><tr><td>Firefox</td><td>Mozilla moved planned default enablement from 157 to 158. Nightly remains enabled by default; 157 retains the Firefox Labs option.</td></tr><tr><td>Safari</td><td>WebKit added JPEG XL support in Safari 17.0.</td></tr></tbody></table>
<p>Sources: <a href="https://developer.chrome.com/blog/jpeg-xl-in-chrome" target="_blank" rel="noopener noreferrer" class="">Chrome announcement</a>, <a href="https://learn.microsoft.com/en-us/microsoft-edge/web-platform/release-notes/155" target="_blank" rel="noopener noreferrer" class="">Edge 155 release notes</a>, <a href="https://groups.google.com/a/mozilla.org/g/dev-platform/c/3YMV4MS34KA" target="_blank" rel="noopener noreferrer" class="">Mozilla's updated plan</a>, and <a href="https://webkit.org/blog/14445/webkit-features-in-safari-17-0/" target="_blank" rel="noopener noreferrer" class="">WebKit's Safari 17.0 overview</a>.</p>
<p>Version support does not mean every visitor has upgraded. Firefox 158 default enablement remains a plan, and individual platforms and image features still need testing.</p>
<h2 class="anchor anchorTargetStickyNavbar_Xe5F" id="why-explore-jpeg-xl">Why explore JPEG XL?<a href="https://hp60.com/blog/jpeg-xl-browser-support-image2jxl-mac/#why-explore-jpeg-xl" class="hash-link" aria-label="Direct link to Why explore JPEG XL?" title="Direct link to Why explore JPEG XL?" translate="no">​</a></h2>
<p>JPEG XL offers lossy and lossless compression, plus reversible JPEG transcoding. Google highlights high-fidelity photography, lossless compression, and progressive decoding as useful applications. Try representative files rather than assuming a fixed size reduction. <a href="https://developer.chrome.com/blog/jpeg-xl-in-chrome" target="_blank" rel="noopener noreferrer" class="">Source: Chrome announcement</a></p>
<p>Pixel-lossless encoding preserves decoded pixels. Reversible JPEG transcoding preserves the information needed to reconstruct a supported original JPEG. Those are different guarantees.</p>
<p>Edge's notes also list wide color gamut, HDR, high bit depth, and progressive decoding. These are format and browser capabilities; an app's individual conversion paths require their own checks. <a href="https://learn.microsoft.com/en-us/microsoft-edge/web-platform/release-notes/155" target="_blank" rel="noopener noreferrer" class="">Source: Edge release notes</a></p>
<h2 class="anchor anchorTargetStickyNavbar_Xe5F" id="meet-image2jxl-for-mac">Meet Image2JXL for Mac<a href="https://hp60.com/blog/jpeg-xl-browser-support-image2jxl-mac/#meet-image2jxl-for-mac" class="hash-link" aria-label="Direct link to Meet Image2JXL for Mac" title="Direct link to Meet Image2JXL for Mac" translate="no">​</a></h2>
<p>Image2JXL processes images locally without uploading them to an online conversion service. Its features include:</p>
<ul>
<li class="">JPEG XL conversion from JPEG, PNG/APNG, GIF, TIFF, BMP, EXR, NetPBM, and PFM.</li>
<li class="">Lossless JPEG mode for reversible conversion of supported JPEG/JFIF inputs.</li>
<li class="">JXL export to JPEG, PNG, or GIF.</li>
<li class="">Batch imports from files and folders, with per-file conversion status.</li>
<li class="">Output location options and EXIF/XMP preservation on supported paths.</li>
</ul>
<p>Pro includes converting more than 10 queued files, folder structure preservation, and moving originals to Trash after successful conversion. Keep important originals until you have checked the results.</p>
<p>If a JXL lacks usable JPEG reconstruction data, JPEG export can use ordinary JPEG encoding. A resulting <code>.jpg</code> is not automatically the original JPEG restored. Read our <a href="https://hp60.com/blog/image2jxl-introduction/" target="_blank" rel="noopener noreferrer" class="">Image2JXL introduction</a> for more detail.</p>
<h2 class="anchor anchorTargetStickyNavbar_Xe5F" id="start-with-a-small-batch">Start with a small batch<a href="https://hp60.com/blog/jpeg-xl-browser-support-image2jxl-mac/#start-with-a-small-batch" class="hash-link" aria-label="Direct link to Start with a small batch" title="Direct link to Start with a small batch" translate="no">​</a></h2>
<p>Choose representative JPEGs, select the appropriate mode, and export into a separate folder. Compare size and appearance. For reversible archiving, restore a sample to JPEG and compare SHA-256 hashes: matching hashes confirm byte-for-byte recovery. Our <a href="https://hp60.com/blog/jpeg-to-jxl-lossless-mac/" target="_blank" rel="noopener noreferrer" class="">lossless conversion guide</a> explains the steps.</p>
<p>For websites, test target browsers and retain JPEG, WebP, or AVIF fallbacks. Check the whole delivery path, including your CMS and CDN, before expanding deployment.</p>
<p>Growing browser support makes JPEG XL worth evaluating for photography, storage, and web images. Image2JXL gives Mac users a local interface for that exploration.</p>
<p><strong><a href="https://apps.apple.com/app/image2jxl-jpeg-xl-converter/id6780512229?pt=127310275&amp;ct=hp60_blog_jxl_browser_support&amp;mt=12" target="_blank" rel="noopener noreferrer" class="">Download Image2JXL on the Mac App Store</a></strong></p>
<p><em>Browser information checked on October 9, 2026. Consult official announcements for subsequent changes.</em></p><section class="margin-top--xl" aria-labelledby="content-responsibility"><h2 class="anchor anchorTargetStickyNavbar_Xe5F" id="content-responsibility">Content responsibility<a href="https://hp60.com/blog/jpeg-xl-browser-support-image2jxl-mac/#content-responsibility" class="hash-link" aria-label="Direct link to Content responsibility" title="Direct link to Content responsibility" translate="no">​</a></h2><p>The HP60 product team is responsible for this article. The publication date above identifies this content version; product behavior may change after release, so consult the linked product and support pages for current limits.</p></section>]]></content>
        <author>
            <name>Image2JXL</name>
            <uri>https://hp60.com/image2jxl/</uri>
        </author>
        <author>
            <name>HP60</name>
            <uri>https://hp60.com</uri>
        </author>
        <category label="Image2JXL" term="Image2JXL"/>
        <category label="Feature" term="Feature"/>
    </entry>
    <entry>
        <title type="html"><![CDATA[Meet FTMask: Hide Faces, Text, and License Plates Before Sharing Photos]]></title>
        <id>https://hp60.com/blog/ftmask-photo-privacy/</id>
        <link href="https://hp60.com/blog/ftmask-photo-privacy/"/>
        <updated>2026-09-30T00:00:00.000Z</updated>
        <summary type="html"><![CDATA[A practical tour of FTMask for iPhone and iPad: detect sensitive areas, review and edit masks, and export a copy while checking watermark and location metadata settings.]]></summary>
        <content type="html"><![CDATA[<p>A photo can capture the moment you want to share and details you would rather keep private: someone's face, a phone number in a screenshot, or a license plate in the background. FTMask helps you cover those areas on iPhone and iPad, with automatic detection followed by manual review.</p>
<p>Its image detection and masking run on your device. You do not need an account, and FTMask does not upload selected images to the developer's servers. If you send an exported image through the system share sheet, the destination app or service handles that copy.</p>
<h2 class="anchor anchorTargetStickyNavbar_Xe5F" id="start-with-detection-then-check-the-results">Start with detection, then check the results<a href="https://hp60.com/blog/ftmask-photo-privacy/#start-with-detection-then-check-the-results" class="hash-link" aria-label="Direct link to Start with detection, then check the results" title="Direct link to Start with detection, then check the results" translate="no">​</a></h2>
<p>Open a picture from Photos, Files, or a compatible app's share sheet. FTMask can detect faces, license plates, and potentially sensitive text to give you a starting point for editing.</p>
<figure><img src="https://hp60.com/img/blog/ftmask-photo-privacy/faces.webp" alt="FTMask editor showing emoji masks over faces in a photo" width="320" loading="lazy"><figcaption>A real FTMask screen showing face masking. The screenshots in this article use the English interface.</figcaption></figure>
<p>Automatic detection can miss something or mark an area you want to leave visible. Review the results rather than treating them as a finished privacy check. You can move or resize masks, turn individual regions off, and add a rectangle or brush mask where needed. Undo, redo, zoom, and the original-image comparison help with adjustments.</p>
<figure><img src="https://hp60.com/img/blog/ftmask-photo-privacy/review.webp" alt="FTMask Review regions panel with individual face-mask toggles and a Scan again button" width="320" loading="lazy"><figcaption>Review detected regions individually before exporting.</figcaption></figure>
<h2 class="anchor anchorTargetStickyNavbar_Xe5F" id="cover-text-in-screenshots">Cover text in screenshots<a href="https://hp60.com/blog/ftmask-photo-privacy/#cover-text-in-screenshots" class="hash-link" aria-label="Direct link to Cover text in screenshots" title="Direct link to Cover text in screenshots" translate="no">​</a></h2>
<p>Screenshots often include information beyond the part you want to discuss. Check names, phone numbers, addresses, and other details before sharing a conversation or a document image. FTMask's text detection can help locate potentially sensitive content; manual masks let you cover additional areas.</p>
<figure><img src="https://hp60.com/img/blog/ftmask-photo-privacy/text.webp" alt="FTMask text-masking example in the image editor" width="320" loading="lazy"><figcaption>Text masking is useful for reviewing a screenshot before sharing it.</figcaption></figure>
<p>FTMask offers solid color, blur, pixelation, and emoji styles. For important private information, use an opaque solid-color mask and inspect the exported result. Blur and pixelation are visual effects and do not guarantee that the underlying content cannot be inferred or recovered. Emoji masks also need to cover the entire sensitive area.</p>
<h2 class="anchor anchorTargetStickyNavbar_Xe5F" id="check-license-plates-and-the-background">Check license plates and the background<a href="https://hp60.com/blog/ftmask-photo-privacy/#check-license-plates-and-the-background" class="hash-link" aria-label="Direct link to Check license plates and the background" title="Direct link to Check license plates and the background" translate="no">​</a></h2>
<p>A street or travel photo may include a license plate you did not notice when taking it. Plate detection helps identify areas to review, and you can adjust the coverage by hand.</p>
<figure><img src="https://hp60.com/img/blog/ftmask-photo-privacy/plates.webp" alt="FTMask editor demonstrating license-plate masking in a photo" width="320" loading="lazy"><figcaption>Check the background as well as the main subject.</figcaption></figure>
<p>Before exporting, zoom in around mask edges and look through the rest of the image. Detection does not replace that final check.</p>
<h2 class="anchor anchorTargetStickyNavbar_Xe5F" id="export-a-copyand-check-location-metadata-separately">Export a copy—and check location metadata separately<a href="https://hp60.com/blog/ftmask-photo-privacy/#export-a-copyand-check-location-metadata-separately" class="hash-link" aria-label="Direct link to Export a copy—and check location metadata separately" title="Direct link to Export a copy—and check location metadata separately" translate="no">​</a></h2>
<p>FTMask exports a separate PNG or JPEG at the original pixel dimensions. It does not overwrite or delete the imported photo or file. You can save the result to Photos or use the system share sheet; saving directly to Photos requires permission to add photos.</p>
<p>Masking the visible image and handling its metadata are separate tasks. <strong>Free exports retain source EXIF/GPS information, if present.</strong> A hidden address in the picture does not mean location metadata has been removed. Lifetime Pro lets you choose whether to keep or remove EXIF/GPS data.</p>
<p>Temporary exports are also separate from saved copies. FTMask attempts to clean up temporary files when exporting again, closing the editor, or releasing the session, and retries cleanup of abnormal leftovers on a later app or extension launch. Copies you save to Photos, Files, or another app remain there until you delete them in that location. See the <a href="https://hp60.com/ftmask/about/privacy/" target="_blank" rel="noopener noreferrer" class="">privacy policy</a> for details.</p>
<h2 class="anchor anchorTargetStickyNavbar_Xe5F" id="what-is-free-and-what-does-pro-add">What is free, and what does Pro add?<a href="https://hp60.com/blog/ftmask-photo-privacy/#what-is-free-and-what-does-pro-add" class="hash-link" aria-label="Direct link to What is free, and what does Pro add?" title="Direct link to What is free, and what does Pro add?" translate="no">​</a></h2>
<p>The free version includes detection, manual editing, all four mask types, six basic emoji, preset colors, and original-resolution exports. Exports carry a movable FTMask watermark.</p>
<p>Lifetime Pro is a one-time in-app purchase with no subscription or automatic renewal. It removes the export watermark, adds the EXIF/GPS choice, and unlocks all emoji styles and custom mask colors. The purchase screen shows the current price, and purchases can be restored in Settings with the Apple account used to buy them.</p>
<p>FTMask requires <strong>iOS or iPadOS 26.0 or later</strong>. It edits one static JPEG, PNG, or HEIC/HEIF image at a time, up to 24 megapixels. Video, animated images, and batch editing are not supported.</p>
<p>For the complete feature overview and instructions, visit the <a href="https://hp60.com/ftmask/" target="_blank" rel="noopener noreferrer" class="">FTMask website</a>, <a href="https://hp60.com/ftmask/guide/" target="_blank" rel="noopener noreferrer" class="">getting-started guide</a>, or <a href="https://hp60.com/ftmask/support/" target="_blank" rel="noopener noreferrer" class="">FAQ and support page</a>.</p><section class="margin-top--xl" aria-labelledby="content-responsibility"><h2 class="anchor anchorTargetStickyNavbar_Xe5F" id="content-responsibility">Content responsibility<a href="https://hp60.com/blog/ftmask-photo-privacy/#content-responsibility" class="hash-link" aria-label="Direct link to Content responsibility" title="Direct link to Content responsibility" translate="no">​</a></h2><p>The HP60 product team is responsible for this article. The publication date above identifies this content version; product behavior may change after release, so consult the linked product and support pages for current limits.</p></section>]]></content>
        <author>
            <name>HP60</name>
            <uri>https://hp60.com</uri>
        </author>
        <category label="FTMask" term="FTMask"/>
        <category label="Feature" term="Feature"/>
    </entry>
    <entry>
        <title type="html"><![CDATA[Mouse SR for Mac: Smooth Scrolling, Buttons & Finder]]></title>
        <id>https://hp60.com/blog/mouse-sr-feature-tour/</id>
        <link href="https://hp60.com/blog/mouse-sr-feature-tour/"/>
        <updated>2026-09-25T00:00:00.000Z</updated>
        <summary type="html"><![CDATA[See how Mouse SR smooths third-party mouse-wheel scrolling, maps mouse buttons to shortcuts, and adds quick file actions to Finder on Mac.]]></summary>
        <content type="html"><![CDATA[<p>A familiar mouse can work even better on a Mac when its wheel and extra buttons feel the way you want. <a href="https://hp60.com/mouse-sr/" target="_blank" rel="noopener noreferrer" class="">Mouse SR</a> brings together smoother wheel scrolling, mouse-button shortcuts, and practical Finder actions in one macOS app.</p>
<p>Mouse SR is designed for discrete wheel input from third-party mice. Trackpads, Magic Mouse, and other continuous scrolling devices pass through unchanged.</p>
<h2 class="anchor anchorTargetStickyNavbar_Xe5F" id="make-scrolling-feel-right">Make scrolling feel right<a href="https://hp60.com/blog/mouse-sr-feature-tour/#make-scrolling-feel-right" class="hash-link" aria-label="Direct link to Make scrolling feel right" title="Direct link to Make scrolling feel right" translate="no">​</a></h2>
<p><img decoding="async" loading="lazy" alt="Mouse SR settings for smooth scrolling with a third-party mouse on Mac" src="https://hp60.com/assets/images/001-2073ff555f735b8ebb2e31ee506e5d50.webp" width="1024" height="1536" class="img_z23Z"></p>
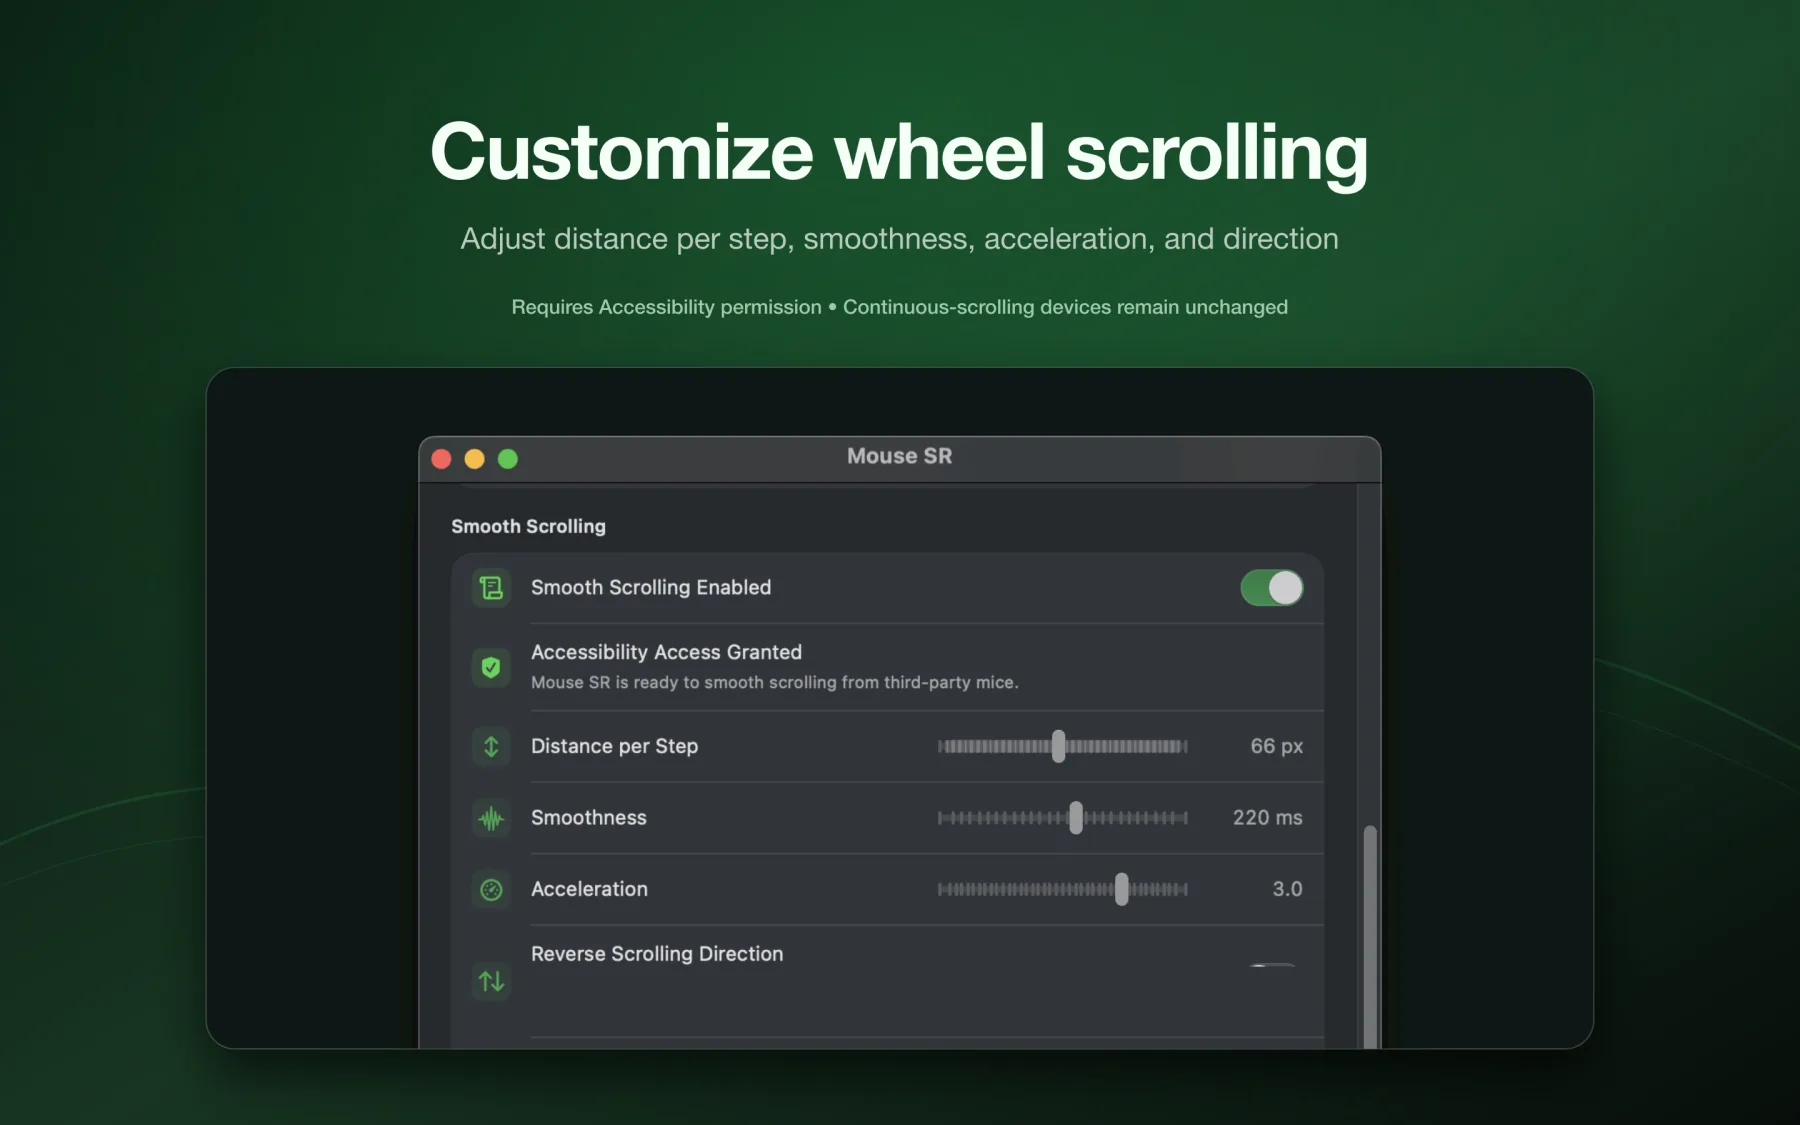
<p>Mouse SR turns the distinct steps of a mouse wheel into smooth, display-synchronized scrolling. You can tune how far each wheel notch moves, how the motion eases between steps, and how much acceleration to apply. If you prefer the opposite direction, you can reverse scrolling too.</p>
<p>That makes it easy to find a feel that suits the way you read, browse, and work. Smooth scrolling requires Accessibility permission in macOS. For a step-by-step setup, see the <a href="https://hp60.com/blog/how-to-get-smooth-scrolling-on-mac/" target="_blank" rel="noopener noreferrer" class="">Mouse SR smooth scrolling guide</a>.</p>
<h2 class="anchor anchorTargetStickyNavbar_Xe5F" id="use-your-mouse-wheel-in-iphone-mirroring">Use your mouse wheel in iPhone Mirroring<a href="https://hp60.com/blog/mouse-sr-feature-tour/#use-your-mouse-wheel-in-iphone-mirroring" class="hash-link" aria-label="Direct link to Use your mouse wheel in iPhone Mirroring" title="Direct link to Use your mouse wheel in iPhone Mirroring" translate="no">​</a></h2>
<p><img decoding="async" loading="lazy" alt="Mouse SR smoothing mouse-wheel scrolling in iPhone Mirroring on Mac" src="https://hp60.com/assets/images/002-8eb63e9d37d1f17f942f32165aba431b.webp" width="1024" height="1536" class="img_z23Z"></p>
<p>When you use iPhone Mirroring on your Mac, Mouse SR can smooth the scrolling from a third-party mouse wheel inside the mirrored window. It is handy when moving through a feed, a long page, or a list with your Mac mouse.</p>
<p>This applies to mouse-wheel input. It does not change touch gestures on the iPhone or the connection between your Mac and iPhone. See the <a href="https://hp60.com/blog/mouse-sr-iphone-mirroring-smooth-scrolling/" target="_blank" rel="noopener noreferrer" class="">iPhone Mirroring scrolling guide</a> for setup and troubleshooting.</p>
<h2 class="anchor anchorTargetStickyNavbar_Xe5F" id="put-shortcuts-under-your-thumb">Put shortcuts under your thumb<a href="https://hp60.com/blog/mouse-sr-feature-tour/#put-shortcuts-under-your-thumb" class="hash-link" aria-label="Direct link to Put shortcuts under your thumb" title="Direct link to Put shortcuts under your thumb" translate="no">​</a></h2>
<p><img decoding="async" loading="lazy" alt="Mouse SR mapping side buttons to shortcuts with common shortcut presets" src="https://hp60.com/assets/images/003-fc0a6158abb9e4ba85cdd03bbfcc631c.webp" width="1024" height="1536" class="img_z23Z"></p>
<p>Give a side button or middle button a keyboard shortcut you already use. Record your own shortcut or choose a common preset such as Hide Current App, Copy, Paste, or Close Window or Tab. Once mapped, the button sends that shortcut to the app you are using.</p>
<p>A mapped button replaces that button's original action; your mouse's left and right clicks stay unchanged. Button mapping also requires Accessibility permission.</p>
<h2 class="anchor anchorTargetStickyNavbar_Xe5F" id="add-useful-actions-to-finder">Add useful actions to Finder<a href="https://hp60.com/blog/mouse-sr-feature-tour/#add-useful-actions-to-finder" class="hash-link" aria-label="Direct link to Add useful actions to Finder" title="Direct link to Add useful actions to Finder" translate="no">​</a></h2>
<p><img decoding="async" loading="lazy" alt="Finder context menu with Mouse SR actions for Terminal, new files, and copying paths" src="https://hp60.com/assets/images/004-8b8aea9767c020b682631d087a598569.webp" width="1024" height="1536" class="img_z23Z"></p>
<p>Mouse SR's Finder extension adds a few handy file actions to Finder's contextual menu. Depending on what you select, you can open a location in Terminal, create a new TXT or Markdown file with a collision-safe name, or copy selected paths. These shortcuts help with small tasks that otherwise mean opening another app or navigating through extra menus.</p>
<p>Enable the Mouse SR Finder extension and choose the folders where you want its actions available. Finder's own commands remain alongside the Mouse SR actions.</p>
<h2 class="anchor anchorTargetStickyNavbar_Xe5F" id="a-few-small-changes-to-your-daily-workflow">A few small changes to your daily workflow<a href="https://hp60.com/blog/mouse-sr-feature-tour/#a-few-small-changes-to-your-daily-workflow" class="hash-link" aria-label="Direct link to A few small changes to your daily workflow" title="Direct link to A few small changes to your daily workflow" translate="no">​</a></h2>
<p>Mouse SR brings your mouse's wheel, extra buttons, and Finder context menu into one place. Set a scroll feel that suits you, make a button call a familiar shortcut, and keep common file actions close at hand.</p>
<p>All the features shown here are included with Mouse SR Pro. You can try every feature for seven days.</p><section class="margin-top--xl" aria-labelledby="content-responsibility"><h2 class="anchor anchorTargetStickyNavbar_Xe5F" id="content-responsibility">Content responsibility<a href="https://hp60.com/blog/mouse-sr-feature-tour/#content-responsibility" class="hash-link" aria-label="Direct link to Content responsibility" title="Direct link to Content responsibility" translate="no">​</a></h2><p>The HP60 product team is responsible for this article. The publication date above identifies this content version; product behavior may change after release, so consult the linked product and support pages for current limits.</p></section>]]></content>
        <author>
            <name>Mouse SR</name>
            <uri>https://hp60.com/mouse-sr/</uri>
        </author>
        <author>
            <name>HP60</name>
            <uri>https://hp60.com</uri>
        </author>
        <category label="Mouse SR" term="Mouse SR"/>
        <category label="Feature" term="Feature"/>
    </entry>
    <entry>
        <title type="html"><![CDATA[Turn Document Photos into Print-Ready PDFs Offline with Imgs2PDF]]></title>
        <id>https://hp60.com/blog/process-document-photos-offline-imgs2pdf/</id>
        <link href="https://hp60.com/blog/process-document-photos-offline-imgs2pdf/"/>
        <updated>2026-09-21T00:00:00.000Z</updated>
        <summary type="html"><![CDATA[A local, no-cloud, no-AI workflow for cropping document photos, applying a print filter, and exporting a readable PDF with Imgs2PDF.]]></summary>
        <content type="html"><![CDATA[<p>Paper documents are often easiest to capture as images. A worksheet, handwritten draft, receipt, form, or class handout can be photographed in seconds, but the result may still need a cleaner crop, better contrast, and a PDF layout that is comfortable to print.</p>
<p>Imgs2PDF provides a simple local workflow for that job. You can crop the page, choose a document filter, and export the result as a PDF without uploading the original image to a server or sending it to an AI service.</p>
<h2 class="anchor anchorTargetStickyNavbar_Xe5F" id="what-this-workflow-doesand-what-it-does-not-do">What this workflow does—and what it does not do<a href="https://hp60.com/blog/process-document-photos-offline-imgs2pdf/#what-this-workflow-doesand-what-it-does-not-do" class="hash-link" aria-label="Direct link to What this workflow does—and what it does not do" title="Direct link to What this workflow does—and what it does not do" translate="no">​</a></h2>
<p>This workflow processes the image itself:</p>
<ul>
<li class="">It runs on the device and does not require an internet connection for the image-editing and PDF-export steps.</li>
<li class="">It uses predictable image adjustments for cropping, contrast, brightness, and document presentation.</li>
<li class="">It creates a PDF whose pages are based on the processed images.</li>
</ul>
<p>This specific crop, filter, and PDF-export workflow does not add an OCR text layer or translate the page. The words remain part of the page image, which is often exactly what you want when the goal is to print, archive, or share a faithful copy of the original document. Imgs2PDF offers OCR as a separate workflow when you need recognized text.</p>
<h2 class="anchor anchorTargetStickyNavbar_Xe5F" id="the-three-step-workflow">The three-step workflow<a href="https://hp60.com/blog/process-document-photos-offline-imgs2pdf/#the-three-step-workflow" class="hash-link" aria-label="Direct link to The three-step workflow" title="Direct link to The three-step workflow" translate="no">​</a></h2>
<h3 class="anchor anchorTargetStickyNavbar_Xe5F" id="1-crop-the-page-to-its-real-edges">1. Crop the page to its real edges<a href="https://hp60.com/blog/process-document-photos-offline-imgs2pdf/#1-crop-the-page-to-its-real-edges" class="hash-link" aria-label="Direct link to 1. Crop the page to its real edges" title="Direct link to 1. Crop the page to its real edges" translate="no">​</a></h3>
<p>Open the image in Imgs2PDF and choose <strong>Crop</strong>. Use <strong>Freeform</strong> when the paper was photographed at an angle, then move the four corner handles to the actual page boundary.</p>
<p><img decoding="async" loading="lazy" alt="Imgs2PDF crop editor with the Freeform mode selected around a photographed paper document" src="https://hp60.com/assets/images/step-3-crop-2f2ce6240b1786536ee778c445cdfcfa.webp" width="492" height="1064" class="img_z23Z"></p>
<p>Cropping first removes desk edges and dark background areas before the document filter is applied. Keep every corner of the paper inside the crop. If a seal, handwritten note, or margin is important, leave a small amount of space around it rather than cutting tightly into the content.</p>
<h3 class="anchor anchorTargetStickyNavbar_Xe5F" id="2-compare-the-document-filters">2. Compare the document filters<a href="https://hp60.com/blog/process-document-photos-offline-imgs2pdf/#2-compare-the-document-filters" class="hash-link" aria-label="Direct link to 2. Compare the document filters" title="Direct link to 2. Compare the document filters" translate="no">​</a></h3>
<p>After confirming the crop, open <strong>Filters</strong>. Imgs2PDF shows a live preview with four choices:</p>
<ul>
<li class=""><strong>Original</strong> keeps the captured appearance.</li>
<li class=""><strong>Enhance</strong> improves readability while retaining more of the original tone and color.</li>
<li class=""><strong>Print</strong> is a document-focused option for pages that will be printed or read as a PDF.</li>
<li class=""><strong>B&amp;W</strong> pushes the page further toward black and white.</li>
</ul>
<p><img decoding="async" loading="lazy" alt="Imgs2PDF filter controls before choosing a document preset" src="https://hp60.com/assets/images/step-2-filter-menu-f1528f279431c0d8e7e977b487c7e751.webp" width="502" height="1066" class="img_z23Z"></p>
<p>For a page with dark characters on light paper, start with <strong>Print</strong>. Compare it with <strong>Enhance</strong> when the page contains colored stamps, pencil marks, or annotations. Use <strong>B&amp;W</strong> only when removing most color produces a clearer result.</p>
<h3 class="anchor anchorTargetStickyNavbar_Xe5F" id="3-apply-the-result-and-export-a-pdf">3. Apply the result and export a PDF<a href="https://hp60.com/blog/process-document-photos-offline-imgs2pdf/#3-apply-the-result-and-export-a-pdf" class="hash-link" aria-label="Direct link to 3. Apply the result and export a PDF" title="Direct link to 3. Apply the result and export a PDF" translate="no">​</a></h3>
<p>Choose <strong>Print</strong> and inspect the preview. When the text, margins, and important marks look right, tap <strong>Apply</strong> and continue to the PDF export flow.</p>
<p><img decoding="async" loading="lazy" alt="Imgs2PDF with the Print preset selected for a print-ready document page" src="https://hp60.com/assets/images/step-1-print-filter-13ea9894c997ed722dd531444ca1fb71.webp" width="518" height="1076" class="img_z23Z"></p>
<p>The <strong>Print</strong> preset changes the presentation of the image; it does not control a physical printer or select a paper size by itself. Choose the PDF page size, orientation, and other export settings separately. The final PDF remains an image-based document, so the printed page preserves the appearance of the source photo rather than reflowing its text.</p>
<p>If the exported file exceeds an upload limit, you can <a href="https://hp60.com/blog/imgs2pdf-pdf-compression-feature/" target="_blank" rel="noopener noreferrer" class="">compress the PDF</a> and check the text and important marks again before sharing.</p>
<h2 class="anchor anchorTargetStickyNavbar_Xe5F" id="why-process-it-locally-without-ai">Why process it locally without AI?<a href="https://hp60.com/blog/process-document-photos-offline-imgs2pdf/#why-process-it-locally-without-ai" class="hash-link" aria-label="Direct link to Why process it locally without AI?" title="Direct link to Why process it locally without AI?" translate="no">​</a></h2>
<p>For personal papers, schoolwork, contracts, and unpublished drafts, keeping the original image on the device can be more important than using a cloud service. A local workflow means you can prepare the page while offline and decide for yourself when—or whether—the finished PDF should be shared.</p>
<p>Avoiding AI also makes the result easier to predict. This workflow is not rewriting, translating, summarizing, or guessing what a character means. It adjusts the page image you selected. That is useful when the exact shape of characters, handwriting, stamps, diagrams, or margins must remain unchanged.</p>
<h2 class="anchor anchorTargetStickyNavbar_Xe5F" id="choosing-the-right-preset">Choosing the right preset<a href="https://hp60.com/blog/process-document-photos-offline-imgs2pdf/#choosing-the-right-preset" class="hash-link" aria-label="Direct link to Choosing the right preset" title="Direct link to Choosing the right preset" translate="no">​</a></h2>
<table><thead><tr><th>Preset</th><th>Best starting point</th><th>Trade-off</th></tr></thead><tbody><tr><td>Original</td><td>You need the closest copy of the captured image</td><td>Shadows and uneven lighting remain visible</td></tr><tr><td>Enhance</td><td>The page has faded text but important color</td><td>Some paper texture and background may remain</td></tr><tr><td>Print</td><td>The page is mainly text and will be printed or shared</td><td>Some color and photographic detail may be reduced</td></tr><tr><td>B&amp;W</td><td>The page is mostly monochrome and needs stronger separation</td><td>Colored stamps and annotations may disappear</td></tr></tbody></table>
<p>Preview the result before applying it. A stronger filter cannot recover text that is out of focus, hidden by glare, or outside the crop.</p>
<h2 class="anchor anchorTargetStickyNavbar_Xe5F" id="practical-tips-for-document-photos">Practical tips for document photos<a href="https://hp60.com/blog/process-document-photos-offline-imgs2pdf/#practical-tips-for-document-photos" class="hash-link" aria-label="Direct link to Practical tips for document photos" title="Direct link to Practical tips for document photos" translate="no">​</a></h2>
<ul>
<li class="">Photograph the entire page before cropping so that no characters near the edge are lost.</li>
<li class="">Use <strong>Freeform</strong> crop for perspective correction, but do not treat it as OCR or automatic text reconstruction. Use Imgs2PDF's separate OCR workflow when you need recognized text.</li>
<li class="">Compare <strong>Enhance</strong> and <strong>Print</strong> when the page includes red seals, blue handwriting, or colored highlights.</li>
<li class="">Keep <strong>Original</strong> until you have checked the exported PDF.</li>
<li class="">For a multi-page set, review every thumbnail before applying the same preset to all pages; lighting can change from one page to the next.</li>
<li class="">If the paper is badly blurred, wrinkled, or reflected, recapture it in better light instead of expecting a filter to recreate missing detail.</li>
</ul>
<h2 class="anchor anchorTargetStickyNavbar_Xe5F" id="frequently-asked-questions">Frequently asked questions<a href="https://hp60.com/blog/process-document-photos-offline-imgs2pdf/#frequently-asked-questions" class="hash-link" aria-label="Direct link to Frequently asked questions" title="Direct link to Frequently asked questions" translate="no">​</a></h2>
<h3 class="anchor anchorTargetStickyNavbar_Xe5F" id="does-imgs2pdf-recognize-text">Does Imgs2PDF recognize text?<a href="https://hp60.com/blog/process-document-photos-offline-imgs2pdf/#does-imgs2pdf-recognize-text" class="hash-link" aria-label="Direct link to Does Imgs2PDF recognize text?" title="Direct link to Does Imgs2PDF recognize text?" translate="no">​</a></h3>
<p>Not in this image-to-PDF workflow. The text remains part of the page image. Use this workflow when you need a faithful printable copy, and use Imgs2PDF's separate OCR workflow when you need editable text.</p>
<h3 class="anchor anchorTargetStickyNavbar_Xe5F" id="do-i-need-an-internet-connection">Do I need an internet connection?<a href="https://hp60.com/blog/process-document-photos-offline-imgs2pdf/#do-i-need-an-internet-connection" class="hash-link" aria-label="Direct link to Do I need an internet connection?" title="Direct link to Do I need an internet connection?" translate="no">​</a></h3>
<p>The crop, filter, and PDF-export workflow is designed to run locally on the device. You can prepare the PDF offline; sharing it later is a separate choice.</p>
<h3 class="anchor anchorTargetStickyNavbar_Xe5F" id="is-the-pdf-searchable">Is the PDF searchable?<a href="https://hp60.com/blog/process-document-photos-offline-imgs2pdf/#is-the-pdf-searchable" class="hash-link" aria-label="Direct link to Is the PDF searchable?" title="Direct link to Is the PDF searchable?" translate="no">​</a></h3>
<p>The output described here is image-based. It preserves the visual page, but it does not automatically add an OCR text layer.</p>
<h3 class="anchor anchorTargetStickyNavbar_Xe5F" id="should-i-choose-print-or-black--white">Should I choose Print or Black &amp; White?<a href="https://hp60.com/blog/process-document-photos-offline-imgs2pdf/#should-i-choose-print-or-black--white" class="hash-link" aria-label="Direct link to Should I choose Print or Black &amp; White?" title="Direct link to Should I choose Print or Black &amp; White?" translate="no">​</a></h3>
<p>Choose <strong>Print</strong> first for most text pages. Compare <strong>B&amp;W</strong> when the document is almost entirely monochrome and stronger contrast is more useful than preserving color.</p>
<h2 class="anchor anchorTargetStickyNavbar_Xe5F" id="a-private-path-from-photo-to-paper">A private path from photo to paper<a href="https://hp60.com/blog/process-document-photos-offline-imgs2pdf/#a-private-path-from-photo-to-paper" class="hash-link" aria-label="Direct link to A private path from photo to paper" title="Direct link to A private path from photo to paper" translate="no">​</a></h2>
<p>The workflow is intentionally straightforward: crop the photographed page, compare the document filters, apply the one that fits the content, and export a PDF. No upload and no AI interpretation are required for these steps.</p>
<p>For more image-to-PDF workflows, visit the <a href="https://hp60.com/imgs2pdf/" target="_blank" rel="noopener noreferrer" class="">Imgs2PDF product page</a> or read the guide to <a href="https://hp60.com/blog/imgs2pdf-camera-scan-document-filters/" target="_blank" rel="noopener noreferrer" class="">scanning documents and using document filters on iPhone and iPad</a>.</p><section class="margin-top--xl" aria-labelledby="content-responsibility"><h2 class="anchor anchorTargetStickyNavbar_Xe5F" id="content-responsibility">Content responsibility<a href="https://hp60.com/blog/process-document-photos-offline-imgs2pdf/#content-responsibility" class="hash-link" aria-label="Direct link to Content responsibility" title="Direct link to Content responsibility" translate="no">​</a></h2><p>The HP60 product team is responsible for this article. The publication date above identifies this content version; product behavior may change after release, so consult the linked product and support pages for current limits.</p></section>]]></content>
        <author>
            <name>Imgs2PDF</name>
            <uri>https://hp60.com/imgs2pdf/</uri>
        </author>
        <author>
            <name>HP60</name>
            <uri>https://hp60.com</uri>
        </author>
        <category label="Imgs2PDF" term="Imgs2PDF"/>
        <category label="Feature" term="Feature"/>
    </entry>
    <entry>
        <title type="html"><![CDATA[Imgs2PDF Adds Document Scanning and a Print Filter for iPhone and iPad]]></title>
        <id>https://hp60.com/blog/imgs2pdf-camera-scan-document-filters/</id>
        <link href="https://hp60.com/blog/imgs2pdf-camera-scan-document-filters/"/>
        <updated>2026-09-19T00:00:00.000Z</updated>
        <summary type="html"><![CDATA[Scan multi-page documents on iPhone and iPad, correct edges and perspective, then use Original, Enhance, Print, and Black & White filters to create PDFs in Imgs2PDF.]]></summary>
        <content type="html"><![CDATA[<p>Turning paper documents into a PDF is not just a matter of taking a picture. Page edges may be uneven, the camera angle can create perspective distortion, and indoor lighting can leave one side of the page brighter than the other. Multi-page documents also need to be ordered, reviewed, and processed consistently.</p>
<p>Imgs2PDF now adds a <strong>Scan Documents</strong> entry point on iPhone and iPad, together with document filters for scanned pages and selected images. Scan several pages in one session, let the system help with edge detection and perspective correction, then return to Imgs2PDF to review, organize, and export a PDF. When a document needs to be printed or shared, the new <strong>Print</strong> preset provides a document-focused starting point.</p>
<h2 class="anchor anchorTargetStickyNavbar_Xe5F" id="the-short-version">The short version<a href="https://hp60.com/blog/imgs2pdf-camera-scan-document-filters/#the-short-version" class="hash-link" aria-label="Direct link to The short version" title="Direct link to The short version" translate="no">​</a></h2>
<ul>
<li class=""><strong>Camera document scanning:</strong> Scan multiple paper pages on iPhone or iPad. The system processes page edges and perspective, then the scanned pages return to Imgs2PDF's image workflow.</li>
<li class=""><strong>Print filter:</strong> Choose <strong>Print</strong> in the image editor for a document-oriented result that can be easier to read, print, or share. The result still depends on the original photo's lighting, focus, and page content.</li>
<li class=""><strong>Four document presets:</strong> Switch between <strong>Original</strong>, <strong>Enhance</strong>, <strong>Print</strong>, and <strong>Black &amp; White</strong>, and compare the result with a live preview.</li>
<li class=""><strong>Batch processing:</strong> Turn on <strong>Apply to All Images</strong> to apply the current preset to a group of pages at once.</li>
<li class=""><strong>Local processing:</strong> Files are processed on the device rather than uploaded to a server, which is useful for assignments, receipts, contracts, and everyday paper documents.</li>
</ul>
<h2 class="anchor anchorTargetStickyNavbar_Xe5F" id="what-is-imgs2pdfs-document-scanner">What is Imgs2PDF's document scanner?<a href="https://hp60.com/blog/imgs2pdf-camera-scan-document-filters/#what-is-imgs2pdfs-document-scanner" class="hash-link" aria-label="Direct link to What is Imgs2PDF's document scanner?" title="Direct link to What is Imgs2PDF's document scanner?" translate="no">​</a></h2>
<p><strong>Scan Documents</strong> is not simply a shortcut to the regular camera. It opens the system document-scanning interface, which is designed for capturing one or more pages of paper. It is useful for:</p>
<ul>
<li class="">class notes, homework, and worksheets;</li>
<li class="">invoices, receipts, and expense records;</li>
<li class="">contracts, forms, and signed documents;</li>
<li class="">book pages, handouts, and paper records that need to be saved together.</li>
</ul>
<p>During the scan, the system tries to identify the page boundary and correct the crop and perspective. Once you finish a multi-page scan, Imgs2PDF imports the pages one by one so you can check them, change their order, edit the images, and continue with the existing PDF export settings.</p>
<p>Automatic processing is meant to reduce manual cleanup, not to guarantee perfect recognition for every photo. If a page edge is covered, the lighting is too dark, or the paper and background have similar colors, review each imported page before exporting.</p>
<h2 class="anchor anchorTargetStickyNavbar_Xe5F" id="how-to-scan-documents-with-the-camera-and-create-a-pdf">How to scan documents with the camera and create a PDF<a href="https://hp60.com/blog/imgs2pdf-camera-scan-document-filters/#how-to-scan-documents-with-the-camera-and-create-a-pdf" class="hash-link" aria-label="Direct link to How to scan documents with the camera and create a PDF" title="Direct link to How to scan documents with the camera and create a PDF" translate="no">​</a></h2>
<p>On iPhone or iPad, the workflow is:</p>
<ol>
<li class="">Open Imgs2PDF and choose <strong>Scan Documents</strong> on the home screen.</li>
<li class="">Point the camera at the paper and follow the system scanning interface to capture one or more pages.</li>
<li class="">Finish the scan and confirm the import, then wait for the pages to return to the Imgs2PDF image list.</li>
<li class="">Check the page order and orientation. Crop, rotate, or adjust a page if necessary.</li>
<li class="">Open an image, choose a document filter, and decide whether to apply it to all pages.</li>
<li class="">Continue to the existing PDF settings and export flow to create and share the PDF.</li>
</ol>
<p>The scan pages arrive with the page processing already performed by the system. Imgs2PDF then handles the local filter and PDF export workflow. This keeps document capture and PDF organization in one place.</p>
<h2 class="anchor anchorTargetStickyNavbar_Xe5F" id="what-problem-does-the-print-filter-solve">What problem does the Print filter solve?<a href="https://hp60.com/blog/imgs2pdf-camera-scan-document-filters/#what-problem-does-the-print-filter-solve" class="hash-link" aria-label="Direct link to What problem does the Print filter solve?" title="Direct link to What problem does the Print filter solve?" translate="no">​</a></h2>
<p>Photos of paper can contain shadows, uneven lighting, a gray background, or text with weak edges. The <strong>Print</strong> preset moves the image toward a document-processing result: it reduces the distraction from uneven light and increases the clarity of text edges and local contrast, making the page more suitable for reading, printing, or sharing.</p>
<p>It is not a printer driver and it does not choose a paper size such as A4 or Letter. It processes the image itself. Paper size, orientation, and PDF layout are still set in Imgs2PDF's PDF settings.</p>
<p><img decoding="async" loading="lazy" alt="Imgs2PDF iPhone document filter panel with the Print preset selected" src="https://hp60.com/assets/images/imgs2pdf-document-filter-print-cc79d27baab58118082ab27fbf000c46.webp" width="824" height="1544" class="img_z23Z"></p>
<p>The screenshot above shows the filter panel on iPhone. The presets <strong>Original</strong>, <strong>Enhance</strong>, <strong>Print</strong>, and <strong>Black &amp; White</strong> appear below the page. Select one to preview the result before tapping <strong>Apply</strong>.</p>
<p>If you want to keep the original colors, start with <strong>Original</strong> or <strong>Enhance</strong>. For pages that are mainly black text on white paper, compare <strong>Print</strong> and <strong>Black &amp; White</strong> and choose the result that fits the page better.</p>
<h2 class="anchor anchorTargetStickyNavbar_Xe5F" id="how-to-choose-among-the-four-document-filters">How to choose among the four document filters<a href="https://hp60.com/blog/imgs2pdf-camera-scan-document-filters/#how-to-choose-among-the-four-document-filters" class="hash-link" aria-label="Direct link to How to choose among the four document filters" title="Direct link to How to choose among the four document filters" translate="no">​</a></h2>
<table><thead><tr><th>Preset</th><th>Useful for</th><th>What it does</th></tr></thead><tbody><tr><td>Original</td><td>Keeping the photo as it was captured or editing it yourself later</td><td>Does not apply an additional document filter</td></tr><tr><td>Enhance</td><td>Uneven light or faded text when page colors still matter</td><td>Improves brightness and local contrast while trying to retain color</td></tr><tr><td>Print</td><td>Text documents, homework, forms, and pages that will be printed or shared</td><td>Moves toward grayscale, reduces uneven lighting, and strengthens text edges</td></tr><tr><td>Black &amp; White</td><td>Mostly black text when a more definite page is preferred</td><td>Pushes the image further toward black and white, discarding color information</td></tr></tbody></table>
<p>The best preset can vary from page to page. For stamps, colored annotations, or handwriting, compare <strong>Enhance</strong> and <strong>Print</strong> first. For pages that contain only text, preview <strong>Print</strong> and <strong>Black &amp; White</strong> side by side before deciding.</p>
<h2 class="anchor anchorTargetStickyNavbar_Xe5F" id="live-preview-undo-and-applying-a-filter-to-multiple-pages">Live preview, undo, and applying a filter to multiple pages<a href="https://hp60.com/blog/imgs2pdf-camera-scan-document-filters/#live-preview-undo-and-applying-a-filter-to-multiple-pages" class="hash-link" aria-label="Direct link to Live preview, undo, and applying a filter to multiple pages" title="Direct link to Live preview, undo, and applying a filter to multiple pages" translate="no">​</a></h2>
<p>You do not have to export a result blindly. Open the <strong>Filter</strong> tool in image details, switch between presets, and inspect the preview before applying one.</p>
<p>If the result is not suitable, undo the change, return to the original, or choose another preset. For multi-page scans, the filter panel also includes an <strong>Apply to All Images</strong> switch:</p>
<p><img decoding="async" loading="lazy" alt="Imgs2PDF iPhone document filter panel showing the Original preset and the Apply to All Images switch" src="https://hp60.com/assets/images/imgs2pdf-document-filter-original-76746537a3452eac7254aff68655da09.webp" width="824" height="1544" class="img_z23Z"></p>
<ul>
<li class="">With the switch off, only the page currently on screen is processed.</li>
<li class="">With the switch on, the current filter can be applied to the entire group of scanned pages or selected images.</li>
<li class="">Preview the thumbnails and result before applying it, especially when pages were captured under different lighting.</li>
</ul>
<p>This is convenient for a set of handouts, assignments, or receipts captured in similar light. When the background and lighting vary from page to page, choosing a preset individually is usually safer.</p>
<h2 class="anchor anchorTargetStickyNavbar_Xe5F" id="when-should-you-use-these-two-new-features">When should you use these two new features?<a href="https://hp60.com/blog/imgs2pdf-camera-scan-document-filters/#when-should-you-use-these-two-new-features" class="hash-link" aria-label="Direct link to When should you use these two new features?" title="Direct link to When should you use these two new features?" translate="no">​</a></h2>
<h3 class="anchor anchorTargetStickyNavbar_Xe5F" id="turn-paper-homework-into-a-pdf">Turn paper homework into a PDF<a href="https://hp60.com/blog/imgs2pdf-camera-scan-document-filters/#turn-paper-homework-into-a-pdf" class="hash-link" aria-label="Direct link to Turn paper homework into a PDF" title="Direct link to Turn paper homework into a PDF" translate="no">​</a></h3>
<p>Use <strong>Scan Documents</strong> to capture several pages in sequence, then check their order in the image list. Try <strong>Print</strong> or <strong>Black &amp; White</strong> for text-heavy pages, review the preview, and export a PDF that is ready to submit or share.</p>
<h3 class="anchor anchorTargetStickyNavbar_Xe5F" id="save-receipts-invoices-and-expense-records">Save receipts, invoices, and expense records<a href="https://hp60.com/blog/imgs2pdf-camera-scan-document-filters/#save-receipts-invoices-and-expense-records" class="hash-link" aria-label="Direct link to Save receipts, invoices, and expense records" title="Direct link to Save receipts, invoices, and expense records" translate="no">​</a></h3>
<p>Receipts often include shadows, a desk background, or a slight angle. The system scanner can help with the page boundary first; <strong>Enhance</strong> or <strong>Print</strong> can then improve readability. If a receipt has a stamp or important color, compare it with the original before choosing a stronger filter.</p>
<h3 class="anchor anchorTargetStickyNavbar_Xe5F" id="process-contracts-forms-and-signature-pages">Process contracts, forms, and signature pages<a href="https://hp60.com/blog/imgs2pdf-camera-scan-document-filters/#process-contracts-forms-and-signature-pages" class="hash-link" aria-label="Direct link to Process contracts, forms, and signature pages" title="Direct link to Process contracts, forms, and signature pages" translate="no">​</a></h3>
<p>Contracts and forms usually need to retain the complete page. Start with <strong>Original</strong> to make sure nothing was cropped, then try <strong>Print</strong> or <strong>Enhance</strong>. Do not automatically use <strong>Black &amp; White</strong> on pages with colored signatures or stamps.</p>
<h3 class="anchor anchorTargetStickyNavbar_Xe5F" id="prepare-documents-for-printing-or-offline-storage">Prepare documents for printing or offline storage<a href="https://hp60.com/blog/imgs2pdf-camera-scan-document-filters/#prepare-documents-for-printing-or-offline-storage" class="hash-link" aria-label="Direct link to Prepare documents for printing or offline storage" title="Direct link to Prepare documents for printing or offline storage" translate="no">​</a></h3>
<p>The <strong>Print</strong> preset can reduce uneven lighting and improve text edges in a photo, but it does not replace the final paper-size, orientation, or printer settings. Confirm the layout in PDF settings before exporting.</p>
<h2 class="anchor anchorTargetStickyNavbar_Xe5F" id="what-should-you-keep-in-mind">What should you keep in mind?<a href="https://hp60.com/blog/imgs2pdf-camera-scan-document-filters/#what-should-you-keep-in-mind" class="hash-link" aria-label="Direct link to What should you keep in mind?" title="Direct link to What should you keep in mind?" translate="no">​</a></h2>
<ul>
<li class="">The camera scanning entry point is intended for iPhone and iPad. Availability also depends on whether the device supports the system document-scanning feature.</li>
<li class="">The first use may require camera permission. If the entry point is unavailable, check the device and system permissions.</li>
<li class="">Automatic cropping and perspective correction reduce manual work, but page edges should still be checked when there is an obstruction, low light, or a complex background.</li>
<li class=""><strong>Print</strong> and <strong>Black &amp; White</strong> reduce or remove some color information. Compare the preview first when a page contains stamps, colored notes, or handwriting.</li>
<li class="">A filter improves how an image is presented; it cannot recover text that is out of focus, badly reflected, or missing entirely.</li>
<li class="">The workflow processes files locally on the device. The screenshots and feature description in this article do not mean that original documents are uploaded.</li>
</ul>
<h2 class="anchor anchorTargetStickyNavbar_Xe5F" id="frequently-asked-questions">Frequently asked questions<a href="https://hp60.com/blog/imgs2pdf-camera-scan-document-filters/#frequently-asked-questions" class="hash-link" aria-label="Direct link to Frequently asked questions" title="Direct link to Frequently asked questions" translate="no">​</a></h2>
<h3 class="anchor anchorTargetStickyNavbar_Xe5F" id="how-is-document-scanning-different-from-taking-a-regular-photo">How is document scanning different from taking a regular photo?<a href="https://hp60.com/blog/imgs2pdf-camera-scan-document-filters/#how-is-document-scanning-different-from-taking-a-regular-photo" class="hash-link" aria-label="Direct link to How is document scanning different from taking a regular photo?" title="Direct link to How is document scanning different from taking a regular photo?" translate="no">​</a></h3>
<p>Document scanning uses the system scanning interface, which is designed for capturing multiple pages and attempting to correct the page edges and perspective. A regular photo is simply an image; its edges and angle usually need more manual work afterward.</p>
<h3 class="anchor anchorTargetStickyNavbar_Xe5F" id="does-the-print-filter-connect-directly-to-a-printer">Does the Print filter connect directly to a printer?<a href="https://hp60.com/blog/imgs2pdf-camera-scan-document-filters/#does-the-print-filter-connect-directly-to-a-printer" class="hash-link" aria-label="Direct link to Does the Print filter connect directly to a printer?" title="Direct link to Does the Print filter connect directly to a printer?" translate="no">​</a></h3>
<p>No. <strong>Print</strong> is an image-processing preset, not a printer-control feature. It changes the way the current image is presented. Paper size, orientation, and the actual print action are still determined by PDF settings or the system share and print flow.</p>
<h3 class="anchor anchorTargetStickyNavbar_Xe5F" id="what-is-the-difference-between-print-and-black--white">What is the difference between Print and Black &amp; White?<a href="https://hp60.com/blog/imgs2pdf-camera-scan-document-filters/#what-is-the-difference-between-print-and-black--white" class="hash-link" aria-label="Direct link to What is the difference between Print and Black &amp; White?" title="Direct link to What is the difference between Print and Black &amp; White?" translate="no">​</a></h3>
<p><strong>Print</strong> aims to keep more document detail while addressing lighting and text edges. <strong>Black &amp; White</strong> removes more color so the contrast between text and background is more pronounced. Preview both instead of treating one as the right choice for every page.</p>
<h3 class="anchor anchorTargetStickyNavbar_Xe5F" id="can-i-apply-the-same-filter-to-a-multi-page-scan">Can I apply the same filter to a multi-page scan?<a href="https://hp60.com/blog/imgs2pdf-camera-scan-document-filters/#can-i-apply-the-same-filter-to-a-multi-page-scan" class="hash-link" aria-label="Direct link to Can I apply the same filter to a multi-page scan?" title="Direct link to Can I apply the same filter to a multi-page scan?" translate="no">​</a></h3>
<p>Yes. For multiple images, the filter panel shows <strong>Apply to All Images</strong>. Turn it on to apply the current preset to the whole group, or leave it off to process only the current page.</p>
<h3 class="anchor anchorTargetStickyNavbar_Xe5F" id="does-imgs2pdf-upload-scanned-documents-to-a-server">Does Imgs2PDF upload scanned documents to a server?<a href="https://hp60.com/blog/imgs2pdf-camera-scan-document-filters/#does-imgs2pdf-upload-scanned-documents-to-a-server" class="hash-link" aria-label="Direct link to Does Imgs2PDF upload scanned documents to a server?" title="Direct link to Does Imgs2PDF upload scanned documents to a server?" translate="no">​</a></h3>
<p>This workflow processes the files locally and does not require the original documents to be uploaded. After creating the PDF, you can still send it through the system share menu to email, messaging apps, or cloud storage.</p>
<h2 class="anchor anchorTargetStickyNavbar_Xe5F" id="summary">Summary<a href="https://hp60.com/blog/imgs2pdf-camera-scan-document-filters/#summary" class="hash-link" aria-label="Direct link to Summary" title="Direct link to Summary" translate="no">​</a></h2>
<p>Imgs2PDF's <strong>Scan Documents</strong> feature turns an iPhone or iPad into a convenient entry point for capturing multi-page documents. The system handles scanning, edge detection, and perspective correction, while Imgs2PDF continues with page organization, document filters, and PDF export.</p>
<p>If you need to print or share paper documents, compare <strong>Original</strong>, <strong>Enhance</strong>, <strong>Print</strong>, and <strong>Black &amp; White</strong> and choose based on the page content. For the complete Imgs2PDF workflow—including image-to-PDF conversion, PDF merging and splitting, and OCR—see the <a href="https://hp60.com/blog/imgs2pdf-introduction/" target="_blank" rel="noopener noreferrer" class="">Imgs2PDF product guide</a> or visit the <a href="https://hp60.com/imgs2pdf/" target="_blank" rel="noopener noreferrer" class="">Imgs2PDF product page</a>.</p><section class="margin-top--xl" aria-labelledby="content-responsibility"><h2 class="anchor anchorTargetStickyNavbar_Xe5F" id="content-responsibility">Content responsibility<a href="https://hp60.com/blog/imgs2pdf-camera-scan-document-filters/#content-responsibility" class="hash-link" aria-label="Direct link to Content responsibility" title="Direct link to Content responsibility" translate="no">​</a></h2><p>The HP60 product team is responsible for this article. The publication date above identifies this content version; product behavior may change after release, so consult the linked product and support pages for current limits.</p></section>]]></content>
        <author>
            <name>Imgs2PDF</name>
            <uri>https://hp60.com/imgs2pdf/</uri>
        </author>
        <author>
            <name>HP60</name>
            <uri>https://hp60.com</uri>
        </author>
        <category label="Imgs2PDF" term="Imgs2PDF"/>
        <category label="Feature" term="Feature"/>
    </entry>
    <entry>
        <title type="html"><![CDATA[Smoother Scrolling in iPhone Mirroring with Mouse SR]]></title>
        <id>https://hp60.com/blog/mouse-sr-iphone-mirroring-smooth-scrolling/</id>
        <link href="https://hp60.com/blog/mouse-sr-iphone-mirroring-smooth-scrolling/"/>
        <updated>2026-09-15T00:00:00.000Z</updated>
        <summary type="html"><![CDATA[Does the mouse wheel feel jumpy in the iPhone Mirroring window on Mac? Learn how Mouse SR smooths the input and how to set it up.]]></summary>
        <content type="html"><![CDATA[<p>If you use a regular mouse with iPhone Mirroring on Mac, the mouse wheel can feel different from scrolling a webpage or a Finder window. A single wheel notch may move a list in a noticeable jump, and quick repeated scrolling can feel less predictable.</p>
<p>Mouse SR now supports smooth scrolling in the iPhone Mirroring window. It adjusts how third-party mouse wheel input is delivered to that window, while leaving trackpads, Magic Mouse, and direct touch on the iPhone unchanged.</p>
<h2 class="anchor anchorTargetStickyNavbar_Xe5F" id="the-short-answer">The short answer<a href="https://hp60.com/blog/mouse-sr-iphone-mirroring-smooth-scrolling/#the-short-answer" class="hash-link" aria-label="Direct link to The short answer" title="Direct link to The short answer" translate="no">​</a></h2>
<ul>
<li class=""><strong>A regular mouse can scroll more smoothly in iPhone Mirroring:</strong> Mouse SR processes discrete third-party mouse wheel input to reduce the jumpy feel in the mirrored window.</li>
<li class=""><strong>You may not need a new mouse:</strong> If the pointer and buttons work normally, the issue may be how wheel input is presented rather than the mouse hardware.</li>
<li class=""><strong>Trackpads and Magic Mouse are not changed:</strong> Mouse SR primarily handles discrete wheel input from third-party mice, while devices that already provide continuous scrolling keep their existing behavior.</li>
<li class=""><strong>This is a Mac-side scrolling adjustment:</strong> It does not change touch gestures on the iPhone or the scrolling logic inside an iPhone app.</li>
<li class=""><strong>You can try it first:</strong> Mouse SR Pro includes a seven-day free trial. One purchase works on up to three Macs, with no subscription or automatic renewal.</li>
</ul>
<h2 class="anchor anchorTargetStickyNavbar_Xe5F" id="why-can-the-mouse-wheel-feel-jumpy-in-iphone-mirroring">Why can the mouse wheel feel jumpy in iPhone Mirroring?<a href="https://hp60.com/blog/mouse-sr-iphone-mirroring-smooth-scrolling/#why-can-the-mouse-wheel-feel-jumpy-in-iphone-mirroring" class="hash-link" aria-label="Direct link to Why can the mouse wheel feel jumpy in iPhone Mirroring?" title="Direct link to Why can the mouse wheel feel jumpy in iPhone Mirroring?" translate="no">​</a></h2>
<p>A typical mouse wheel sends input in physical notches. Each notch produces a separate scroll event. A normal webpage, Finder window, or document on Mac processes those events in its own way, while the iPhone Mirroring window also has to pass the input through the bridge between macOS and the iPhone interface.</p>
<p>As a result, a larger wheel input may appear as one noticeable jump. During quick repeated scrolling, different interfaces may receive and present the input differently, so the screen can seem to skip the movement between two positions.</p>
<p>This is different from an unstable mouse connection. If the pointer, clicks, and dragging respond normally while only scrolling in iPhone Mirroring feels uneven, the presentation of wheel input is a more likely place to look.</p>
<h2 class="anchor anchorTargetStickyNavbar_Xe5F" id="how-does-mouse-sr-improve-smooth-scrolling-in-iphone-mirroring">How does Mouse SR improve smooth scrolling in iPhone Mirroring?<a href="https://hp60.com/blog/mouse-sr-iphone-mirroring-smooth-scrolling/#how-does-mouse-sr-improve-smooth-scrolling-in-iphone-mirroring" class="hash-link" aria-label="Direct link to How does Mouse SR improve smooth scrolling in iPhone Mirroring?" title="Direct link to How does Mouse SR improve smooth scrolling in iPhone Mirroring?" translate="no">​</a></h2>
<p>Mouse SR’s regular smooth scrolling turns discrete wheel input into more continuous screen movement. Inside the iPhone Mirroring window, it uses a scrolling strategy suited to that interface instead of applying the longer inertia animation used for ordinary Mac apps unchanged.</p>
<p>In practice, Mouse SR:</p>
<ul>
<li class="">breaks the wheel distance into smaller updates that are easier for the mirrored window to receive, reducing the “one notch, one jump” effect;</li>
<li class="">controls the timing of those updates so a quick scroll does not send a whole distance to the mirrored window at once;</li>
<li class="">uses a shorter response curve so movement can settle promptly after the wheel stops;</li>
<li class="">keeps settings such as scroll distance and direction while making the mirrored window’s response more direct;</li>
<li class="">adjusts promptly when you reverse direction, helping reduce the tail of the previous movement.</li>
</ul>
<p>You can think of it this way: the mouse still produces each wheel input, and Mouse SR organizes those inputs into motion that is better suited to the iPhone Mirroring window. It does not turn the mouse into a trackpad or add touch gestures that the iPhone app does not already have.</p>
<h2 class="anchor anchorTargetStickyNavbar_Xe5F" id="when-will-you-notice-the-difference">When will you notice the difference?<a href="https://hp60.com/blog/mouse-sr-iphone-mirroring-smooth-scrolling/#when-will-you-notice-the-difference" class="hash-link" aria-label="Direct link to When will you notice the difference?" title="Direct link to When will you notice the difference?" translate="no">​</a></h2>
<p>Smooth scrolling for iPhone Mirroring is useful when you:</p>
<ul>
<li class="">browse news, social, or reading apps on the iPhone with a mouse;</li>
<li class="">move through long lists of settings, messages, or other content;</li>
<li class="">need to review several screens without each wheel notch jumping a large distance;</li>
<li class="">use regular Mac apps and iPhone Mirroring side by side and want the wheel feel to be less different.</li>
</ul>
<p>If the entire mirrored image is delayed, the connection drops, or the pointer stutters in every app, check the iPhone connection, Mac system load, and mouse first. Mouse SR improves the smoothness of wheel input; it does not repair a network connection or a Bluetooth receiver.</p>
<h2 class="anchor anchorTargetStickyNavbar_Xe5F" id="how-to-enable-smooth-scrolling-for-iphone-mirroring">How to enable smooth scrolling for iPhone Mirroring<a href="https://hp60.com/blog/mouse-sr-iphone-mirroring-smooth-scrolling/#how-to-enable-smooth-scrolling-for-iphone-mirroring" class="hash-link" aria-label="Direct link to How to enable smooth scrolling for iPhone Mirroring" title="Direct link to How to enable smooth scrolling for iPhone Mirroring" translate="no">​</a></h2>
<ol>
<li class="">Open the <a href="https://hp60.com/mouse-sr/install/" target="_blank" rel="noopener noreferrer" class="">Mouse SR installation page</a>, then download and launch the Mac app.</li>
<li class="">Open Mouse SR settings from the menu bar and enable <strong>Smooth Scrolling</strong>.</li>
<li class="">Go to <strong>System Settings → Privacy &amp; Security → Accessibility</strong> and allow Mouse SR to work.</li>
<li class="">Open iPhone Mirroring on macOS and move the pointer over a scrollable area inside the mirrored window.</li>
<li class="">Test a list with the mouse wheel. Start with the default settings, then adjust scroll distance, smoothness, and direction one at a time. If you also use Mouse SR in regular Mac apps, adjust acceleration separately for those apps.</li>
</ol>
<p>Mouse SR supports macOS 15 or later. After granting Accessibility permission for the first time, quit and reopen Mouse SR if the behavior does not change immediately, then test again.</p>
<h2 class="anchor anchorTargetStickyNavbar_Xe5F" id="how-to-tune-the-scrolling-feel">How to tune the scrolling feel<a href="https://hp60.com/blog/mouse-sr-iphone-mirroring-smooth-scrolling/#how-to-tune-the-scrolling-feel" class="hash-link" aria-label="Direct link to How to tune the scrolling feel" title="Direct link to How to tune the scrolling feel" translate="no">​</a></h2>
<p>Change one setting at a time so it is easier to tell what helped.</p>
<h3 class="anchor anchorTargetStickyNavbar_Xe5F" id="start-with-scroll-distance">Start with scroll distance<a href="https://hp60.com/blog/mouse-sr-iphone-mirroring-smooth-scrolling/#start-with-scroll-distance" class="hash-link" aria-label="Direct link to Start with scroll distance" title="Direct link to Start with scroll distance" translate="no">​</a></h3>
<p>If one wheel notch moves an iPhone Mirroring list too far, lower the per-notch distance. If each movement is too small, increase it gradually. It is easier to judge smoothness after the distance feels right.</p>
<h3 class="anchor anchorTargetStickyNavbar_Xe5F" id="then-adjust-smoothness">Then adjust smoothness<a href="https://hp60.com/blog/mouse-sr-iphone-mirroring-smooth-scrolling/#then-adjust-smoothness" class="hash-link" aria-label="Direct link to Then adjust smoothness" title="Direct link to Then adjust smoothness" translate="no">​</a></h3>
<p>Lower smoothness feels more direct; higher smoothness makes repeated scrolling softer. If the screen does not feel responsive enough, try lowering smoothness before simply increasing scroll speed.</p>
<h3 class="anchor anchorTargetStickyNavbar_Xe5F" id="set-direction-last-keep-acceleration-for-regular-mac-apps">Set direction last; keep acceleration for regular Mac apps<a href="https://hp60.com/blog/mouse-sr-iphone-mirroring-smooth-scrolling/#set-direction-last-keep-acceleration-for-regular-mac-apps" class="hash-link" aria-label="Direct link to Set direction last; keep acceleration for regular Mac apps" title="Direct link to Set direction last; keep acceleration for regular Mac apps" translate="no">​</a></h3>
<p>You can set the direction for a third-party mouse without changing the natural scrolling direction of a trackpad. The iPhone Mirroring window uses a short, direct response strategy and does not add Mouse SR’s longer acceleration or inertia tail for ordinary Mac apps. Acceleration is mainly useful for webpages, Finder, and other regular Mac apps.</p>
<p>Because the mirrored window still passes the display between Mac and iPhone, avoid making smoothness or acceleration overly aggressive at first. Small changes followed by a few minutes of normal use are easier to judge than repeatedly dragging sliders.</p>
<h2 class="anchor anchorTargetStickyNavbar_Xe5F" id="will-mouse-sr-affect-other-devices">Will Mouse SR affect other devices?<a href="https://hp60.com/blog/mouse-sr-iphone-mirroring-smooth-scrolling/#will-mouse-sr-affect-other-devices" class="hash-link" aria-label="Direct link to Will Mouse SR affect other devices?" title="Direct link to Will Mouse SR affect other devices?" translate="no">​</a></h2>
<p>No. Mouse SR primarily targets discrete wheel input from third-party mice. Trackpads, Magic Mouse, drawing tablets, and other devices that already provide continuous scrolling keep their existing behavior.</p>
<p>It also does not change the basic way you use webpages, Finder, or documents on Mac. You can turn smooth scrolling off from the menu bar whenever you want to compare the result. For general Mac mouse-wheel settings, see <a href="https://hp60.com/blog/how-to-get-smooth-scrolling-on-mac/" target="_blank" rel="noopener noreferrer" class="">How to Get Smooth Scrolling on Mac with Mouse SR</a>.</p>
<h2 class="anchor anchorTargetStickyNavbar_Xe5F" id="troubleshooting-uneven-scrolling-in-iphone-mirroring">Troubleshooting uneven scrolling in iPhone Mirroring<a href="https://hp60.com/blog/mouse-sr-iphone-mirroring-smooth-scrolling/#troubleshooting-uneven-scrolling-in-iphone-mirroring" class="hash-link" aria-label="Direct link to Troubleshooting uneven scrolling in iPhone Mirroring" title="Direct link to Troubleshooting uneven scrolling in iPhone Mirroring" translate="no">​</a></h2>
<p>If scrolling still feels jumpy after enabling the feature, check these items in order:</p>
<ol>
<li class="">Confirm that <strong>Smooth Scrolling</strong> is enabled in the Mouse SR menu bar menu.</li>
<li class="">Confirm that Mouse SR is still allowed under Accessibility. macOS updates or a reinstall may require you to check this again.</li>
<li class="">Make sure the pointer is inside the iPhone Mirroring window while testing, not over a neighboring Mac page.</li>
<li class="">Temporarily turn off other wheel-processing options in Mos, SmoothScroll, or your mouse vendor’s software so multiple tools are not changing the same input.</li>
<li class="">Test another iPhone app with a list to rule out an app-specific wheel support or scroll-container difference.</li>
<li class="">If the pointer and clicks are delayed too, check Bluetooth, the receiver, the battery, and mouse driver software first.</li>
</ol>
<p>For more complete setup instructions, see the <a href="https://hp60.com/mouse-sr/install/" target="_blank" rel="noopener noreferrer" class="">Mouse SR installation guide</a>. You can also browse the <a href="https://hp60.com/mouse-sr/feature/" target="_blank" rel="noopener noreferrer" class="">Mouse SR feature overview</a> or the <a href="https://hp60.com/mouse-sr/faq/" target="_blank" rel="noopener noreferrer" class="">Mouse SR FAQ</a> for information about permissions, privacy, and the trial.</p>
<h2 class="anchor anchorTargetStickyNavbar_Xe5F" id="frequently-asked-questions">Frequently asked questions<a href="https://hp60.com/blog/mouse-sr-iphone-mirroring-smooth-scrolling/#frequently-asked-questions" class="hash-link" aria-label="Direct link to Frequently asked questions" title="Direct link to Frequently asked questions" translate="no">​</a></h2>
<h3 class="anchor anchorTargetStickyNavbar_Xe5F" id="do-i-need-to-replace-my-mouse-if-iphone-mirroring-scrolling-feels-uneven">Do I need to replace my mouse if iPhone Mirroring scrolling feels uneven?<a href="https://hp60.com/blog/mouse-sr-iphone-mirroring-smooth-scrolling/#do-i-need-to-replace-my-mouse-if-iphone-mirroring-scrolling-feels-uneven" class="hash-link" aria-label="Direct link to Do I need to replace my mouse if iPhone Mirroring scrolling feels uneven?" title="Direct link to Do I need to replace my mouse if iPhone Mirroring scrolling feels uneven?" translate="no">​</a></h3>
<p>Not necessarily. If the pointer, clicks, and other actions work normally and only the wheel jumps in iPhone Mirroring, try adjusting the wheel input with Mouse SR first.</p>
<h3 class="anchor anchorTargetStickyNavbar_Xe5F" id="does-mouse-sr-change-scrolling-when-i-touch-the-iphone-directly">Does Mouse SR change scrolling when I touch the iPhone directly?<a href="https://hp60.com/blog/mouse-sr-iphone-mirroring-smooth-scrolling/#does-mouse-sr-change-scrolling-when-i-touch-the-iphone-directly" class="hash-link" aria-label="Direct link to Does Mouse SR change scrolling when I touch the iPhone directly?" title="Direct link to Does Mouse SR change scrolling when I touch the iPhone directly?" translate="no">​</a></h3>
<p>No. Mouse SR handles mouse wheel input on the Mac. It does not change touch scrolling or gestures when you use the iPhone directly.</p>
<h3 class="anchor anchorTargetStickyNavbar_Xe5F" id="do-i-need-to-turn-mouse-sr-off-when-using-a-trackpad">Do I need to turn Mouse SR off when using a trackpad?<a href="https://hp60.com/blog/mouse-sr-iphone-mirroring-smooth-scrolling/#do-i-need-to-turn-mouse-sr-off-when-using-a-trackpad" class="hash-link" aria-label="Direct link to Do I need to turn Mouse SR off when using a trackpad?" title="Direct link to Do I need to turn Mouse SR off when using a trackpad?" translate="no">​</a></h3>
<p>No. Trackpads and other continuous-scrolling devices keep their existing behavior. You can still turn smooth scrolling off from the menu bar when you want to compare different devices.</p>
<h3 class="anchor anchorTargetStickyNavbar_Xe5F" id="do-all-iphone-apps-support-mouse-wheel-scrolling">Do all iPhone apps support mouse-wheel scrolling?<a href="https://hp60.com/blog/mouse-sr-iphone-mirroring-smooth-scrolling/#do-all-iphone-apps-support-mouse-wheel-scrolling" class="hash-link" aria-label="Direct link to Do all iPhone apps support mouse-wheel scrolling?" title="Direct link to Do all iPhone apps support mouse-wheel scrolling?" translate="no">​</a></h3>
<p>Mouse SR can improve the wheel input received by the iPhone Mirroring window, but support for mouse-wheel interaction still depends on the app’s interface and scroll container. A smoothing tool cannot add wheel interaction that the app does not accept.</p>
<h3 class="anchor anchorTargetStickyNavbar_Xe5F" id="is-mouse-sr-a-subscription">Is Mouse SR a subscription?<a href="https://hp60.com/blog/mouse-sr-iphone-mirroring-smooth-scrolling/#is-mouse-sr-a-subscription" class="hash-link" aria-label="Direct link to Is Mouse SR a subscription?" title="Direct link to Is Mouse SR a subscription?" translate="no">​</a></h3>
<p>No. Mouse SR Pro has a seven-day free trial, followed by a one-time purchase for use on up to three Macs. There is no subscription or automatic renewal. See the <a href="https://hp60.com/mouse-sr/" target="_blank" rel="noopener noreferrer" class="">Mouse SR product page</a> for the full feature set.</p>
<h2 class="anchor anchorTargetStickyNavbar_Xe5F" id="conclusion">Conclusion<a href="https://hp60.com/blog/mouse-sr-iphone-mirroring-smooth-scrolling/#conclusion" class="hash-link" aria-label="Direct link to Conclusion" title="Direct link to Conclusion" translate="no">​</a></h2>
<p>If you like using a mouse with your Mac but find the wheel jumpy in the iPhone Mirroring window, Mouse SR can make the experience smoother. It adjusts the timing and response of wheel input for that window, helping reduce jumps and leftover motion without changing trackpad, Magic Mouse, or direct iPhone interaction.</p>
<p>Start with the default settings, grant Accessibility permission, and then fine-tune scroll distance and smoothness for your mouse and workflow. To try it, visit <a href="https://hp60.com/mouse-sr/" target="_blank" rel="noopener noreferrer" class="">Mouse SR</a> for a seven-day free trial.</p><section class="margin-top--xl" aria-labelledby="content-responsibility"><h2 class="anchor anchorTargetStickyNavbar_Xe5F" id="content-responsibility">Content responsibility<a href="https://hp60.com/blog/mouse-sr-iphone-mirroring-smooth-scrolling/#content-responsibility" class="hash-link" aria-label="Direct link to Content responsibility" title="Direct link to Content responsibility" translate="no">​</a></h2><p>The HP60 product team is responsible for this article. The publication date above identifies this content version; product behavior may change after release, so consult the linked product and support pages for current limits.</p></section>]]></content>
        <author>
            <name>Mouse SR</name>
            <uri>https://hp60.com/mouse-sr/</uri>
        </author>
        <author>
            <name>HP60</name>
            <uri>https://hp60.com</uri>
        </author>
        <category label="Mouse SR" term="Mouse SR"/>
        <category label="Feature" term="Feature"/>
    </entry>
    <entry>
        <title type="html"><![CDATA[How to Convert JPEG to JPEG XL Losslessly on Mac]]></title>
        <id>https://hp60.com/blog/jpeg-to-jxl-lossless-mac/</id>
        <link href="https://hp60.com/blog/jpeg-to-jxl-lossless-mac/"/>
        <updated>2026-09-10T20:00:00.000Z</updated>
        <summary type="html"><![CDATA[Learn how to convert JPEG to JPEG XL losslessly on Mac with Image2JXL, batch-convert folders locally, preserve metadata, and verify reversible output.]]></summary>
        <content type="html"><![CDATA[<p>Want to convert JPEG to JPEG XL losslessly on Mac? <strong>Image2JXL</strong> gives you a native, local workflow for importing JPEG files or folders, converting them to JPEG XL, and exporting JXL files back to JPEG, PNG, or GIF when compatibility matters.</p>
<p>The important detail is that “lossless” can describe two different JPEG XL workflows. Reversible JPEG recompression can preserve a supported JPEG well enough to reconstruct the original file. Pixel-lossless encoding preserves the decoded pixels, but not necessarily the original JPEG bytes. This guide explains the difference, shows how to use Image2JXL, and includes a command-line method for checking the result.</p>
<p>For product details and supported formats, see the <a href="https://hp60.com/image2jxl/" target="_blank" rel="noopener noreferrer" class="">Image2JXL JPEG XL converter for Mac</a>.</p>
<p><img decoding="async" loading="lazy" alt="JPEG to JPEG XL lossless workflow with reversible JPEG recompression and pixel-lossless encoding" src="https://hp60.com/assets/images/jpeg-to-jxl-lossless-workflow-5a9296264ebc4d45c65d88ce96d6318b.webp" width="1376" height="768" class="img_z23Z"></p>
<h2 class="anchor anchorTargetStickyNavbar_Xe5F" id="what-does-lossless-jpeg-to-jxl-conversion-mean">What Does Lossless JPEG-to-JXL Conversion Mean?<a href="https://hp60.com/blog/jpeg-to-jxl-lossless-mac/#what-does-lossless-jpeg-to-jxl-conversion-mean" class="hash-link" aria-label="Direct link to What Does Lossless JPEG-to-JXL Conversion Mean?" title="Direct link to What Does Lossless JPEG-to-JXL Conversion Mean?" translate="no">​</a></h2>
<p>JPEG XL is an image format standardized by the JPEG committee. It supports both lossy and lossless compression, so a <code>.jxl</code> file can either preserve an image exactly or intentionally reduce visual information.</p>
<p>For a JPEG source, there are two useful meanings of lossless:</p>
<table><thead><tr><th>Workflow</th><th>What stays identical?</th><th>Can the original JPEG be restored?</th></tr></thead><tbody><tr><td>Reversible JPEG recompression</td><td>The JPEG codestream and decoded pixels</td><td>Yes, when the JPEG XL file keeps reconstruction metadata and the source is supported</td></tr><tr><td>Pixel-lossless JPEG XL encoding</td><td>The decoded image pixels</td><td>No byte-for-byte restoration of the original JPEG container</td></tr></tbody></table>
<h3 class="anchor anchorTargetStickyNavbar_Xe5F" id="reversible-jpeg-recompression">Reversible JPEG recompression<a href="https://hp60.com/blog/jpeg-to-jxl-lossless-mac/#reversible-jpeg-recompression" class="hash-link" aria-label="Direct link to Reversible JPEG recompression" title="Direct link to Reversible JPEG recompression" translate="no">​</a></h3>
<p>JPEG XL can reuse the discrete cosine transform coefficients already stored in a JPEG file and encode them more efficiently. The resulting JXL file is often smaller while retaining the information required to reconstruct the original JPEG.</p>
<p>This is the right path for an archive when you may need the exact JPEG again. “Exact” here means that a later reconstruction can produce the same JPEG file bytes, not just an image that looks similar.</p>
<h3 class="anchor anchorTargetStickyNavbar_Xe5F" id="pixel-lossless-encoding">Pixel-lossless encoding<a href="https://hp60.com/blog/jpeg-to-jxl-lossless-mac/#pixel-lossless-encoding" class="hash-link" aria-label="Direct link to Pixel-lossless encoding" title="Direct link to Pixel-lossless encoding" translate="no">​</a></h3>
<p>The other path decodes the JPEG into pixels and stores those pixels losslessly in JPEG XL’s modular mode. The picture remains pixel-identical after decoding, but the original JPEG container and its exact byte sequence are not preserved.</p>
<p>That distinction matters for photographers, developers, and archivists. If you only need the image to look and decode the same, pixel-lossless output may be enough. If you need to recover the original JPEG file, use reversible JPEG recompression and verify the round trip.</p>
<h2 class="anchor anchorTargetStickyNavbar_Xe5F" id="convert-jpeg-to-jpeg-xl-on-mac-with-image2jxl">Convert JPEG to JPEG XL on Mac with Image2JXL<a href="https://hp60.com/blog/jpeg-to-jxl-lossless-mac/#convert-jpeg-to-jpeg-xl-on-mac-with-image2jxl" class="hash-link" aria-label="Direct link to Convert JPEG to JPEG XL on Mac with Image2JXL" title="Direct link to Convert JPEG to JPEG XL on Mac with Image2JXL" translate="no">​</a></h2>
<p>Image2JXL is designed for local JPEG XL conversion on macOS. Files are processed on your Mac rather than uploaded to a cloud converter, which is useful for private photo libraries, client assets, website images, and offline archive work.</p>
<h3 class="anchor anchorTargetStickyNavbar_Xe5F" id="1-import-jpeg-files-or-a-folder">1. Import JPEG files or a folder<a href="https://hp60.com/blog/jpeg-to-jxl-lossless-mac/#1-import-jpeg-files-or-a-folder" class="hash-link" aria-label="Direct link to 1. Import JPEG files or a folder" title="Direct link to 1. Import JPEG files or a folder" translate="no">​</a></h3>
<p>Open Image2JXL and drag in one or more <code>.jpg</code> or <code>.jpeg</code> files. You can also import a folder for a batch conversion and review the status of each item as it is processed.</p>
<h3 class="anchor anchorTargetStickyNavbar_Xe5F" id="2-choose-the-jpeg-xl-conversion-path">2. Choose the JPEG XL conversion path<a href="https://hp60.com/blog/jpeg-to-jxl-lossless-mac/#2-choose-the-jpeg-xl-conversion-path" class="hash-link" aria-label="Direct link to 2. Choose the JPEG XL conversion path" title="Direct link to 2. Choose the JPEG XL conversion path" translate="no">​</a></h3>
<p>For JPEG input, choose the reversible JPEG recompression path when you need the option to restore the original JPEG later. If the selected path decodes the source to pixels first, the output can still be pixel-lossless, but it should not be treated as a byte-for-byte JPEG backup.</p>
<h3 class="anchor anchorTargetStickyNavbar_Xe5F" id="3-select-where-the-jxl-files-should-go">3. Select where the JXL files should go<a href="https://hp60.com/blog/jpeg-to-jxl-lossless-mac/#3-select-where-the-jxl-files-should-go" class="hash-link" aria-label="Direct link to 3. Select where the JXL files should go" title="Direct link to 3. Select where the JXL files should go" translate="no">​</a></h3>
<p>Save the converted files beside the originals or choose another local output folder. A separate destination is useful for a first test because it leaves the source JPEGs untouched while you compare file sizes and verify the result.</p>
<h3 class="anchor anchorTargetStickyNavbar_Xe5F" id="4-review-the-batch-result">4. Review the batch result<a href="https://hp60.com/blog/jpeg-to-jxl-lossless-mac/#4-review-the-batch-result" class="hash-link" aria-label="Direct link to 4. Review the batch result" title="Direct link to 4. Review the batch result" translate="no">​</a></h3>
<p>After conversion, check the per-file status and open a few JXL files. Image2JXL supports local batch import and output review, so you can find a failed or unsupported input before changing the original folder.</p>
<h3 class="anchor anchorTargetStickyNavbar_Xe5F" id="5-keep-the-originals-until-verification-is-complete">5. Keep the originals until verification is complete<a href="https://hp60.com/blog/jpeg-to-jxl-lossless-mac/#5-keep-the-originals-until-verification-is-complete" class="hash-link" aria-label="Direct link to 5. Keep the originals until verification is complete" title="Direct link to 5. Keep the originals until verification is complete" translate="no">​</a></h3>
<p>Do not delete the JPEGs immediately. First restore a sample JXL file to JPEG and compare hashes, or compare decoded pixels when you used a pixel-lossless path. Once the archive has passed that check, decide whether the original JPEGs should remain beside the JXL files or move to a backup location.</p>
<h2 class="anchor anchorTargetStickyNavbar_Xe5F" id="what-image2jxl-supports">What Image2JXL Supports<a href="https://hp60.com/blog/jpeg-to-jxl-lossless-mac/#what-image2jxl-supports" class="hash-link" aria-label="Direct link to What Image2JXL Supports" title="Direct link to What Image2JXL Supports" translate="no">​</a></h2>
<p>Image2JXL focuses on JPEG XL rather than trying to be a universal image converter.</p>
<table><thead><tr><th>Direction</th><th>Supported formats and workflow</th></tr></thead><tbody><tr><td>Encode to JPEG XL</td><td>JPEG, PNG/APNG, GIF, TIFF, BMP, EXR, NetPBM, and PFM</td></tr><tr><td>Export from JPEG XL</td><td>JPEG, PNG, or GIF for apps and websites that do not accept JXL</td></tr><tr><td>Local workflow</td><td>Individual files, folders, drag and drop, batch status, and local output</td></tr><tr><td>Metadata</td><td>Supported EXIF and XMP can be preserved when the selected conversion path allows it</td></tr></tbody></table>
<p>The current import pipeline does not accept WebP, AVIF, HEIC/HEIF, TGA, PSD, RAW, SVG, PDF, or ICO as image-to-JXL inputs. If your source library is primarily WebP or AVIF, use a converter designed for those formats first, then bring a supported output into Image2JXL.</p>
<h2 class="anchor anchorTargetStickyNavbar_Xe5F" id="convert-a-single-jpeg-with-cjxl">Convert a Single JPEG with <code>cjxl</code><a href="https://hp60.com/blog/jpeg-to-jxl-lossless-mac/#convert-a-single-jpeg-with-cjxl" class="hash-link" aria-label="Direct link to convert-a-single-jpeg-with-cjxl" title="Direct link to convert-a-single-jpeg-with-cjxl" translate="no">​</a></h2>
<p>Image2JXL is the easier choice when you want a visual workflow. The reference JPEG XL tools are useful when you need a repeatable command-line process or want to inspect the exact encoder settings.</p>
<p>Install the <code>libjxl</code> command-line tools, then confirm that both commands are available:</p>
<div class="language-bash codeBlockContainer_mPxw theme-code-block" style="--prism-color:#393A34;--prism-background-color:#f6f8fa"><div class="codeBlockContent_XiAf"><pre tabindex="0" class="prism-code language-bash codeBlock_wya3 thin-scrollbar" style="color:#393A34;background-color:#f6f8fa"><code class="codeBlockLines_vBsX"><div class="token-line" style="color:#393A34"><span class="token plain">cjxl --version</span><br></div><div class="token-line" style="color:#393A34"><span class="token plain">djxl --version</span><br></div></code></pre></div></div>
<p>For an explicit lossless JPEG conversion, use distance 0:</p>
<div class="language-bash codeBlockContainer_mPxw theme-code-block" style="--prism-color:#393A34;--prism-background-color:#f6f8fa"><div class="codeBlockContent_XiAf"><pre tabindex="0" class="prism-code language-bash codeBlock_wya3 thin-scrollbar" style="color:#393A34;background-color:#f6f8fa"><code class="codeBlockLines_vBsX"><div class="token-line" style="color:#393A34"><span class="token plain">cjxl -d 0 photo.jpg photo.jxl</span><br></div></code></pre></div></div>
<p>The <code>-d 0</code> setting tells the encoder not to discard image information. For a supported JPEG input, keep JPEG reconstruction enabled if you want the option to rebuild the original JPEG:</p>
<div class="language-bash codeBlockContainer_mPxw theme-code-block" style="--prism-color:#393A34;--prism-background-color:#f6f8fa"><div class="codeBlockContent_XiAf"><pre tabindex="0" class="prism-code language-bash codeBlock_wya3 thin-scrollbar" style="color:#393A34;background-color:#f6f8fa"><code class="codeBlockLines_vBsX"><div class="token-line" style="color:#393A34"><span class="token plain">cjxl -d 0 -e 8 --allow_jpeg_reconstruction=1 photo.jpg photo.jxl</span><br></div></code></pre></div></div>
<p>Here, <code>-e 8</code> increases encoder effort. It may produce a smaller file, but it can take longer to finish. It does not make the output more visually lossless; distance 0 already defines the lossless target.</p>
<p>To reconstruct the JPEG later, use a <code>.jpg</code> or <code>.jpeg</code> output name:</p>
<div class="language-bash codeBlockContainer_mPxw theme-code-block" style="--prism-color:#393A34;--prism-background-color:#f6f8fa"><div class="codeBlockContent_XiAf"><pre tabindex="0" class="prism-code language-bash codeBlock_wya3 thin-scrollbar" style="color:#393A34;background-color:#f6f8fa"><code class="codeBlockLines_vBsX"><div class="token-line" style="color:#393A34"><span class="token plain">djxl photo.jxl photo-recovered.jpeg</span><br></div></code></pre></div></div>
<p>The reconstruction only works when the JXL file contains the required JPEG reconstruction data and the source JPEG is supported by that path. A JXL file made from pixels can still produce an identical-looking JPEG, but it cannot recreate the original JPEG codestream byte for byte.</p>
<h2 class="anchor anchorTargetStickyNavbar_Xe5F" id="batch-convert-a-jpeg-folder-locally">Batch Convert a JPEG Folder Locally<a href="https://hp60.com/blog/jpeg-to-jxl-lossless-mac/#batch-convert-a-jpeg-folder-locally" class="hash-link" aria-label="Direct link to Batch Convert a JPEG Folder Locally" title="Direct link to Batch Convert a JPEG Folder Locally" translate="no">​</a></h2>
<p>For a simple folder conversion, write the JXL files to a separate directory so the source files remain untouched:</p>
<div class="language-bash codeBlockContainer_mPxw theme-code-block" style="--prism-color:#393A34;--prism-background-color:#f6f8fa"><div class="codeBlockContent_XiAf"><pre tabindex="0" class="prism-code language-bash codeBlock_wya3 thin-scrollbar" style="color:#393A34;background-color:#f6f8fa"><code class="codeBlockLines_vBsX"><div class="token-line" style="color:#393A34"><span class="token plain">mkdir -p jxl-out</span><br></div><div class="token-line" style="color:#393A34"><span class="token plain">for f in *.jpg *.jpeg; do</span><br></div><div class="token-line" style="color:#393A34"><span class="token plain">  [ -e "$f" ] || continue</span><br></div><div class="token-line" style="color:#393A34"><span class="token plain">  cjxl -d 0 "$f" "jxl-out/${f%.*}.jxl"</span><br></div><div class="token-line" style="color:#393A34"><span class="token plain">done</span><br></div></code></pre></div></div>
<p>Image2JXL provides the same kind of local batch workflow through a native Mac interface. Import a folder, choose the output location, review the per-file result, and keep the source folder until a sample round trip has passed.</p>
<p><img decoding="async" loading="lazy" alt="Batch converting a JPEG folder to JPEG XL on a Mac" src="https://hp60.com/assets/images/jpeg-to-jxl-batch-conversion-2de7f1b619b8525f7bcc9a01e2f6207d.webp" width="1376" height="768" class="img_z23Z"></p>
<p>Batch conversion is useful for:</p>
<ul>
<li class="">Archiving a large JPEG photo library.</li>
<li class="">Preparing website or app assets in a JXL test folder.</li>
<li class="">Comparing JPEG XL sizes across a group of similar images.</li>
<li class="">Keeping a repeatable local conversion process without uploading source files.</li>
<li class="">Exporting selected JXL files back to JPEG or PNG for broader compatibility.</li>
</ul>
<h2 class="anchor anchorTargetStickyNavbar_Xe5F" id="verify-that-the-jpeg-to-jxl-conversion-is-lossless">Verify That the JPEG-to-JXL Conversion Is Lossless<a href="https://hp60.com/blog/jpeg-to-jxl-lossless-mac/#verify-that-the-jpeg-to-jxl-conversion-is-lossless" class="hash-link" aria-label="Direct link to Verify That the JPEG-to-JXL Conversion Is Lossless" title="Direct link to Verify That the JPEG-to-JXL Conversion Is Lossless" translate="no">​</a></h2>
<p>The strongest test for reversible JPEG recompression is a SHA-256 comparison. Restore one JXL file, hash both JPEG files, and compare the results:</p>
<div class="language-bash codeBlockContainer_mPxw theme-code-block" style="--prism-color:#393A34;--prism-background-color:#f6f8fa"><div class="codeBlockContent_XiAf"><pre tabindex="0" class="prism-code language-bash codeBlock_wya3 thin-scrollbar" style="color:#393A34;background-color:#f6f8fa"><code class="codeBlockLines_vBsX"><div class="token-line" style="color:#393A34"><span class="token plain">djxl jxl-out/photo.jxl photo-recovered.jpeg</span><br></div><div class="token-line" style="color:#393A34"><span class="token plain">shasum -a 256 photo.jpg photo-recovered.jpeg</span><br></div></code></pre></div></div>
<p>Matching hashes show that the recovered JPEG is byte-for-byte identical to the source JPEG. A mismatch does not automatically mean the image is visibly different; it may mean that the JXL file used pixel-lossless encoding or that reconstruction metadata was not retained.</p>
<p>For pixel-lossless output, compare decoded images instead of JPEG file hashes. Decode both the source JPEG and the JXL file to a lossless raster format such as PNG, then use an image comparison tool. Matching pixels confirm that the picture survived even though the original JPEG container cannot be rebuilt.</p>
<p><img decoding="async" loading="lazy" alt="Verifying a JPEG XL archive with a round-trip JPEG and hash comparison" src="https://hp60.com/assets/images/jpeg-to-jxl-verification-196a053e5eb2d33659cfbfcb8df97538.webp" width="1376" height="768" class="img_z23Z"></p>
<p>After a batch conversion, check three things:</p>
<ol>
<li class="">Every JXL file decodes without an error.</li>
<li class="">A representative sample restores to matching JPEG hashes when reversible recompression was selected.</li>
<li class="">EXIF and XMP metadata are present when the selected Image2JXL or <code>cjxl</code> path is expected to preserve them.</li>
</ol>
<h2 class="anchor anchorTargetStickyNavbar_Xe5F" id="settings-that-can-change-the-result">Settings That Can Change the Result<a href="https://hp60.com/blog/jpeg-to-jxl-lossless-mac/#settings-that-can-change-the-result" class="hash-link" aria-label="Direct link to Settings That Can Change the Result" title="Direct link to Settings That Can Change the Result" translate="no">​</a></h2>
<p>Several options can quietly change a lossless archive into a lossy or non-reversible workflow.</p>
<h3 class="anchor anchorTargetStickyNavbar_Xe5F" id="distance-above-zero">Distance above zero<a href="https://hp60.com/blog/jpeg-to-jxl-lossless-mac/#distance-above-zero" class="hash-link" aria-label="Direct link to Distance above zero" title="Direct link to Distance above zero" translate="no">​</a></h3>
<p>A distance such as <code>-d 1</code> can look excellent, but it is not mathematically lossless. Use <code>-d 0</code> when identical pixels are required.</p>
<h3 class="anchor anchorTargetStickyNavbar_Xe5F" id="jpeg-reconstruction-disabled">JPEG reconstruction disabled<a href="https://hp60.com/blog/jpeg-to-jxl-lossless-mac/#jpeg-reconstruction-disabled" class="hash-link" aria-label="Direct link to JPEG reconstruction disabled" title="Direct link to JPEG reconstruction disabled" translate="no">​</a></h3>
<p>If reconstruction metadata is disabled or removed, the original JPEG cannot be rebuilt from the JXL file even if the decoded pixels remain identical. Keep reconstruction enabled for a reversible JPEG archive.</p>
<h3 class="anchor anchorTargetStickyNavbar_Xe5F" id="metadata-stripping">Metadata stripping<a href="https://hp60.com/blog/jpeg-to-jxl-lossless-mac/#metadata-stripping" class="hash-link" aria-label="Direct link to Metadata stripping" title="Direct link to Metadata stripping" translate="no">​</a></h3>
<p>Stripping EXIF may conflict with JPEG reconstruction. If the source JPEG may need to be restored exactly, keep the reconstruction metadata and avoid a metadata-cleaning step that removes it.</p>
<h3 class="anchor anchorTargetStickyNavbar_Xe5F" id="exporting-with-djxl--j">Exporting with <code>djxl -j</code><a href="https://hp60.com/blog/jpeg-to-jxl-lossless-mac/#exporting-with-djxl--j" class="hash-link" aria-label="Direct link to exporting-with-djxl--j" title="Direct link to exporting-with-djxl--j" translate="no">​</a></h3>
<p>The <code>-j</code> or <code>--pixels_to_jpeg</code> option creates a new JPEG from decoded pixels. That is useful for compatibility, but it is not the same as reconstructing the original JPEG file. Use it for a new delivery JPEG, not for an archival round-trip check.</p>
<h2 class="anchor anchorTargetStickyNavbar_Xe5F" id="when-should-you-use-image2jxl">When Should You Use Image2JXL?<a href="https://hp60.com/blog/jpeg-to-jxl-lossless-mac/#when-should-you-use-image2jxl" class="hash-link" aria-label="Direct link to When Should You Use Image2JXL?" title="Direct link to When Should You Use Image2JXL?" translate="no">​</a></h2>
<p>Image2JXL is a good fit when you want a JPEG XL converter for Mac with a native interface and local batch processing. It is especially useful when you need to:</p>
<ul>
<li class="">Convert JPG files to JXL without uploading them.</li>
<li class="">Keep a reversible JPEG workflow for supported JPEG sources.</li>
<li class="">Convert folders instead of repeating a one-file command.</li>
<li class="">Review per-file conversion status before touching the originals.</li>
<li class="">Preserve supported EXIF and XMP metadata where the selected path allows it.</li>
<li class="">Export JXL files to JPEG, PNG, or GIF for software that does not support JPEG XL.</li>
</ul>
<p>It is less suitable when your starting files are mostly WebP, AVIF, HEIC, RAW, PSD, or PDF, because those formats are outside the current Image2JXL import pipeline.</p>
<h2 class="anchor anchorTargetStickyNavbar_Xe5F" id="should-you-keep-the-original-jpeg-files">Should You Keep the Original JPEG Files?<a href="https://hp60.com/blog/jpeg-to-jxl-lossless-mac/#should-you-keep-the-original-jpeg-files" class="hash-link" aria-label="Direct link to Should You Keep the Original JPEG Files?" title="Direct link to Should You Keep the Original JPEG Files?" translate="no">​</a></h2>
<p>Keep the original JPEGs until the JXL archive has been verified and backed up. After a matching hash confirms reversible reconstruction, the JXL file can serve as a smaller archival copy. Whether you remove the JPEG afterward depends on your compatibility needs:</p>
<ul>
<li class="">Keep JPEG copies for sharing with any app, browser, or service.</li>
<li class="">Keep JXL as the archive when storage size matters and your tools can export it when needed.</li>
<li class="">Keep both when the images are irreplaceable or you need a simple recovery path.</li>
</ul>
<p>JPEG XL makes the decision reversible only when the conversion path and verification prove that the original JPEG can be reconstructed. A smaller file is not enough evidence by itself.</p>
<h2 class="anchor anchorTargetStickyNavbar_Xe5F" id="frequently-asked-questions">Frequently Asked Questions<a href="https://hp60.com/blog/jpeg-to-jxl-lossless-mac/#frequently-asked-questions" class="hash-link" aria-label="Direct link to Frequently Asked Questions" title="Direct link to Frequently Asked Questions" translate="no">​</a></h2>
<h3 class="anchor anchorTargetStickyNavbar_Xe5F" id="is-jpeg-xl-lossless">Is JPEG XL lossless?<a href="https://hp60.com/blog/jpeg-to-jxl-lossless-mac/#is-jpeg-xl-lossless" class="hash-link" aria-label="Direct link to Is JPEG XL lossless?" title="Direct link to Is JPEG XL lossless?" translate="no">​</a></h3>
<p>Yes, JPEG XL supports lossless compression. For JPEG input, distinguish reversible JPEG recompression from pixel-lossless encoding: both can preserve the picture, but only the reversible path can restore the original JPEG bytes when reconstruction data is retained.</p>
<h3 class="anchor anchorTargetStickyNavbar_Xe5F" id="can-i-convert-jxl-back-to-jpeg-on-a-mac">Can I convert JXL back to JPEG on a Mac?<a href="https://hp60.com/blog/jpeg-to-jxl-lossless-mac/#can-i-convert-jxl-back-to-jpeg-on-a-mac" class="hash-link" aria-label="Direct link to Can I convert JXL back to JPEG on a Mac?" title="Direct link to Can I convert JXL back to JPEG on a Mac?" translate="no">​</a></h3>
<p>Yes. Image2JXL can export JPEG XL files to JPEG, PNG, or GIF. For an exact JPEG archive, use the reversible reconstruction path where supported; otherwise, the app can still create a new compatible JPEG from decoded pixels.</p>
<h3 class="anchor anchorTargetStickyNavbar_Xe5F" id="does-image2jxl-upload-my-images">Does Image2JXL upload my images?<a href="https://hp60.com/blog/jpeg-to-jxl-lossless-mac/#does-image2jxl-upload-my-images" class="hash-link" aria-label="Direct link to Does Image2JXL upload my images?" title="Direct link to Does Image2JXL upload my images?" translate="no">​</a></h3>
<p>No. Image2JXL is built for local conversion on Mac, so the selected files are processed on your device rather than uploaded to an online converter.</p>
<h3 class="anchor anchorTargetStickyNavbar_Xe5F" id="can-image2jxl-batch-convert-jpeg-files">Can Image2JXL batch-convert JPEG files?<a href="https://hp60.com/blog/jpeg-to-jxl-lossless-mac/#can-image2jxl-batch-convert-jpeg-files" class="hash-link" aria-label="Direct link to Can Image2JXL batch-convert JPEG files?" title="Direct link to Can Image2JXL batch-convert JPEG files?" translate="no">​</a></h3>
<p>Yes. Import individual files or a folder, run the conversion locally, and review the status of each item before organizing the output.</p>
<h3 class="anchor anchorTargetStickyNavbar_Xe5F" id="does-image2jxl-convert-webp-or-avif-to-jpeg-xl">Does Image2JXL convert WebP or AVIF to JPEG XL?<a href="https://hp60.com/blog/jpeg-to-jxl-lossless-mac/#does-image2jxl-convert-webp-or-avif-to-jpeg-xl" class="hash-link" aria-label="Direct link to Does Image2JXL convert WebP or AVIF to JPEG XL?" title="Direct link to Does Image2JXL convert WebP or AVIF to JPEG XL?" translate="no">​</a></h3>
<p>Not in the current import pipeline. WebP and AVIF are intentionally unsupported image-to-JXL inputs, along with HEIC/HEIF, RAW, PSD, SVG, PDF, and ICO.</p>
<h2 class="anchor anchorTargetStickyNavbar_Xe5F" id="download-image2jxl-for-mac">Download Image2JXL for Mac<a href="https://hp60.com/blog/jpeg-to-jxl-lossless-mac/#download-image2jxl-for-mac" class="hash-link" aria-label="Direct link to Download Image2JXL for Mac" title="Direct link to Download Image2JXL for Mac" translate="no">​</a></h2>
<p>For a visual, local workflow, <a href="https://apps.apple.com/us/app/image2jxl-jpeg-xl-converter/id6780512229?pt=127310275&amp;ct=hp60_blog_jpeg_to_jxl_lossless_mac&amp;mt=8" target="_blank" rel="noopener noreferrer" class="">download Image2JXL from the Mac App Store</a>. Use the app to import a JPEG or folder, choose the appropriate JPEG XL path, review the output, and verify a sample before archiving the originals.</p>
<p>For a shorter introduction to the app, read the <a class="" href="https://hp60.com/blog/image2jxl-introduction/">Image2JXL product guide</a>.</p><section class="margin-top--xl" aria-labelledby="content-responsibility"><h2 class="anchor anchorTargetStickyNavbar_Xe5F" id="content-responsibility">Content responsibility<a href="https://hp60.com/blog/jpeg-to-jxl-lossless-mac/#content-responsibility" class="hash-link" aria-label="Direct link to Content responsibility" title="Direct link to Content responsibility" translate="no">​</a></h2><p>The HP60 product team is responsible for this article. The publication date above identifies this content version; product behavior may change after release, so consult the linked product and support pages for current limits.</p></section>]]></content>
        <author>
            <name>Image2JXL</name>
            <uri>https://hp60.com/image2jxl/</uri>
        </author>
        <author>
            <name>HP60</name>
            <uri>https://hp60.com</uri>
        </author>
        <category label="Image2JXL" term="Image2JXL"/>
        <category label="Feature" term="Feature"/>
    </entry>
    <entry>
        <title type="html"><![CDATA[How to Convert iPhone Photos to PDF Without Installing an App]]></title>
        <id>https://hp60.com/blog/how-to-convert-iphone-photos-to-pdf/</id>
        <link href="https://hp60.com/blog/how-to-convert-iphone-photos-to-pdf/"/>
        <updated>2026-09-05T00:00:00.000Z</updated>
        <summary type="html"><![CDATA[Save iPhone photos as a PDF using Photos or Files. Combine images, check page order and file size, and scan paper documents with Notes.]]></summary>
        <content type="html"><![CDATA[<p>You can save iPhone photos as a PDF using the apps already on your phone. For images in Photos, use the Print preview and save the result to Files. If your images are already in Files, look for the Create PDF action.</p>
<p>These methods are useful for sending receipts, sharing photographed notes, or preparing images for a form that requires a PDF. You can convert one photo or combine several into a single document.</p>
<h2 class="anchor anchorTargetStickyNavbar_Xe5F" id="save-a-photo-as-a-pdf-from-photos">Save a Photo as a PDF From Photos<a href="https://hp60.com/blog/how-to-convert-iphone-photos-to-pdf/#save-a-photo-as-a-pdf-from-photos" class="hash-link" aria-label="Direct link to Save a Photo as a PDF From Photos" title="Direct link to Save a Photo as a PDF From Photos" translate="no">​</a></h2>
<p>The Print option lets you create a PDF without connecting to a printer.</p>
<ol>
<li class="">Open <strong>Photos</strong> and select the image you want to convert.</li>
<li class="">Tap <strong>Share</strong>, then scroll through the available actions and choose <strong>Print</strong>.</li>
<li class="">In the print preview, place two fingers on the page preview and spread them apart to open it.</li>
<li class="">Tap <strong>Share</strong> in the expanded preview, then choose <strong>Save to Files</strong>.</li>
<li class="">Enter a filename, choose a folder, and tap <strong>Save</strong>.</li>
</ol>
<p>Open the saved PDF in Files to check its appearance. Creating the PDF this way leaves the original photo in your library.</p>
<p>The position and appearance of buttons can vary with your iOS version. If you do not see Print immediately, scroll through the full list of share actions.</p>
<h2 class="anchor anchorTargetStickyNavbar_Xe5F" id="combine-several-photos-into-one-pdf">Combine Several Photos Into One PDF<a href="https://hp60.com/blog/how-to-convert-iphone-photos-to-pdf/#combine-several-photos-into-one-pdf" class="hash-link" aria-label="Direct link to Combine Several Photos Into One PDF" title="Direct link to Combine Several Photos Into One PDF" translate="no">​</a></h2>
<p>To include multiple images, select them before opening the Print preview.</p>
<ol>
<li class="">In <strong>Photos</strong>, tap <strong>Select</strong> and choose the images you want to include.</li>
<li class="">Tap <strong>Share</strong>, then <strong>Print</strong>.</li>
<li class="">Review the preview to check which images are included and how they are arranged.</li>
<li class="">Spread two fingers apart on a page preview to open the PDF preview.</li>
<li class="">Tap <strong>Share &gt; Save to Files</strong>, then name and save the document.</li>
</ol>
<p>Check every page in the saved PDF, especially when the images form a sequence, such as photographed notes or a multi-page form. Do not assume that the order in which you tapped the photos will determine the final page order.</p>
<p>If the pages need rearranging and the available controls do not support it, use a PDF editor with page reordering before sharing the file.</p>
<h2 class="anchor anchorTargetStickyNavbar_Xe5F" id="create-a-pdf-from-images-in-files">Create a PDF From Images in Files<a href="https://hp60.com/blog/how-to-convert-iphone-photos-to-pdf/#create-a-pdf-from-images-in-files" class="hash-link" aria-label="Direct link to Create a PDF From Images in Files" title="Direct link to Create a PDF From Images in Files" translate="no">​</a></h2>
<p>If your images are already saved in Files, you may be able to create the PDF there directly.</p>
<ol>
<li class="">Open <strong>Files</strong> and go to the folder containing the images.</li>
<li class="">Open the folder’s <strong>More</strong> menu and choose <strong>Select</strong>.</li>
<li class="">Select the images you want to include.</li>
<li class="">Open the selection’s <strong>More</strong> menu and look for <strong>Create PDF</strong>. Depending on the interface, this may appear under <strong>Quick Actions</strong>.</li>
<li class="">Open the resulting PDF, check its pages, and rename it as needed.</li>
</ol>
<p>The available actions can vary by file type, storage location, and iOS version. If Create PDF is unavailable, try the Photos and Print method instead.</p>
<p>For multiple images, verify the output order rather than relying on selection order alone.</p>
<h2 class="anchor anchorTargetStickyNavbar_Xe5F" id="check-the-pdf-before-sending-it">Check the PDF Before Sending It<a href="https://hp60.com/blog/how-to-convert-iphone-photos-to-pdf/#check-the-pdf-before-sending-it" class="hash-link" aria-label="Direct link to Check the PDF Before Sending It" title="Direct link to Check the PDF Before Sending It" translate="no">​</a></h2>
<p>A quick review can help you catch layout problems or avoid submitting a file that is too large.</p>
<ul>
<li class=""><strong>Page orientation:</strong> Make sure each image is the right way up. If necessary, rotate a copy of the source image and create the PDF again.</li>
<li class=""><strong>Cropping and margins:</strong> Check that no text or document edges have been cut off. The print layout may add white space around an image.</li>
<li class=""><strong>Readability:</strong> Zoom in on small text, particularly in photographed receipts and forms.</li>
<li class=""><strong>File size:</strong> Several high-resolution photos can produce a large PDF. Check the recipient’s upload limit before sending it. If you <a href="https://hp60.com/blog/imgs2pdf-pdf-compression-feature/" target="_blank" rel="noopener noreferrer" class="">compress the PDF</a>, review the text again afterward.</li>
<li class=""><strong>Text recognition:</strong> Converting a photo to PDF does not by itself guarantee a searchable text layer. Some viewers can recognize text in images, but if searchable text is required, use OCR and verify the result.</li>
</ul>
<p>If a submission requires a specific paper size or layout, check the finished PDF against those requirements. Do not assume the default print layout will match them.</p>
<h2 class="anchor anchorTargetStickyNavbar_Xe5F" id="using-notes-for-paper-documents">Using Notes for Paper Documents<a href="https://hp60.com/blog/how-to-convert-iphone-photos-to-pdf/#using-notes-for-paper-documents" class="hash-link" aria-label="Direct link to Using Notes for Paper Documents" title="Direct link to Using Notes for Paper Documents" translate="no">​</a></h2>
<p>If you are starting with a paper document, scanning it may be more convenient than taking an ordinary photo and converting it later.</p>
<p>In <strong>Notes</strong>, open or create a note and look for <strong>Scan Documents</strong> in the attachment or camera menu. Capture the pages, adjust their edges, and save the scan. You can then share the scanned document or save it to Files as a PDF.</p>
<p>This approach is useful for forms, letters, and receipts because you can frame the document during capture. Check the scan for missing edges, shadows, and blurred text before sending it.</p>
<h2 class="anchor anchorTargetStickyNavbar_Xe5F" id="when-a-separate-pdf-app-may-help">When a Separate PDF App May Help<a href="https://hp60.com/blog/how-to-convert-iphone-photos-to-pdf/#when-a-separate-pdf-app-may-help" class="hash-link" aria-label="Direct link to When a Separate PDF App May Help" title="Direct link to When a Separate PDF App May Help" translate="no">​</a></h2>
<p>The built-in methods are suitable for occasional conversions. If you prepare PDFs regularly, a dedicated app may reduce the steps needed to reorder pages, adjust margins, compress files, or recognize text.</p>
<p>Choose based on the controls you need. For example, arranging photographed pages requires page reordering, while a strict upload limit may require compression. Check which features are included and whether the app processes documents locally or uploads them to a service. For a local option, see <a href="https://hp60.com/imgs2pdf/" target="_blank" rel="noopener noreferrer" class="">Imgs2PDF’s PDF organization features</a>.</p>
<h2 class="anchor anchorTargetStickyNavbar_Xe5F" id="common-questions">Common Questions<a href="https://hp60.com/blog/how-to-convert-iphone-photos-to-pdf/#common-questions" class="hash-link" aria-label="Direct link to Common Questions" title="Direct link to Common Questions" translate="no">​</a></h2>
<p><strong>Do I need to install an app or connect a printer?</strong></p>
<p>No. The Photos method uses the Print preview to create a PDF, so you do not need a printer or an additional app.</p>
<p><strong>Can I convert a screenshot?</strong></p>
<p>Yes. Open or select the screenshot in Photos and follow the same Print preview steps.</p>
<p><strong>Will converting delete the original photos?</strong></p>
<p>No. Saving a PDF creates a separate file. Your original images remain where they were stored.</p>
<p><strong>Does this require uploading my photos to a converter?</strong></p>
<p>No online converter is needed. However, photos or PDFs stored in iCloud or another synced location may be uploaded by that service. Choose <strong>On My iPhone</strong> when saving if you want the output in local storage.</p>
<p><strong>Where can I find the finished PDF?</strong></p>
<p>Open Files and navigate to the folder you chose when saving. From there, you can rename, move, or share the PDF.</p><section class="margin-top--xl" aria-labelledby="content-responsibility"><h2 class="anchor anchorTargetStickyNavbar_Xe5F" id="content-responsibility">Content responsibility<a href="https://hp60.com/blog/how-to-convert-iphone-photos-to-pdf/#content-responsibility" class="hash-link" aria-label="Direct link to Content responsibility" title="Direct link to Content responsibility" translate="no">​</a></h2><p>The HP60 product team is responsible for this article. The publication date above identifies this content version; product behavior may change after release, so consult the linked product and support pages for current limits.</p></section>]]></content>
        <author>
            <name>Imgs2PDF</name>
            <uri>https://hp60.com/imgs2pdf/</uri>
        </author>
        <author>
            <name>HP60</name>
            <uri>https://hp60.com</uri>
        </author>
        <category label="Imgs2PDF" term="Imgs2PDF"/>
    </entry>
    <entry>
        <title type="html"><![CDATA[How to Split a PDF on a Mac Using Preview]]></title>
        <id>https://hp60.com/blog/how-to-split-a-pdf-on-mac/</id>
        <link href="https://hp60.com/blog/how-to-split-a-pdf-on-mac/"/>
        <updated>2026-09-05T00:00:00.000Z</updated>
        <summary type="html"><![CDATA[Learn how to extract PDF pages on a Mac with Preview, save selected pages as a new file, and troubleshoot common page extraction problems.]]></summary>
        <content type="html"><![CDATA[<p>If you need to save a few pages from a PDF as a separate file, you can use Preview, the PDF viewer included with macOS. It lets you extract a single page, a continuous range, or selected pages from different parts of a document.</p>
<p>This is useful when you want to share part of a report, separate a form from a larger file, or keep only the pages you need for a particular task. You can do it on your Mac without uploading the document to an online service.</p>
<h2 class="anchor anchorTargetStickyNavbar_Xe5F" id="extract-pages-with-preview">Extract Pages With Preview<a href="https://hp60.com/blog/how-to-split-a-pdf-on-mac/#extract-pages-with-preview" class="hash-link" aria-label="Direct link to Extract Pages With Preview" title="Direct link to Extract Pages With Preview" translate="no">​</a></h2>
<p>The usual method is to select pages in Preview’s thumbnail sidebar and drag them into a Finder folder.</p>
<ol>
<li class=""><strong>Open the PDF in Preview.</strong> If the file opens in another app, Control-click it in Finder and choose <strong>Open With &gt; Preview</strong>.</li>
<li class=""><strong>Show the page thumbnails.</strong> Choose <strong>View &gt; Thumbnails</strong> from the menu bar.</li>
<li class=""><strong>Select the pages you want.</strong> Click a thumbnail to select one page. To select a range, click the first page, then hold <strong>Shift</strong> and click the last. Hold <strong>Command</strong> while clicking to select pages that are not next to each other.</li>
<li class=""><strong>Drag the selected thumbnails into Finder.</strong> Drop them on the Desktop or inside an open folder. This creates a new PDF containing the selected pages.</li>
<li class=""><strong>Open and check the new file.</strong> Confirm the page count, content, and order, then give the file a descriptive name.</li>
</ol>
<p>Dragging pages into Finder creates a separate file and leaves the source PDF unchanged. To divide a document into several files, repeat the process for each group of pages.</p>
<p>For a dedicated local app, <a href="https://hp60.com/imgs2pdf/" target="_blank" rel="noopener noreferrer" class="">Imgs2PDF’s page-selection tools</a> let you visually choose pages and export them into a new PDF.</p>
<h3 class="anchor anchorTargetStickyNavbar_Xe5F" id="example-save-pages-510-as-a-separate-pdf">Example: Save Pages 5–10 as a Separate PDF<a href="https://hp60.com/blog/how-to-split-a-pdf-on-mac/#example-save-pages-510-as-a-separate-pdf" class="hash-link" aria-label="Direct link to Example: Save Pages 5–10 as a Separate PDF" title="Direct link to Example: Save Pages 5–10 as a Separate PDF" translate="no">​</a></h3>
<p>In the thumbnail sidebar, click the fifth page. Hold <strong>Shift</strong> and click the tenth page, then drag the selection into a Finder folder.</p>
<p>Check the actual page content before sharing the result. A document’s printed page numbers may differ from its position in the PDF, especially if it includes a cover or table of contents.</p>
<h2 class="anchor anchorTargetStickyNavbar_Xe5F" id="another-method-duplicate-the-pdf-and-remove-pages">Another Method: Duplicate the PDF and Remove Pages<a href="https://hp60.com/blog/how-to-split-a-pdf-on-mac/#another-method-duplicate-the-pdf-and-remove-pages" class="hash-link" aria-label="Direct link to Another Method: Duplicate the PDF and Remove Pages" title="Direct link to Another Method: Duplicate the PDF and Remove Pages" translate="no">​</a></h2>
<p>If you want to keep most of a document and remove only a few pages, working from a copy may be more convenient.</p>
<ol>
<li class="">Open the PDF in Preview and choose <strong>File &gt; Duplicate</strong>.</li>
<li class="">In the copy, choose <strong>View &gt; Thumbnails</strong>.</li>
<li class="">Select the pages you want to remove and press <strong>Delete</strong>.</li>
<li class="">Save the copy with a new name.</li>
</ol>
<p>Make sure you are editing the duplicate before deleting pages. Open the saved file afterward to check that it contains the pages you intended to keep.</p>
<h2 class="anchor anchorTargetStickyNavbar_Xe5F" id="if-page-extraction-does-not-work">If Page Extraction Does Not Work<a href="https://hp60.com/blog/how-to-split-a-pdf-on-mac/#if-page-extraction-does-not-work" class="hash-link" aria-label="Direct link to If Page Extraction Does Not Work" title="Direct link to If Page Extraction Does Not Work" translate="no">​</a></h2>
<p>Start by checking where you are selecting and dropping the pages.</p>
<ul>
<li class=""><strong>Use the thumbnail sidebar.</strong> Select and drag the small page previews on the left, rather than the page in the main reading area.</li>
<li class=""><strong>Drop into a Finder folder.</strong> Dropping pages into another PDF’s thumbnail sidebar can add them to that document. Use the Desktop or an open Finder folder to create a separate file.</li>
<li class=""><strong>Allow large documents to load.</strong> Image-heavy PDFs may take time to display their thumbnails. Wait for the pages you need to appear before selecting them.</li>
<li class=""><strong>Check document permissions.</strong> A password-protected or restricted PDF may require a password or an unrestricted copy from its owner. Duplicating a file does not remove those restrictions.</li>
<li class=""><strong>Try reopening the file.</strong> If Preview stops responding, close and reopen it. If the problem continues, check whether the PDF opens correctly in another viewer.</li>
</ul>
<h3 class="anchor anchorTargetStickyNavbar_Xe5F" id="what-if-save-as-pdf-is-unavailable">What if “Save as PDF” Is Unavailable?<a href="https://hp60.com/blog/how-to-split-a-pdf-on-mac/#what-if-save-as-pdf-is-unavailable" class="hash-link" aria-label="Direct link to What if “Save as PDF” Is Unavailable?" title="Direct link to What if “Save as PDF” Is Unavailable?" translate="no">​</a></h3>
<p>You do not need the Print dialog to extract pages with the thumbnail method. If <strong>Save as PDF</strong> is unavailable, return to the document and try selecting and dragging the pages into Finder.</p>
<p>An unavailable print option alone does not establish the cause. Check the document’s permissions if other operations are also blocked.</p>
<h2 class="anchor anchorTargetStickyNavbar_Xe5F" id="when-to-use-a-batch-workflow">When to Use a Batch Workflow<a href="https://hp60.com/blog/how-to-split-a-pdf-on-mac/#when-to-use-a-batch-workflow" class="hash-link" aria-label="Direct link to When to Use a Batch Workflow" title="Direct link to When to Use a Batch Workflow" translate="no">​</a></h2>
<p>Preview works well for occasional page extraction. It takes more manual work when you need to turn a long document into one file per page or split many documents in the same way.</p>
<p>For repeated tasks, a dedicated PDF utility or a command-line tool such as qpdf may be worth considering. A command-line workflow can also be run through an Automator Quick Action once the required tool is installed and configured.</p>
<p>Before using a batch workflow on several documents, try it on a copy of one file. Check the output folder, filenames, page order, and whether existing files could be overwritten.</p>
<p>If the documents contain personal or confidential information, check how the tool handles files. Preview performs the extraction locally, though files saved in a cloud-synced folder may still be synced by that service.</p>
<h2 class="anchor anchorTargetStickyNavbar_Xe5F" id="common-questions">Common Questions<a href="https://hp60.com/blog/how-to-split-a-pdf-on-mac/#common-questions" class="hash-link" aria-label="Direct link to Common Questions" title="Direct link to Common Questions" translate="no">​</a></h2>
<p><strong>Can I split a PDF on a Mac for free?</strong></p>
<p>Yes. You can use Preview to extract pages into a new PDF without buying additional software.</p>
<p><strong>Can I extract pages that are not next to each other?</strong></p>
<p>Yes. Hold <strong>Command</strong> while clicking the page thumbnails you want, then drag the selection into a Finder folder.</p>
<p><strong>Can Preview create a separate PDF for every page?</strong></p>
<p>You can drag each page out individually. For a long document, a batch splitting tool will reduce the manual work.</p>
<p><strong>Does extracting pages delete them from the original PDF?</strong></p>
<p>No. Dragging selected thumbnails into Finder creates a new file. Deleting pages inside Preview is a separate editing action, so make a duplicate first if you plan to use that method.</p><section class="margin-top--xl" aria-labelledby="content-responsibility"><h2 class="anchor anchorTargetStickyNavbar_Xe5F" id="content-responsibility">Content responsibility<a href="https://hp60.com/blog/how-to-split-a-pdf-on-mac/#content-responsibility" class="hash-link" aria-label="Direct link to Content responsibility" title="Direct link to Content responsibility" translate="no">​</a></h2><p>The HP60 product team is responsible for this article. The publication date above identifies this content version; product behavior may change after release, so consult the linked product and support pages for current limits.</p></section>]]></content>
        <author>
            <name>Imgs2PDF</name>
            <uri>https://hp60.com/imgs2pdf/</uri>
        </author>
        <author>
            <name>HP60</name>
            <uri>https://hp60.com</uri>
        </author>
        <category label="Imgs2PDF" term="Imgs2PDF"/>
    </entry>
    <entry>
        <title type="html"><![CDATA[What Is a Mac Mouse Utility? Fix Notchy Scrolling with Mouse SR]]></title>
        <id>https://hp60.com/blog/what-is-a-mac-mouse-utility/</id>
        <link href="https://hp60.com/blog/what-is-a-mac-mouse-utility/"/>
        <updated>2026-08-19T16:00:00.000Z</updated>
        <summary type="html"><![CDATA[A practical guide to Mac mouse utilities: when you need one, what to look for, and how Mouse SR makes third-party mouse wheels feel smoother.]]></summary>
        <content type="html"><![CDATA[<p>A Mac mouse utility is a small app that changes how a mouse behaves beyond the few controls macOS provides. Depending on the app, that can mean smoother scrolling, a different scroll direction, cursor tuning, button remapping, or mouse-triggered shortcuts.</p>
<p>The important detail is that these utilities do not all do the same job. <strong>Mouse SR</strong> is a focused Mac mouse utility for one of the most common problems: a third-party mouse wheel that moves in stiff, separate steps instead of the continuous motion you are used to from a trackpad.</p>
<p><img decoding="async" loading="lazy" alt="A black mouse sending a smooth lime-green scrolling motion toward a Mac laptop" src="https://hp60.com/assets/images/mac-mouse-utility-hero-62edfbfcaeb480af5af3de67351d5042.webp" width="1672" height="941" class="img_z23Z"></p>
<h2 class="anchor anchorTargetStickyNavbar_Xe5F" id="the-short-answer">The short answer<a href="https://hp60.com/blog/what-is-a-mac-mouse-utility/#the-short-answer" class="hash-link" aria-label="Direct link to The short answer" title="Direct link to The short answer" translate="no">​</a></h2>
<ul>
<li class=""><strong>What is a Mac mouse utility?</strong> A macOS app that adds mouse controls beyond the built-in settings. The exact features depend on the utility.</li>
<li class=""><strong>When do you need one?</strong> When your mouse works correctly but its scrolling, direction, sensitivity, or extra buttons do not behave the way you want.</li>
<li class=""><strong>What does Mouse SR focus on?</strong> It turns discrete third-party mouse-wheel steps into smoother, continuous movement and lets you tune distance, smoothness, acceleration, and direction.</li>
<li class=""><strong>Does it change a trackpad or Magic Mouse?</strong> No. Mouse SR targets discrete third-party mouse-wheel input and leaves trackpads, Magic Mouse, tablets, and other continuously scrolling devices unchanged.</li>
<li class=""><strong>What does Mouse SR cost?</strong> Mouse SR Pro includes a seven-day full-featured trial. A one-time $1.99 purchase unlocks lifetime use on up to three Macs, with no subscription or automatic renewal.</li>
</ul>
<h2 class="anchor anchorTargetStickyNavbar_Xe5F" id="what-can-a-mac-mouse-utility-do">What can a Mac mouse utility do?<a href="https://hp60.com/blog/what-is-a-mac-mouse-utility/#what-can-a-mac-mouse-utility-do" class="hash-link" aria-label="Direct link to What can a Mac mouse utility do?" title="Direct link to What can a Mac mouse utility do?" translate="no">​</a></h2>
<p>“Mouse utility” describes a category, not a single feature set. Some apps are built around scrolling, some around button mapping, and others around gaming-mouse profiles. Check the actual controls before assuming an app supports the workflow you have in mind.</p>
<p><strong>Scrolling.</strong> This is the most common reason to install a utility. Some can reverse the wheel direction, smooth out jerky steps, adjust acceleration, or control how far each notch moves. If a mouse wheel feels rough compared with a trackpad, this is the category to investigate first.</p>
<p><strong>Cursor tuning.</strong> Some utilities separate pointer speed from acceleration, offer per-device sensitivity, or keep a preferred feel across more than one mouse. These controls are separate from smooth wheel scrolling.</p>
<p><strong>Button bindings.</strong> Other utilities remap side buttons, the middle button, or extra gaming-mouse buttons to actions such as back, forward, copy, paste, Mission Control, or app-specific commands.</p>
<p><strong>Shortcuts and profiles.</strong> Some tools let a mouse button trigger a keyboard shortcut, switch behavior by app, or load a profile for a particular device. These features are useful, but they are not part of every Mac mouse utility.</p>
<p><img decoding="async" loading="lazy" alt="A visual workflow from discrete mouse-wheel input through controls to continuous scrolling on a Mac" src="https://hp60.com/assets/images/mac-mouse-utility-workflow-887ffc6e3f6e979b2c33694d7dc5cc5b.webp" width="1672" height="941" class="img_z23Z"></p>
<h2 class="anchor anchorTargetStickyNavbar_Xe5F" id="when-do-you-actually-need-one">When do you actually need one?<a href="https://hp60.com/blog/what-is-a-mac-mouse-utility/#when-do-you-actually-need-one" class="hash-link" aria-label="Direct link to When do you actually need one?" title="Direct link to When do you actually need one?" translate="no">​</a></h2>
<p>You need a Mac mouse utility when macOS's built-in settings leave out a control you genuinely want. Common examples include:</p>
<ul>
<li class="">A third-party mouse wheel scrolls in jerky steps and you want it to feel closer to a trackpad.</li>
<li class="">You want a different scroll direction for the mouse without changing the trackpad.</li>
<li class="">Your mouse has extra buttons that do nothing or trigger the wrong action.</li>
<li class="">You use more than one mouse and want each device to behave consistently.</li>
</ul>
<p>If System Settings already gives you the behavior you want, you do not need another utility. That is a good result. A small background app should earn its place by solving a specific problem.</p>
<h2 class="anchor anchorTargetStickyNavbar_Xe5F" id="what-to-look-for-in-a-mac-mouse-utility">What to look for in a Mac mouse utility<a href="https://hp60.com/blog/what-is-a-mac-mouse-utility/#what-to-look-for-in-a-mac-mouse-utility" class="hash-link" aria-label="Direct link to What to look for in a Mac mouse utility" title="Direct link to What to look for in a Mac mouse utility" translate="no">​</a></h2>
<p>Start with the control you actually want to change, then check the app's safety, privacy, and pricing model.</p>
<ul>
<li class=""><strong>The right controls.</strong> Confirm whether the app handles scrolling, cursor tuning, button bindings, or the specific combination you need.</li>
<li class=""><strong>A real trial.</strong> Test it with your own mouse, apps, and daily workflow before paying.</li>
<li class=""><strong>Local processing.</strong> Prefer a utility that keeps mouse input and settings on your Mac.</li>
<li class=""><strong>Signing and notarization.</strong> Download from the Mac App Store or the developer's official site, and favor apps that macOS can verify.</li>
<li class=""><strong>An easy off switch.</strong> A menu-bar toggle and a clear uninstall path make troubleshooting much easier.</li>
<li class=""><strong>Clear pricing.</strong> Check whether the app is free, subscription-based, or a one-time purchase before you build your workflow around it.</li>
</ul>
<h2 class="anchor anchorTargetStickyNavbar_Xe5F" id="mouse-sr-a-focused-utility-for-smoother-wheel-scrolling">Mouse SR: a focused utility for smoother wheel scrolling<a href="https://hp60.com/blog/what-is-a-mac-mouse-utility/#mouse-sr-a-focused-utility-for-smoother-wheel-scrolling" class="hash-link" aria-label="Direct link to Mouse SR: a focused utility for smoother wheel scrolling" title="Direct link to Mouse SR: a focused utility for smoother wheel scrolling" translate="no">​</a></h2>
<p>Mouse SR is designed for the scrolling problem rather than for every possible mouse customization. It takes discrete steps from a third-party mouse wheel and rebuilds them as continuous, pixel-based movement.</p>
<p>You can tune four controls:</p>
<ul>
<li class=""><strong>Distance per step:</strong> how far each wheel turn moves the page</li>
<li class=""><strong>Smoothness:</strong> how softly each movement settles</li>
<li class=""><strong>Acceleration:</strong> how quickly repeated turns cover more ground</li>
<li class=""><strong>Direction:</strong> the wheel direction, independently from the trackpad</li>
</ul>
<p>The physical clicks and precision of the wheel stay the same. The page simply moves more calmly between those inputs. Trackpads, Magic Mouse, tablets, and other devices that already send continuous scrolling pass through unchanged.</p>
<p>Mouse SR also includes optional Finder actions in folders you choose: open a folder in Terminal, create an empty TXT or Markdown file, or copy a file or folder path. Mouse and file actions are processed locally, and the app does not upload mouse input, file contents, or paths.</p>
<h2 class="anchor anchorTargetStickyNavbar_Xe5F" id="how-to-set-up-mouse-sr-safely">How to set up Mouse SR safely<a href="https://hp60.com/blog/what-is-a-mac-mouse-utility/#how-to-set-up-mouse-sr-safely" class="hash-link" aria-label="Direct link to How to set up Mouse SR safely" title="Direct link to How to set up Mouse SR safely" translate="no">​</a></h2>
<p>The setup usually takes a few minutes:</p>
<ol>
<li class=""><a href="https://hp60.com/mouse-sr/install/" target="_blank" rel="noopener noreferrer" class="">Download Mouse SR</a> from the official product page and open it from Applications.</li>
<li class="">Open Mouse SR's settings from the menu bar.</li>
<li class="">Turn on <strong>Smooth Scrolling</strong>.</li>
<li class="">In <strong>System Settings → Privacy &amp; Security → Accessibility</strong>, allow Mouse SR to work with scrolling.</li>
<li class="">Scroll a familiar page and <a href="https://hp60.com/blog/how-to-get-smooth-scrolling-on-mac/" target="_blank" rel="noopener noreferrer" class="">adjust distance, smoothness, acceleration, and direction</a> one at a time.</li>
<li class="">Use the menu-bar switch to compare processed and unprocessed scrolling.</li>
</ol>
<p>Start with the defaults and test Safari, Finder, and a long document. If the pointer also lags, check the mouse connection separately; smoother scrolling cannot repair Bluetooth, receiver, battery, or pointer-latency problems.</p>
<h2 class="anchor anchorTargetStickyNavbar_Xe5F" id="free-vs-paid-mouse-utilities">Free vs. paid mouse utilities<a href="https://hp60.com/blog/what-is-a-mac-mouse-utility/#free-vs-paid-mouse-utilities" class="hash-link" aria-label="Direct link to Free vs. paid mouse utilities" title="Direct link to Free vs. paid mouse utilities" translate="no">​</a></h2>
<p>Free utilities can be the right answer when you only need a basic direction switch or cursor setting. Paid tools are worth considering when a specific workflow saves enough time to justify the cost, such as per-app profiles, advanced button bindings, or more precise scrolling controls.</p>
<p>Mouse SR Pro follows the simple version of that model: try every Pro feature free for seven days, without entering a payment method, then unlock it with a one-time $1.99 purchase for up to three Macs. There is no subscription and no automatic renewal. <a href="https://hp60.com/mouse-sr/pricing/" target="_blank" rel="noopener noreferrer" class="">See Mouse SR Pro pricing</a>.</p>
<h2 class="anchor anchorTargetStickyNavbar_Xe5F" id="frequently-asked-questions">Frequently asked questions<a href="https://hp60.com/blog/what-is-a-mac-mouse-utility/#frequently-asked-questions" class="hash-link" aria-label="Direct link to Frequently asked questions" title="Direct link to Frequently asked questions" translate="no">​</a></h2>
<h3 class="anchor anchorTargetStickyNavbar_Xe5F" id="is-a-mac-mouse-utility-safe-to-install">Is a Mac mouse utility safe to install?<a href="https://hp60.com/blog/what-is-a-mac-mouse-utility/#is-a-mac-mouse-utility-safe-to-install" class="hash-link" aria-label="Direct link to Is a Mac mouse utility safe to install?" title="Direct link to Is a Mac mouse utility safe to install?" translate="no">​</a></h3>
<p>It can be, when you download from the Mac App Store or the developer's official site and grant permissions only to apps you trust. Check what the utility processes, whether it runs locally, and how to disable it before installing.</p>
<h3 class="anchor anchorTargetStickyNavbar_Xe5F" id="does-mouse-sr-work-with-the-magic-mouse-and-trackpads">Does Mouse SR work with the Magic Mouse and trackpads?<a href="https://hp60.com/blog/what-is-a-mac-mouse-utility/#does-mouse-sr-work-with-the-magic-mouse-and-trackpads" class="hash-link" aria-label="Direct link to Does Mouse SR work with the Magic Mouse and trackpads?" title="Direct link to Does Mouse SR work with the Magic Mouse and trackpads?" translate="no">​</a></h3>
<p>Yes, without changing their behavior. Mouse SR is aimed at discrete third-party mouse-wheel input and passes through devices that already send continuous scrolling.</p>
<h3 class="anchor anchorTargetStickyNavbar_Xe5F" id="can-a-mac-mouse-utility-reverse-the-scroll-direction">Can a Mac mouse utility reverse the scroll direction?<a href="https://hp60.com/blog/what-is-a-mac-mouse-utility/#can-a-mac-mouse-utility-reverse-the-scroll-direction" class="hash-link" aria-label="Direct link to Can a Mac mouse utility reverse the scroll direction?" title="Direct link to Can a Mac mouse utility reverse the scroll direction?" translate="no">​</a></h3>
<p>Many can. Mouse SR lets you set the third-party mouse direction independently, so you can keep natural scrolling on the trackpad and use another direction on the wheel.</p>
<h3 class="anchor anchorTargetStickyNavbar_Xe5F" id="do-i-need-a-utility-for-a-gaming-mouse">Do I need a utility for a gaming mouse?<a href="https://hp60.com/blog/what-is-a-mac-mouse-utility/#do-i-need-a-utility-for-a-gaming-mouse" class="hash-link" aria-label="Direct link to Do I need a utility for a gaming mouse?" title="Direct link to Do I need a utility for a gaming mouse?" translate="no">​</a></h3>
<p>Only if the macOS defaults or the mouse's own software do not cover what you need. Mouse SR is useful for the wheel-scrolling problem, but it is not a button-remapping or gaming-profile manager.</p>
<h3 class="anchor anchorTargetStickyNavbar_Xe5F" id="how-do-i-uninstall-a-mac-mouse-utility">How do I uninstall a Mac mouse utility?<a href="https://hp60.com/blog/what-is-a-mac-mouse-utility/#how-do-i-uninstall-a-mac-mouse-utility" class="hash-link" aria-label="Direct link to How do I uninstall a Mac mouse utility?" title="Direct link to How do I uninstall a Mac mouse utility?" translate="no">​</a></h3>
<p>Turn it off or quit it first, remove the app from Applications, remove any menu-bar or login item it added, and revoke Accessibility permission if you no longer use it. Follow the developer's uninstaller instructions when provided.</p>
<h2 class="anchor anchorTargetStickyNavbar_Xe5F" id="final-thoughts">Final thoughts<a href="https://hp60.com/blog/what-is-a-mac-mouse-utility/#final-thoughts" class="hash-link" aria-label="Direct link to Final thoughts" title="Direct link to Final thoughts" translate="no">​</a></h2>
<p>A Mac mouse utility is worth installing when it solves a concrete problem that macOS leaves untouched. If your complaint is a notchy third-party mouse wheel, Mouse SR is a focused way to make the movement smoother without replacing a mouse you already like.</p>
<p><a href="https://hp60.com/mouse-sr/" target="_blank" rel="noopener noreferrer" class="">Try Mouse SR</a> free for seven days, then keep it with a one-time purchase if it fits your setup.</p><section class="margin-top--xl" aria-labelledby="content-responsibility"><h2 class="anchor anchorTargetStickyNavbar_Xe5F" id="content-responsibility">Content responsibility<a href="https://hp60.com/blog/what-is-a-mac-mouse-utility/#content-responsibility" class="hash-link" aria-label="Direct link to Content responsibility" title="Direct link to Content responsibility" translate="no">​</a></h2><p>The HP60 product team is responsible for this article. The publication date above identifies this content version; product behavior may change after release, so consult the linked product and support pages for current limits.</p></section>]]></content>
        <author>
            <name>Mouse SR</name>
            <uri>https://hp60.com/mouse-sr/</uri>
        </author>
        <author>
            <name>HP60</name>
            <uri>https://hp60.com</uri>
        </author>
        <category label="Mouse SR" term="Mouse SR"/>
        <category label="Feature" term="Feature"/>
    </entry>
    <entry>
        <title type="html"><![CDATA[How to Get Smooth Scrolling on a Mac with Mouse SR]]></title>
        <id>https://hp60.com/blog/how-to-get-smooth-scrolling-on-mac/</id>
        <link href="https://hp60.com/blog/how-to-get-smooth-scrolling-on-mac/"/>
        <updated>2026-08-19T14:30:00.000Z</updated>
        <summary type="html"><![CDATA[Make a third-party mouse wheel feel more like a Mac trackpad with Mouse SR. Learn why scrolling feels notchy, which settings matter, and how to set it up.]]></summary>
        <content type="html"><![CDATA[<p>Yes, you can get smooth scrolling on a Mac without replacing a perfectly good mouse. The usual problem is not the mouse connection or the page you are reading. It is the difference between the discrete wheel steps sent by a conventional mouse and the continuous motion sent by a trackpad.</p>
<p><strong>Mouse SR</strong> is a small macOS utility that turns third-party mouse-wheel steps into smoother, continuous movement. You can adjust the distance, smoothness, acceleration, and direction to match the way you read, browse, code, or work in Finder.</p>
<p><img decoding="async" loading="lazy" alt="A third-party mouse wheel transitioning from discrete steps to smooth scrolling on a Mac" src="https://hp60.com/assets/images/mouse-sr-smooth-scrolling-mac-hero-e00a440d279372b2fb013dd038c271b2.webp" width="1672" height="941" class="img_z23Z"></p>
<h2 class="anchor anchorTargetStickyNavbar_Xe5F" id="the-short-answer">The short answer<a href="https://hp60.com/blog/how-to-get-smooth-scrolling-on-mac/#the-short-answer" class="hash-link" aria-label="Direct link to The short answer" title="Direct link to The short answer" translate="no">​</a></h2>
<ul>
<li class=""><strong>macOS has a setting for smooth mouse-wheel scrolling:</strong> Not as a dedicated control. System Settings can change scroll speed and direction, but it does not turn every notched wheel into continuous motion.</li>
<li class=""><strong>Does a mouse need to be replaced?</strong> Usually not. If the pointer and clicks are responsive, software can improve the scrolling feel while you keep the mouse you already like.</li>
<li class=""><strong>Does Mouse SR work with a trackpad?</strong> Yes, without changing its behavior. Mouse SR targets discrete third-party mouse-wheel input and passes through trackpads, Magic Mouse, tablets, and other continuous-scrolling devices.</li>
<li class=""><strong>What does it cost?</strong> Mouse SR Pro includes a seven-day free trial. A one-time purchase unlocks lifetime use on up to three Macs, with no subscription or automatic renewal.</li>
<li class=""><strong>What macOS version is required?</strong> Mouse SR works on macOS 15 or later.</li>
</ul>
<h2 class="anchor anchorTargetStickyNavbar_Xe5F" id="why-mouse-wheel-scrolling-feels-notchy-on-a-mac">Why mouse-wheel scrolling feels notchy on a Mac<a href="https://hp60.com/blog/how-to-get-smooth-scrolling-on-mac/#why-mouse-wheel-scrolling-feels-notchy-on-a-mac" class="hash-link" aria-label="Direct link to Why mouse-wheel scrolling feels notchy on a Mac" title="Direct link to Why mouse-wheel scrolling feels notchy on a Mac" translate="no">​</a></h2>
<p>A traditional mouse wheel has physical detents. Each detent produces a separate scroll event, so macOS may move a page in visible jumps. A trackpad reports much smaller changes as your fingers move, which gives the system a continuous stream of motion to display.</p>
<p>That is why the same page can feel fluid with two fingers and stiff with a mouse. Increasing the scroll speed only makes each jump travel farther; it does not fill in the movement between wheel steps.</p>
<p>This distinction also helps separate scrolling roughness from connection problems:</p>
<ul>
<li class="">If the pointer, clicks, and wheel input all arrive late, check the battery, receiver, Bluetooth connection, or vendor software.</li>
<li class="">If the pointer is responsive but a page moves one notch at a time, the issue is probably the wheel animation.</li>
<li class="">If only one app stutters, compare Finder, Safari, and another native app before changing system-wide settings.</li>
</ul>
<h2 class="anchor anchorTargetStickyNavbar_Xe5F" id="what-mouse-sr-changes">What Mouse SR changes<a href="https://hp60.com/blog/how-to-get-smooth-scrolling-on-mac/#what-mouse-sr-changes" class="hash-link" aria-label="Direct link to What Mouse SR changes" title="Direct link to What Mouse SR changes" translate="no">​</a></h2>
<p>Mouse SR sits between a discrete third-party mouse wheel and the scrolling behavior you see on screen. It translates the individual wheel turns into continuous pixel-based movement, then combines nearby turns so fast reading or long-page navigation does not feel like a sequence of hard jumps.</p>
<p>The result is not meant to imitate every trackpad gesture. Your wheel still has the same physical clicks and precision. The difference is that the page moves through the space between those clicks in a calmer, more intentional way.</p>
<p><img decoding="async" loading="lazy" alt="Mouse SR scroll workflow from wheel steps to continuous movement" src="https://hp60.com/assets/images/mouse-sr-smooth-scrolling-workflow-ae44d7ff9373e19583a42a6a5dbc03c4.webp" width="1672" height="941" class="img_z23Z"></p>
<p>Mouse SR processes the scrolling locally on your Mac. Mouse input is not uploaded, and the app does not need Input Monitoring permission. macOS does require Accessibility permission because the app needs to work with scroll input.</p>
<h2 class="anchor anchorTargetStickyNavbar_Xe5F" id="the-four-controls-that-shape-the-feel">The four controls that shape the feel<a href="https://hp60.com/blog/how-to-get-smooth-scrolling-on-mac/#the-four-controls-that-shape-the-feel" class="hash-link" aria-label="Direct link to The four controls that shape the feel" title="Direct link to The four controls that shape the feel" translate="no">​</a></h2>
<p>Mouse SR keeps the important controls together, so you can tune the result by feel instead of hunting through several unrelated settings.</p>
<h3 class="anchor anchorTargetStickyNavbar_Xe5F" id="1-distance-per-step">1. Distance per step<a href="https://hp60.com/blog/how-to-get-smooth-scrolling-on-mac/#1-distance-per-step" class="hash-link" aria-label="Direct link to 1. Distance per step" title="Direct link to 1. Distance per step" translate="no">​</a></h3>
<p>This controls how far one wheel turn moves the page. If a single notch skips too much text, reduce the distance. If scrolling through a long document takes too many turns, increase it slightly.</p>
<p>Set distance first. It is easier to judge smoothness after each wheel turn already travels a comfortable amount.</p>
<h3 class="anchor anchorTargetStickyNavbar_Xe5F" id="2-smoothness">2. Smoothness<a href="https://hp60.com/blog/how-to-get-smooth-scrolling-on-mac/#2-smoothness" class="hash-link" aria-label="Direct link to 2. Smoothness" title="Direct link to 2. Smoothness" translate="no">​</a></h3>
<p>Smoothness controls how quickly the movement settles. A lower setting feels direct and precise. A higher setting blends neighboring wheel turns into a softer motion that can be more comfortable for reading.</p>
<p>Too much smoothness can feel delayed, so increase it until the jumps blend together without making the pointer-to-page response feel detached.</p>
<h3 class="anchor anchorTargetStickyNavbar_Xe5F" id="3-acceleration">3. Acceleration<a href="https://hp60.com/blog/how-to-get-smooth-scrolling-on-mac/#3-acceleration" class="hash-link" aria-label="Direct link to 3. Acceleration" title="Direct link to 3. Acceleration" translate="no">​</a></h3>
<p>Acceleration lets repeated wheel turns cover more ground. A gentle setting works well when you alternate between slow reading and quick navigation. Keep it moderate if you spend most of the day in code, tables, or dense text where predictable movement matters more than speed.</p>
<h3 class="anchor anchorTargetStickyNavbar_Xe5F" id="4-direction">4. Direction<a href="https://hp60.com/blog/how-to-get-smooth-scrolling-on-mac/#4-direction" class="hash-link" aria-label="Direct link to 4. Direction" title="Direct link to 4. Direction" translate="no">​</a></h3>
<p>Many Mac users prefer natural scrolling on a trackpad but a traditional wheel direction on a mouse. Mouse SR can change the third-party mouse direction independently, so you do not have to compromise the rest of your setup.</p>
<p><img decoding="async" loading="lazy" alt="Mouse SR controls for distance per step, smoothness, acceleration, and direction" src="https://hp60.com/assets/images/mouse-sr-smooth-scrolling-ui-3ad9b557fdbcea6a5dd51593a3283e85.webp" width="1800" height="1125" class="img_z23Z"></p>
<h2 class="anchor anchorTargetStickyNavbar_Xe5F" id="how-to-set-up-smooth-scrolling-in-mouse-sr">How to set up smooth scrolling in Mouse SR<a href="https://hp60.com/blog/how-to-get-smooth-scrolling-on-mac/#how-to-set-up-smooth-scrolling-in-mouse-sr" class="hash-link" aria-label="Direct link to How to set up smooth scrolling in Mouse SR" title="Direct link to How to set up smooth scrolling in Mouse SR" translate="no">​</a></h2>
<p>The first setup usually takes only a couple of minutes:</p>
<ol>
<li class=""><a href="https://hp60.com/mouse-sr/install/" target="_blank" rel="noopener noreferrer" class="">Download Mouse SR</a> and open the app from Applications.</li>
<li class="">Find Mouse SR in the menu bar and open its settings.</li>
<li class="">Turn on <strong>Smooth Scrolling</strong>.</li>
<li class="">When macOS asks for permission, open <strong>System Settings → Privacy &amp; Security → Accessibility</strong> and enable Mouse SR.</li>
<li class="">Scroll a familiar page and adjust distance, smoothness, acceleration, and direction one at a time.</li>
<li class="">Use the menu-bar switch to compare the processed and unprocessed wheel behavior.</li>
</ol>
<p>Start with the defaults, then change only one control at a time. A quick comparison in Safari, Finder, and a document or code editor is more useful than trying to optimize every slider from memory.</p>
<p>If Mouse SR is enabled but nothing changes, check that the app has Accessibility permission and that another mouse utility is not also processing the wheel. Two smoothing layers can compete for the same input and make the result worse.</p>
<h2 class="anchor anchorTargetStickyNavbar_Xe5F" id="what-about-mos-smoothscroll-or-mouse-vendor-software">What about Mos, SmoothScroll, or mouse-vendor software?<a href="https://hp60.com/blog/how-to-get-smooth-scrolling-on-mac/#what-about-mos-smoothscroll-or-mouse-vendor-software" class="hash-link" aria-label="Direct link to What about Mos, SmoothScroll, or mouse-vendor software?" title="Direct link to What about Mos, SmoothScroll, or mouse-vendor software?" translate="no">​</a></h2>
<p>Free utilities and vendor software can also improve mouse-wheel scrolling. They are reasonable choices when all you need is a basic smoothing switch. The important rule is to run one scrolling layer at a time.</p>
<p>Mouse SR is a better fit when you want the controls to be explicit and easy to tune, need a per-mouse direction change, or prefer a small utility that also includes practical Finder actions. It stays in the menu bar and leaves devices that already send continuous scrolling alone.</p>
<h2 class="anchor anchorTargetStickyNavbar_Xe5F" id="optional-finder-tools">Optional Finder tools<a href="https://hp60.com/blog/how-to-get-smooth-scrolling-on-mac/#optional-finder-tools" class="hash-link" aria-label="Direct link to Optional Finder tools" title="Direct link to Optional Finder tools" translate="no">​</a></h2>
<p>Smooth scrolling is the main reason to install Mouse SR, but the optional Finder extension can remove a few repetitive file steps too. In folders you choose, the right-click menu can:</p>
<ul>
<li class="">Open the current or selected folder in Terminal</li>
<li class="">Create an empty TXT or Markdown file</li>
<li class="">Copy the path of a file, folder, or current Finder location</li>
</ul>
<p>The extension appears only in the folders you allow and their subfolders. It does not need unrestricted access to the whole disk. See the <a href="https://hp60.com/mouse-sr/finder-right-click-tools/" target="_blank" rel="noopener noreferrer" class="">Mouse SR Finder right-click tools guide</a> if you want to set this up.</p>
<h2 class="anchor anchorTargetStickyNavbar_Xe5F" id="troubleshooting-checklist">Troubleshooting checklist<a href="https://hp60.com/blog/how-to-get-smooth-scrolling-on-mac/#troubleshooting-checklist" class="hash-link" aria-label="Direct link to Troubleshooting checklist" title="Direct link to Troubleshooting checklist" translate="no">​</a></h2>
<p>If scrolling still feels rough after installation, work through these checks:</p>
<ol>
<li class="">Confirm that <strong>Smooth Scrolling</strong> is on in Mouse SR's menu-bar settings.</li>
<li class="">Recheck <strong>Accessibility</strong> permission after a macOS update or app reinstall.</li>
<li class="">Disable other wheel-smoothing options in Logitech, Razer, or similar vendor software while testing.</li>
<li class="">Test more than one app. App-specific rendering or extensions can make one page feel different.</li>
<li class="">Lower smoothness if the page feels delayed, or lower distance if each turn travels too far.</li>
<li class="">If the pointer also lags, troubleshoot the mouse connection separately; smooth scrolling cannot repair Bluetooth or receiver latency.</li>
</ol>
<p>For a more detailed diagnosis, read <a href="https://hp60.com/mouse-sr/mouse-scrolling-not-smooth/" target="_blank" rel="noopener noreferrer" class="">Mouse Scrolling Not Smooth on Mac? Here's How to Fix It</a>. If you want a more trackpad-like starting point, see <a href="https://hp60.com/mouse-sr/make-mouse-scroll-like-trackpad/" target="_blank" rel="noopener noreferrer" class="">How to Make Your Mouse Scroll Like a Trackpad on Mac</a>.</p>
<p>If the issue is specific to the mirrored iPhone window, follow the <a href="https://hp60.com/blog/mouse-sr-iphone-mirroring-smooth-scrolling/" target="_blank" rel="noopener noreferrer" class="">iPhone Mirroring scrolling setup and troubleshooting guide</a>.</p>
<h2 class="anchor anchorTargetStickyNavbar_Xe5F" id="frequently-asked-questions">Frequently asked questions<a href="https://hp60.com/blog/how-to-get-smooth-scrolling-on-mac/#frequently-asked-questions" class="hash-link" aria-label="Direct link to Frequently asked questions" title="Direct link to Frequently asked questions" translate="no">​</a></h2>
<h3 class="anchor anchorTargetStickyNavbar_Xe5F" id="does-macos-have-built-in-smooth-scrolling-for-a-regular-mouse">Does macOS have built-in smooth scrolling for a regular mouse?<a href="https://hp60.com/blog/how-to-get-smooth-scrolling-on-mac/#does-macos-have-built-in-smooth-scrolling-for-a-regular-mouse" class="hash-link" aria-label="Direct link to Does macOS have built-in smooth scrolling for a regular mouse?" title="Direct link to Does macOS have built-in smooth scrolling for a regular mouse?" translate="no">​</a></h3>
<p>macOS has scroll speed and direction controls, but not a universal smoothness control for every third-party wheel. Mouse SR adds that missing layer for discrete mouse-wheel input.</p>
<h3 class="anchor anchorTargetStickyNavbar_Xe5F" id="will-mouse-sr-change-my-trackpad-or-magic-mouse">Will Mouse SR change my trackpad or Magic Mouse?<a href="https://hp60.com/blog/how-to-get-smooth-scrolling-on-mac/#will-mouse-sr-change-my-trackpad-or-magic-mouse" class="hash-link" aria-label="Direct link to Will Mouse SR change my trackpad or Magic Mouse?" title="Direct link to Will Mouse SR change my trackpad or Magic Mouse?" translate="no">​</a></h3>
<p>No. Trackpads, Magic Mouse, tablets, and other devices that already send continuous scrolling input are passed through unchanged.</p>
<h3 class="anchor anchorTargetStickyNavbar_Xe5F" id="is-mouse-sr-safe-to-use">Is Mouse SR safe to use?<a href="https://hp60.com/blog/how-to-get-smooth-scrolling-on-mac/#is-mouse-sr-safe-to-use" class="hash-link" aria-label="Direct link to Is Mouse SR safe to use?" title="Direct link to Is Mouse SR safe to use?" translate="no">​</a></h3>
<p>Mouse SR processes scrolling and Finder actions locally on your Mac. Mouse input, file contents, and file paths are not uploaded. The app is notarized by Apple and requires Accessibility permission for its scrolling function.</p>
<h3 class="anchor anchorTargetStickyNavbar_Xe5F" id="is-mouse-sr-a-subscription">Is Mouse SR a subscription?<a href="https://hp60.com/blog/how-to-get-smooth-scrolling-on-mac/#is-mouse-sr-a-subscription" class="hash-link" aria-label="Direct link to Is Mouse SR a subscription?" title="Direct link to Is Mouse SR a subscription?" translate="no">​</a></h3>
<p>No. Mouse SR Pro has a seven-day free trial and a one-time lifetime purchase for up to three Macs. It does not renew automatically. <a href="https://hp60.com/mouse-sr/pricing/" target="_blank" rel="noopener noreferrer" class="">See Mouse SR Pro pricing</a>.</p>
<h3 class="anchor anchorTargetStickyNavbar_Xe5F" id="can-a-mouse-really-scroll-exactly-like-a-trackpad">Can a mouse really scroll exactly like a trackpad?<a href="https://hp60.com/blog/how-to-get-smooth-scrolling-on-mac/#can-a-mouse-really-scroll-exactly-like-a-trackpad" class="hash-link" aria-label="Direct link to Can a mouse really scroll exactly like a trackpad?" title="Direct link to Can a mouse really scroll exactly like a trackpad?" translate="no">​</a></h3>
<p>The devices still behave differently: a wheel reports turns, while a trackpad reports finger movement and gestures. Mouse SR makes the visible wheel movement continuous and adjustable, which is usually the part that feels uncomfortable on a Mac.</p>
<h2 class="anchor anchorTargetStickyNavbar_Xe5F" id="final-thoughts">Final thoughts<a href="https://hp60.com/blog/how-to-get-smooth-scrolling-on-mac/#final-thoughts" class="hash-link" aria-label="Direct link to Final thoughts" title="Direct link to Final thoughts" translate="no">​</a></h2>
<p>Smooth scrolling on a Mac does not have to mean buying a new mouse or changing the way your trackpad works. If your current mouse is comfortable and responsive, Mouse SR can turn its discrete wheel steps into a smoother, more controlled motion.</p>
<p><a href="https://hp60.com/mouse-sr/" target="_blank" rel="noopener noreferrer" class="">Try Mouse SR</a> free for seven days, then keep it with a one-time lifetime purchase if it fits your setup.</p><section class="margin-top--xl" aria-labelledby="content-responsibility"><h2 class="anchor anchorTargetStickyNavbar_Xe5F" id="content-responsibility">Content responsibility<a href="https://hp60.com/blog/how-to-get-smooth-scrolling-on-mac/#content-responsibility" class="hash-link" aria-label="Direct link to Content responsibility" title="Direct link to Content responsibility" translate="no">​</a></h2><p>The HP60 product team is responsible for this article. The publication date above identifies this content version; product behavior may change after release, so consult the linked product and support pages for current limits.</p></section>]]></content>
        <author>
            <name>Mouse SR</name>
            <uri>https://hp60.com/mouse-sr/</uri>
        </author>
        <author>
            <name>HP60</name>
            <uri>https://hp60.com</uri>
        </author>
        <category label="Mouse SR" term="Mouse SR"/>
        <category label="Feature" term="Feature"/>
    </entry>
    <entry>
        <title type="html"><![CDATA[Mac Mouse Scrolling Not Smooth? Make Scrolling Feel Better with Mouse SR]]></title>
        <id>https://hp60.com/blog/mac-mouse-scrolling-not-smooth-mouse-sr/</id>
        <link href="https://hp60.com/blog/mac-mouse-scrolling-not-smooth-mouse-sr/"/>
        <updated>2026-08-19T10:00:00.000Z</updated>
        <summary type="html"><![CDATA[Is your Mac mouse scrolling not smooth or jumping one step at a time? Mouse SR makes third-party mouse scrolling feel smoother and lets you adjust distance, smoothness, acceleration, and direction.]]></summary>
        <content type="html"><![CDATA[<p>If your Mac mouse scrolling feels stiff, jumpy, or a little behind the smoothness of your trackpad, you are not alone. Many third-party mice work perfectly well on a Mac but still feel uncomfortable when you scroll through a long page.</p>
<p>If you are searching for <strong>Mac mouse scrolling not smooth</strong>, you may not need to replace your mouse. <strong>Mouse SR</strong> helps make ordinary third-party mouse scrolling feel more natural, with settings you can adjust to match the way you work.</p>
<h2 class="anchor anchorTargetStickyNavbar_Xe5F" id="why-does-mouse-scrolling-feel-different-on-a-mac">Why does mouse scrolling feel different on a Mac?<a href="https://hp60.com/blog/mac-mouse-scrolling-not-smooth-mouse-sr/#why-does-mouse-scrolling-feel-different-on-a-mac" class="hash-link" aria-label="Direct link to Why does mouse scrolling feel different on a Mac?" title="Direct link to Why does mouse scrolling feel different on a Mac?" translate="no">​</a></h2>
<p>Most traditional mouse wheels move in small steps. A trackpad and Magic Mouse feel more continuous, so the difference becomes obvious when you switch between them.</p>
<p>You may notice it while:</p>
<ul>
<li class="">Reading long articles or documents</li>
<li class="">Browsing websites</li>
<li class="">Reviewing code</li>
<li class="">Looking through folders in Finder</li>
<li class="">Working with tables, images, or other detailed content</li>
</ul>
<p>This does not necessarily mean that your mouse is broken. Its scrolling simply does not feel as natural as the scrolling you are used to on the Mac.</p>
<h2 class="anchor anchorTargetStickyNavbar_Xe5F" id="how-mouse-sr-makes-scrolling-feel-better">How Mouse SR makes scrolling feel better<a href="https://hp60.com/blog/mac-mouse-scrolling-not-smooth-mouse-sr/#how-mouse-sr-makes-scrolling-feel-better" class="hash-link" aria-label="Direct link to How Mouse SR makes scrolling feel better" title="Direct link to How Mouse SR makes scrolling feel better" translate="no">​</a></h2>
<p>Mouse SR smooths the movement from a regular third-party mouse wheel, so scrolling feels less like a series of sudden jumps. You can adjust a few simple settings:</p>
<h3 class="anchor anchorTargetStickyNavbar_Xe5F" id="change-the-distance-for-each-scroll">Change the distance for each scroll<a href="https://hp60.com/blog/mac-mouse-scrolling-not-smooth-mouse-sr/#change-the-distance-for-each-scroll" class="hash-link" aria-label="Direct link to Change the distance for each scroll" title="Direct link to Change the distance for each scroll" translate="no">​</a></h3>
<p>If every wheel step moves too far, you may skip over content. If it moves too little, you have to keep scrolling.</p>
<p>Mouse SR lets you choose a more comfortable distance for each step.</p>
<h3 class="anchor anchorTargetStickyNavbar_Xe5F" id="adjust-how-smooth-the-movement-feels">Adjust how smooth the movement feels<a href="https://hp60.com/blog/mac-mouse-scrolling-not-smooth-mouse-sr/#adjust-how-smooth-the-movement-feels" class="hash-link" aria-label="Direct link to Adjust how smooth the movement feels" title="Direct link to Adjust how smooth the movement feels" translate="no">​</a></h3>
<p>You can make scrolling feel more direct or more gentle. A softer setting can be especially comfortable when reading, browsing, or working through long pages.</p>
<h3 class="anchor anchorTargetStickyNavbar_Xe5F" id="tune-speed-and-acceleration">Tune speed and acceleration<a href="https://hp60.com/blog/mac-mouse-scrolling-not-smooth-mouse-sr/#tune-speed-and-acceleration" class="hash-link" aria-label="Direct link to Tune speed and acceleration" title="Direct link to Tune speed and acceleration" translate="no">​</a></h3>
<p>Use a faster setting to move through a long page quickly, or a more controlled setting for text, code, and tables. There is no single correct setting—the best one is the one that feels right with your mouse.</p>
<h3 class="anchor anchorTargetStickyNavbar_Xe5F" id="change-the-scrolling-direction">Change the scrolling direction<a href="https://hp60.com/blog/mac-mouse-scrolling-not-smooth-mouse-sr/#change-the-scrolling-direction" class="hash-link" aria-label="Direct link to Change the scrolling direction" title="Direct link to Change the scrolling direction" translate="no">​</a></h3>
<p>If the current direction feels unfamiliar, you can change it without changing the rest of your Mac workflow.</p>
<p>Mouse SR can also be turned on or off from the menu bar whenever you need a quick switch.</p>
<h2 class="anchor anchorTargetStickyNavbar_Xe5F" id="does-mouse-sr-affect-the-trackpad-or-magic-mouse">Does Mouse SR affect the trackpad or Magic Mouse?<a href="https://hp60.com/blog/mac-mouse-scrolling-not-smooth-mouse-sr/#does-mouse-sr-affect-the-trackpad-or-magic-mouse" class="hash-link" aria-label="Direct link to Does Mouse SR affect the trackpad or Magic Mouse?" title="Direct link to Does Mouse SR affect the trackpad or Magic Mouse?" translate="no">​</a></h2>
<p>No. Mouse SR is designed for ordinary third-party mice. Trackpads, Magic Mouse, drawing tablets, and other devices that already use continuous scrolling can keep working as before.</p>
<h2 class="anchor anchorTargetStickyNavbar_Xe5F" id="useful-finder-tools-too">Useful Finder tools, too<a href="https://hp60.com/blog/mac-mouse-scrolling-not-smooth-mouse-sr/#useful-finder-tools-too" class="hash-link" aria-label="Direct link to Useful Finder tools, too" title="Direct link to Useful Finder tools, too" translate="no">​</a></h2>
<p>Mouse SR is not only about scrolling. Its Finder extension adds a few practical actions to the right-click menu:</p>
<ul>
<li class="">Open the current or selected folder in Terminal</li>
<li class="">Create a new TXT or Markdown file</li>
<li class="">Copy the path of a file, folder, or current Finder location</li>
</ul>
<p>These shortcuts are small, but they save time when you work with code, notes, project folders, and files that you need to reference elsewhere.</p>
<p>For more details, see <a href="https://hp60.com/mouse-sr/finder-right-click-tools/" target="_blank" rel="noopener noreferrer" class="">Finder right-click tools for Mac</a>.</p>
<h2 class="anchor anchorTargetStickyNavbar_Xe5F" id="who-is-mouse-sr-for">Who is Mouse SR for?<a href="https://hp60.com/blog/mac-mouse-scrolling-not-smooth-mouse-sr/#who-is-mouse-sr-for" class="hash-link" aria-label="Direct link to Who is Mouse SR for?" title="Direct link to Who is Mouse SR for?" translate="no">​</a></h2>
<p>Mouse SR is a good fit if you:</p>
<ul>
<li class="">Like your current mouse but dislike its scrolling feel on Mac</li>
<li class="">Read, browse, or work with code for long periods</li>
<li class="">Want mouse scrolling to feel closer to trackpad scrolling</li>
<li class="">Prefer to adjust speed and smoothness yourself</li>
<li class="">Spend a lot of time managing files in Finder</li>
<li class="">Would rather improve your current setup than buy another mouse</li>
</ul>
<p>If the grip, buttons, and weight of your mouse already work for you, software adjustment may be all you need.</p>
<h2 class="anchor anchorTargetStickyNavbar_Xe5F" id="how-to-get-started">How to get started<a href="https://hp60.com/blog/mac-mouse-scrolling-not-smooth-mouse-sr/#how-to-get-started" class="hash-link" aria-label="Direct link to How to get started" title="Direct link to How to get started" translate="no">​</a></h2>
<ol>
<li class="">Visit the <a href="https://hp60.com/mouse-sr/" target="_blank" rel="noopener noreferrer" class="">Mouse SR product page</a>.</li>
<li class="">Install and open Mouse SR.</li>
<li class="">Open the scrolling settings from the menu bar.</li>
<li class="">Start with the distance and smoothness settings.</li>
<li class="">Fine-tune speed, acceleration, and direction as needed.</li>
<li class="">Enable the Finder extension if you want the extra shortcuts.</li>
</ol>
<p>Start with small adjustments instead of changing everything at once. After a few minutes of normal use, you should have a better sense of what feels comfortable. For a walkthrough of each control, follow the <a href="https://hp60.com/blog/how-to-get-smooth-scrolling-on-mac/" target="_blank" rel="noopener noreferrer" class="">Mouse SR smooth scrolling setup guide</a>.</p>
<h2 class="anchor anchorTargetStickyNavbar_Xe5F" id="frequently-asked-questions">Frequently asked questions<a href="https://hp60.com/blog/mac-mouse-scrolling-not-smooth-mouse-sr/#frequently-asked-questions" class="hash-link" aria-label="Direct link to Frequently asked questions" title="Direct link to Frequently asked questions" translate="no">​</a></h2>
<h3 class="anchor anchorTargetStickyNavbar_Xe5F" id="does-a-mac-mouse-that-scrolls-poorly-need-to-be-replaced">Does a Mac mouse that scrolls poorly need to be replaced?<a href="https://hp60.com/blog/mac-mouse-scrolling-not-smooth-mouse-sr/#does-a-mac-mouse-that-scrolls-poorly-need-to-be-replaced" class="hash-link" aria-label="Direct link to Does a Mac mouse that scrolls poorly need to be replaced?" title="Direct link to Does a Mac mouse that scrolls poorly need to be replaced?" translate="no">​</a></h3>
<p>Not necessarily. If the mouse itself works well and the main problem is the scrolling feel, try adjusting it with Mouse SR first.</p>
<h3 class="anchor anchorTargetStickyNavbar_Xe5F" id="can-i-still-use-my-trackpad">Can I still use my trackpad?<a href="https://hp60.com/blog/mac-mouse-scrolling-not-smooth-mouse-sr/#can-i-still-use-my-trackpad" class="hash-link" aria-label="Direct link to Can I still use my trackpad?" title="Direct link to Can I still use my trackpad?" translate="no">​</a></h3>
<p>Yes. Mouse SR focuses on ordinary mouse scrolling and does not change the normal behavior of your trackpad or other continuous-scrolling devices.</p>
<h2 class="anchor anchorTargetStickyNavbar_Xe5F" id="final-thoughts">Final thoughts<a href="https://hp60.com/blog/mac-mouse-scrolling-not-smooth-mouse-sr/#final-thoughts" class="hash-link" aria-label="Direct link to Final thoughts" title="Direct link to Final thoughts" translate="no">​</a></h2>
<p>When Mac mouse scrolling is not smooth, the problem may be the scrolling feel rather than the mouse itself.</p>
<p>Mouse SR helps make scrolling more comfortable by letting you adjust distance, smoothness, speed, acceleration, and direction. It also adds handy Finder shortcuts for everyday file work.</p>
<p>If you like your current mouse, try <a href="https://hp60.com/mouse-sr/" target="_blank" rel="noopener noreferrer" class="">Mouse SR</a> before replacing it.</p><section class="margin-top--xl" aria-labelledby="content-responsibility"><h2 class="anchor anchorTargetStickyNavbar_Xe5F" id="content-responsibility">Content responsibility<a href="https://hp60.com/blog/mac-mouse-scrolling-not-smooth-mouse-sr/#content-responsibility" class="hash-link" aria-label="Direct link to Content responsibility" title="Direct link to Content responsibility" translate="no">​</a></h2><p>The HP60 product team is responsible for this article. The publication date above identifies this content version; product behavior may change after release, so consult the linked product and support pages for current limits.</p></section>]]></content>
        <author>
            <name>Mouse SR</name>
            <uri>https://hp60.com/mouse-sr/</uri>
        </author>
        <author>
            <name>HP60</name>
            <uri>https://hp60.com</uri>
        </author>
        <category label="Mouse SR" term="Mouse SR"/>
        <category label="Feature" term="Feature"/>
    </entry>
    <entry>
        <title type="html"><![CDATA[How Security Camera Motion Detection Works]]></title>
        <id>https://hp60.com/blog/security-camera-motion-detection/</id>
        <link href="https://hp60.com/blog/security-camera-motion-detection/"/>
        <updated>2026-08-12T21:30:00.000Z</updated>
        <summary type="html"><![CDATA[Learn how pixel motion, PIR sensors, and AI object detection work in security cameras, plus how to reduce false alerts and review saved footage.]]></summary>
        <content type="html"><![CDATA[<p>Security camera motion detection turns a change in a scene into a useful event. Depending on the system, that event can start recording, send a notification, switch on a light, or trigger an alarm.</p>
<p>The difficult part is not detecting any change—it is deciding which changes matter. This guide explains the main detection methods, why false alerts happen, and how to configure a camera so its recordings and notifications remain useful.</p>
<p><img decoding="async" loading="lazy" alt="Security camera motion detection pipeline from scene change to action" src="https://hp60.com/assets/images/security-camera-detection-pipeline-deaf15049c9f8d2a3f6bdcd50672d8f0.webp" width="1376" height="768" class="img_z23Z"></p>
<h2 class="anchor anchorTargetStickyNavbar_Xe5F" id="motion-detection-is-a-pipeline">Motion Detection Is a Pipeline<a href="https://hp60.com/blog/security-camera-motion-detection/#motion-detection-is-a-pipeline" class="hash-link" aria-label="Direct link to Motion Detection Is a Pipeline" title="Direct link to Motion Detection Is a Pipeline" translate="no">​</a></h2>
<p>A practical motion system has three stages:</p>
<ol>
<li class=""><strong>Detection:</strong> a sensor or video algorithm notices a change.</li>
<li class=""><strong>Decision:</strong> rules decide whether the change counts as an event. Zones, schedules, object type, duration, and sensitivity may all be involved.</li>
<li class=""><strong>Action:</strong> the system records, alerts, activates a light or siren, or marks a point on the timeline.</li>
</ol>
<p>This distinction matters because recording and notification rules do not have to be identical. A driveway camera can record all movement while notifying you only when it identifies a person after dark.</p>
<h2 class="anchor anchorTargetStickyNavbar_Xe5F" id="three-common-detection-methods">Three Common Detection Methods<a href="https://hp60.com/blog/security-camera-motion-detection/#three-common-detection-methods" class="hash-link" aria-label="Direct link to Three Common Detection Methods" title="Direct link to Three Common Detection Methods" translate="no">​</a></h2>
<p><img decoding="async" loading="lazy" alt="Comparison of PIR, pixel-based, and AI security camera motion detection" src="https://hp60.com/assets/images/security-camera-detection-methods-45ea3de12462dfb558b20f30461eba9f.webp" width="1376" height="768" class="img_z23Z"></p>
<h3 class="anchor anchorTargetStickyNavbar_Xe5F" id="pixel-based-video-motion-detection">Pixel-Based Video Motion Detection<a href="https://hp60.com/blog/security-camera-motion-detection/#pixel-based-video-motion-detection" class="hash-link" aria-label="Direct link to Pixel-Based Video Motion Detection" title="Direct link to Pixel-Based Video Motion Detection" translate="no">​</a></h3>
<p>Pixel or frame-difference detection compares successive video frames. When enough pixels change within a watched region, the camera creates a motion event.</p>
<p>It works well for general activity recording and makes it possible to draw zones around a door, gate, driveway, or shelf. Its weakness is that the algorithm sees visual change rather than intent. Shadows, headlights, rain, branches, insects near the lens, and automatic exposure changes can all look like motion.</p>
<h3 class="anchor anchorTargetStickyNavbar_Xe5F" id="pir-heat-sensing">PIR Heat Sensing<a href="https://hp60.com/blog/security-camera-motion-detection/#pir-heat-sensing" class="hash-link" aria-label="Direct link to PIR Heat Sensing" title="Direct link to PIR Heat Sensing" translate="no">​</a></h3>
<p>A passive infrared sensor reacts to changes in infrared energy, often when a warm person or animal moves across its field. Battery cameras commonly use PIR because it consumes little power and can wake the camera before video processing begins.</p>
<p>PIR does not identify what moved. Its reliability depends on ambient temperature, placement, distance, and the direction of travel. A subject crossing the sensor's view is often easier to detect than one moving directly toward it.</p>
<h3 class="anchor anchorTargetStickyNavbar_Xe5F" id="ai-person-and-vehicle-detection">AI Person and Vehicle Detection<a href="https://hp60.com/blog/security-camera-motion-detection/#ai-person-and-vehicle-detection" class="hash-link" aria-label="Direct link to AI Person and Vehicle Detection" title="Direct link to AI Person and Vehicle Detection" translate="no">​</a></h3>
<p>AI detection analyzes the video and classifies objects such as people, vehicles, pets, or packages. It can suppress many notifications caused by leaves, shadows, and distant traffic, making phone alerts more trustworthy.</p>
<p>Classification still depends on the source image. Poor lighting, glare, bad weather, long distance, and partial obstruction can cause missed or incorrect labels. Smart analysis may also add a small delay before an alert arrives.</p>
<p>These methods can work together. A battery camera might use PIR to wake, frame differences to confirm scene activity, and AI classification to decide whether to notify you.</p>
<h2 class="anchor anchorTargetStickyNavbar_Xe5F" id="what-happens-after-a-trigger">What Happens After a Trigger?<a href="https://hp60.com/blog/security-camera-motion-detection/#what-happens-after-a-trigger" class="hash-link" aria-label="Direct link to What Happens After a Trigger?" title="Direct link to What Happens After a Trigger?" translate="no">​</a></h2>
<table><thead><tr><th>Response</th><th>Benefit</th><th>Trade-off</th></tr></thead><tbody><tr><td><strong>Motion recording</strong></td><td>Saves storage by recording around events</td><td>Can miss activity when the trigger fails</td></tr><tr><td><strong>Pre/post buffer</strong></td><td>Adds context before and after movement</td><td>Uses slightly more storage and processing</td></tr><tr><td><strong>Phone alert</strong></td><td>Provides timely awareness</td><td>Becomes noise when false triggers are frequent</td></tr><tr><td><strong>Light or siren</strong></td><td>Can deter an intruder</td><td>Needs a high-confidence rule</td></tr><tr><td><strong>Continuous recording with motion markers</strong></td><td>Preserves evidence while making review faster</td><td>Requires the most storage</td></tr></tbody></table>
<p>Schedules are part of the decision. Movement near a shop entrance may be routine during business hours and important after closing. Configure actions around the real use of the scene, not one global sensitivity setting for every camera.</p>
<h2 class="anchor anchorTargetStickyNavbar_Xe5F" id="why-false-alerts-happen">Why False Alerts Happen<a href="https://hp60.com/blog/security-camera-motion-detection/#why-false-alerts-happen" class="hash-link" aria-label="Direct link to Why False Alerts Happen" title="Direct link to Why False Alerts Happen" translate="no">​</a></h2>
<p>False alarms usually come from the scene, the installation, or overly broad rules:</p>
<ul>
<li class="">Trees, flags, water, shadows, rain, or snow</li>
<li class="">Headlights, reflections, and sudden brightness changes</li>
<li class="">Insects or water drops close to infrared LEDs</li>
<li class="">Camera vibration from wind or a loose mount</li>
<li class="">Roads, sidewalks, and neighboring property inside the zone</li>
<li class="">Indoor screens, fans, pets, or sunlight moving across a floor</li>
</ul>
<p>Night mode changes the scene. Infrared illumination can make nearby insects extremely bright, create reflections from glass or walls, and reduce useful detail at a distance. Daytime settings should always be tested again after dark.</p>
<h2 class="anchor anchorTargetStickyNavbar_Xe5F" id="how-to-reduce-unwanted-motion-alerts">How to Reduce Unwanted Motion Alerts<a href="https://hp60.com/blog/security-camera-motion-detection/#how-to-reduce-unwanted-motion-alerts" class="hash-link" aria-label="Direct link to How to Reduce Unwanted Motion Alerts" title="Direct link to How to Reduce Unwanted Motion Alerts" translate="no">​</a></h2>
<p><img decoding="async" loading="lazy" alt="Outdoor security camera monitoring a driveway at night" src="https://hp60.com/assets/images/security-camera-motion-settings-e88fca86aa6e908061e039bb1caa1623.webp" width="1376" height="768" class="img_z23Z"></p>
<p>Tune the system in this order:</p>
<ol>
<li class=""><strong>Improve the camera position.</strong> Stabilize the mount, avoid reflective glass and direct headlights, and keep moving branches out of the near field.</li>
<li class=""><strong>Create a tight detection zone.</strong> Include the door, path, gate, or driveway that matters. Exclude roads, trees, sky, and neighboring areas.</li>
<li class=""><strong>Begin with moderate sensitivity.</strong> Raise it only until a person at the farthest important point is detected consistently.</li>
<li class=""><strong>Use person or vehicle filters for notifications.</strong> Broader motion can still create recordings without sending every event to your phone.</li>
<li class=""><strong>Set minimum object size or duration when available.</strong> Tiny or momentary changes are less likely to become alerts.</li>
<li class=""><strong>Walk-test day and night.</strong> Approach from realistic directions and test the edge of every important zone.</li>
</ol>
<p>Motion tuning balances two kinds of failure: missing a real event and receiving too many useless alerts. The correct balance can differ for a front door, driveway, stock room, and nursery.</p>
<h2 class="anchor anchorTargetStickyNavbar_Xe5F" id="outdoor-and-indoor-cameras-need-different-rules">Outdoor and Indoor Cameras Need Different Rules<a href="https://hp60.com/blog/security-camera-motion-detection/#outdoor-and-indoor-cameras-need-different-rules" class="hash-link" aria-label="Direct link to Outdoor and Indoor Cameras Need Different Rules" title="Direct link to Outdoor and Indoor Cameras Need Different Rules" translate="no">​</a></h2>
<p>Outdoor cameras face changing weather, wildlife, vehicles, vegetation, and difficult lighting. Person or vehicle classification is especially valuable for notifications, while generic motion can remain useful for recording. Sirens and spotlights should normally require a higher-confidence trigger.</p>
<p>Indoor scenes are more stable but introduce pets, televisions, fans, windows, and scheduled activity. An office camera may need strict alerts after hours and no notifications during the workday. A room facing a glass door may require a zone that excludes movement outside.</p>
<p>Power also affects design. Battery cameras often rely on PIR wake-up and shorter event clips. Continuously powered or PoE cameras can run richer video analysis and maintain longer recording buffers.</p>
<h2 class="anchor anchorTargetStickyNavbar_Xe5F" id="a-setup-checklist">A Setup Checklist<a href="https://hp60.com/blog/security-camera-motion-detection/#a-setup-checklist" class="hash-link" aria-label="Direct link to A Setup Checklist" title="Direct link to A Setup Checklist" translate="no">​</a></h2>
<p>Before buying or configuring a system, ask:</p>
<ul>
<li class="">Does it use PIR, pixel motion, AI classification, or a combination?</li>
<li class="">Can each camera have its own include and exclude zones?</li>
<li class="">Can recording and notifications use different rules?</li>
<li class="">Are person and vehicle filters available?</li>
<li class="">Does it support schedules, object-size filters, and trigger delays?</li>
<li class="">How does detection perform with infrared or color night vision?</li>
<li class="">Is footage stored locally, in the cloud, or both?</li>
<li class="">Can recorded events be reviewed as a list or timeline?</li>
</ul>
<p>During installation, map the paths that matter, aim the camera so people cross the frame when possible, start with a narrow zone, and test the far edge in daylight and darkness. Revisit settings when seasons, lighting, or landscaping change.</p>
<h2 class="anchor anchorTargetStickyNavbar_Xe5F" id="reviewing-saved-security-camera-footage">Reviewing Saved Security Camera Footage<a href="https://hp60.com/blog/security-camera-motion-detection/#reviewing-saved-security-camera-footage" class="hash-link" aria-label="Direct link to Reviewing Saved Security Camera Footage" title="Direct link to Reviewing Saved Security Camera Footage" translate="no">​</a></h2>
<p>Live camera detection and later footage review are separate tasks. Even a well-configured system can leave hours of recordings or many clips to inspect after an incident.</p>
<p>If you have already exported an MP4, M4V, or MOV file, <a href="https://hp60.com/mofind/" target="_blank" rel="noopener noreferrer" class="">MoFind</a> can scan the saved video on iPhone, iPad, or Mac and produce a list of motion events with timestamps, scores, and thumbnails. The analysis runs on the device, so the selected footage is not uploaded for motion detection.</p>
<p>MoFind is a review aid for files you already have. It does not connect to a camera, replace the camera's live alerts, or operate as a real-time security system. See the focused guide to <a href="https://hp60.com/mofind/security-camera-footage-motion/" target="_blank" rel="noopener noreferrer" class="">finding motion in saved security-camera footage</a>.</p>
<h2 class="anchor anchorTargetStickyNavbar_Xe5F" id="frequently-asked-questions">Frequently Asked Questions<a href="https://hp60.com/blog/security-camera-motion-detection/#frequently-asked-questions" class="hash-link" aria-label="Direct link to Frequently Asked Questions" title="Direct link to Frequently Asked Questions" translate="no">​</a></h2>
<h3 class="anchor anchorTargetStickyNavbar_Xe5F" id="is-a-motion-sensor-the-same-as-video-motion-detection">Is a motion sensor the same as video motion detection?<a href="https://hp60.com/blog/security-camera-motion-detection/#is-a-motion-sensor-the-same-as-video-motion-detection" class="hash-link" aria-label="Direct link to Is a motion sensor the same as video motion detection?" title="Direct link to Is a motion sensor the same as video motion detection?" translate="no">​</a></h3>
<p>Not necessarily. “Motion sensor” may refer to PIR hardware, while video motion detection usually means comparing image frames. Some cameras combine both and add AI classification.</p>
<h3 class="anchor anchorTargetStickyNavbar_Xe5F" id="should-a-camera-record-continuously-or-only-on-motion">Should a camera record continuously or only on motion?<a href="https://hp60.com/blog/security-camera-motion-detection/#should-a-camera-record-continuously-or-only-on-motion" class="hash-link" aria-label="Direct link to Should a camera record continuously or only on motion?" title="Direct link to Should a camera record continuously or only on motion?" translate="no">​</a></h3>
<p>Continuous recording gives the strongest evidence trail but requires more storage. Motion-only recording reduces storage and power use but can miss activity. Many powered systems record continuously and add motion markers for faster review.</p>
<h3 class="anchor anchorTargetStickyNavbar_Xe5F" id="why-are-there-more-false-alerts-at-night">Why are there more false alerts at night?<a href="https://hp60.com/blog/security-camera-motion-detection/#why-are-there-more-false-alerts-at-night" class="hash-link" aria-label="Direct link to Why are there more false alerts at night?" title="Direct link to Why are there more false alerts at night?" translate="no">​</a></h3>
<p>Night images contain less detail and stronger infrared reflections. Insects near the lens, reflective surfaces, headlights, and image noise can all produce apparent motion. Test night settings separately.</p>
<h3 class="anchor anchorTargetStickyNavbar_Xe5F" id="does-maximum-sensitivity-provide-the-best-security">Does maximum sensitivity provide the best security?<a href="https://hp60.com/blog/security-camera-motion-detection/#does-maximum-sensitivity-provide-the-best-security" class="hash-link" aria-label="Direct link to Does maximum sensitivity provide the best security?" title="Direct link to Does maximum sensitivity provide the best security?" translate="no">​</a></h3>
<p>No. Maximum sensitivity often creates so many unwanted alerts that users begin ignoring or disabling them. A stable camera, focused zones, and appropriate object filters are usually more effective.</p>
<h2 class="anchor anchorTargetStickyNavbar_Xe5F" id="bottom-line">Bottom Line<a href="https://hp60.com/blog/security-camera-motion-detection/#bottom-line" class="hash-link" aria-label="Direct link to Bottom Line" title="Direct link to Bottom Line" translate="no">​</a></h2>
<p>Security camera motion detection works best when the detection method, camera position, zones, schedule, and response rules match the scene. Pixel detection notices general change, PIR provides a low-power heat trigger, and AI classification helps decide which events deserve attention.</p>
<p>Configure recording and alerts separately, test both day and night, and use a local review tool such as <a href="https://apps.apple.com/app/mofind-motion-scan/id6771765502?pt=127310275&amp;ct=hp60_blog_security_camera_motion&amp;mt=8" target="_blank" rel="noopener noreferrer" class="">MoFind on the App Store</a> when you need to inspect saved footage without scrubbing through every quiet minute.</p><section class="margin-top--xl" aria-labelledby="content-responsibility"><h2 class="anchor anchorTargetStickyNavbar_Xe5F" id="content-responsibility">Content responsibility<a href="https://hp60.com/blog/security-camera-motion-detection/#content-responsibility" class="hash-link" aria-label="Direct link to Content responsibility" title="Direct link to Content responsibility" translate="no">​</a></h2><p>The HP60 product team is responsible for this article. The publication date above identifies this content version; product behavior may change after release, so consult the linked product and support pages for current limits.</p></section>]]></content>
        <author>
            <name>MoFind</name>
            <uri>https://hp60.com/mofind/</uri>
        </author>
        <author>
            <name>HP60</name>
            <uri>https://hp60.com</uri>
        </author>
        <category label="MoFind" term="MoFind"/>
    </entry>
    <entry>
        <title type="html"><![CDATA[How to Convert Video to MP3 on iPhone and Android]]></title>
        <id>https://hp60.com/blog/2mp3-video-to-mp3-converter/</id>
        <link href="https://hp60.com/blog/2mp3-video-to-mp3-converter/"/>
        <updated>2026-08-12T17:30:00.000Z</updated>
        <summary type="html"><![CDATA[A practical guide to converting video to MP3 with 2MP3, including format selection, trimming, volume normalization, export, and playback checks.]]></summary>
        <content type="html"><![CDATA[<p>Sometimes the useful part of a video is only its audio: an interview, lecture, voice-over, rehearsal, or screen recording. In that situation, a focused video-to-audio app is often quicker than moving the file to a desktop editor or uploading it to a conversion website.</p>
<p>This guide shows how to turn a saved video into an MP3 with <strong>2MP3</strong>, clean up the result, and verify the exported file on iPhone, iPad, or Android.</p>
<p><img decoding="async" loading="lazy" alt="Converting a saved video to audio with 2MP3 on a phone" src="https://hp60.com/assets/images/2mp3-video-to-mp3-hero-1395874d3161daf157d4489da296ea73.webp" width="1376" height="768" class="img_z23Z"></p>
<h2 class="anchor anchorTargetStickyNavbar_Xe5F" id="when-video-to-mp3-conversion-is-useful">When Video-to-MP3 Conversion Is Useful<a href="https://hp60.com/blog/2mp3-video-to-mp3-converter/#when-video-to-mp3-conversion-is-useful" class="hash-link" aria-label="Direct link to When Video-to-MP3 Conversion Is Useful" title="Direct link to When Video-to-MP3 Conversion Is Useful" translate="no">​</a></h2>
<p>Extracting audio is helpful when you want to:</p>
<ul>
<li class="">Keep the spoken track from an interview or lecture</li>
<li class="">Save narration from a screen recording</li>
<li class="">Prepare a voice clip for a podcast draft</li>
<li class="">Listen to the audio from your own downloaded video offline</li>
<li class="">Convert an existing audio file into a format another app accepts</li>
</ul>
<p>Only convert media you own or are authorized to use. A local file converter is not a tool for bypassing streaming protections or copying restricted content.</p>
<h2 class="anchor anchorTargetStickyNavbar_Xe5F" id="choose-the-output-format-before-you-start">Choose the Output Format Before You Start<a href="https://hp60.com/blog/2mp3-video-to-mp3-converter/#choose-the-output-format-before-you-start" class="hash-link" aria-label="Direct link to Choose the Output Format Before You Start" title="Direct link to Choose the Output Format Before You Start" translate="no">​</a></h2>
<p>MP3 is the safest default when broad compatibility matters, but it is not the only useful option.</p>
<table><thead><tr><th>Format</th><th>Good choice for</th></tr></thead><tbody><tr><td><strong>MP3</strong></td><td>General listening, messaging, car stereos, and wide compatibility</td></tr><tr><td><strong>AAC / M4A</strong></td><td>Efficient files in Apple-oriented workflows</td></tr><tr><td><strong>FLAC / ALAC</strong></td><td>Lossless storage when preserving the source audio matters</td></tr><tr><td><strong>WAV</strong></td><td>Further editing in an audio workstation</td></tr></tbody></table>
<p>2MP3 accepts common video containers such as MP4, MOV, AVI, MKV, and M4V. If the next app specifically asks for WAV or M4A, choose that format rather than converting to MP3 first and re-encoding again later.</p>
<h2 class="anchor anchorTargetStickyNavbar_Xe5F" id="how-to-convert-a-video-to-mp3-with-2mp3">How to Convert a Video to MP3 With 2MP3<a href="https://hp60.com/blog/2mp3-video-to-mp3-converter/#how-to-convert-a-video-to-mp3-with-2mp3" class="hash-link" aria-label="Direct link to How to Convert a Video to MP3 With 2MP3" title="Direct link to How to Convert a Video to MP3 With 2MP3" translate="no">​</a></h2>
<p><img decoding="async" loading="lazy" alt="2MP3 workflow: import, convert, trim, export, and verify playback" src="https://hp60.com/assets/images/2mp3-conversion-workflow-528d872f44ec7a97322a19c8ed7555e2.webp" width="1376" height="768" class="img_z23Z"></p>
<h3 class="anchor anchorTargetStickyNavbar_Xe5F" id="1-make-sure-the-video-is-stored-locally">1. Make Sure the Video Is Stored Locally<a href="https://hp60.com/blog/2mp3-video-to-mp3-converter/#1-make-sure-the-video-is-stored-locally" class="hash-link" aria-label="Direct link to 1. Make Sure the Video Is Stored Locally" title="Direct link to 1. Make Sure the Video Is Stored Locally" translate="no">​</a></h3>
<p>Before opening 2MP3, play the source video and confirm it is fully downloaded. A cloud placeholder or streaming link may appear in a file browser but remain unavailable to an offline converter.</p>
<p>Also check that you selected the original recording rather than a smaller preview or low-quality copy. Audio extracted from a poor source cannot be repaired by choosing a higher output quality.</p>
<h3 class="anchor anchorTargetStickyNavbar_Xe5F" id="2-import-the-video">2. Import the Video<a href="https://hp60.com/blog/2mp3-video-to-mp3-converter/#2-import-the-video" class="hash-link" aria-label="Direct link to 2. Import the Video" title="Direct link to 2. Import the Video" translate="no">​</a></h3>
<p>Open 2MP3 and add the video from Photos, Files, Downloads, or another location available on your device. Confirm that the correct filename and duration appear in the app.</p>
<p>If an import fails, verify that the file is local, that 2MP3 has permission to access its location, and that the container is supported.</p>
<h3 class="anchor anchorTargetStickyNavbar_Xe5F" id="3-select-mp3-or-another-audio-format">3. Select MP3 or Another Audio Format<a href="https://hp60.com/blog/2mp3-video-to-mp3-converter/#3-select-mp3-or-another-audio-format" class="hash-link" aria-label="Direct link to 3. Select MP3 or Another Audio Format" title="Direct link to 3. Select MP3 or Another Audio Format" translate="no">​</a></h3>
<p>Choose <strong>MP3</strong> for an output that needs to open almost everywhere. Choose M4A or AAC for many Apple workflows, FLAC or ALAC for lossless storage, or WAV when you plan to edit the audio further.</p>
<p>When several videos need the same output format, add them as a batch. Test one representative clip before committing to a large queue.</p>
<h3 class="anchor anchorTargetStickyNavbar_Xe5F" id="4-run-the-conversion-on-your-device">4. Run the Conversion on Your Device<a href="https://hp60.com/blog/2mp3-video-to-mp3-converter/#4-run-the-conversion-on-your-device" class="hash-link" aria-label="Direct link to 4. Run the Conversion on Your Device" title="Direct link to 4. Run the Conversion on Your Device" translate="no">​</a></h3>
<p>Start the conversion and allow it to finish. 2MP3 performs the core conversion on-device, so the video does not need to be uploaded to a conversion server. Processing time depends on the length of the source and the performance of the phone or tablet rather than upload speed.</p>
<p>When conversion finishes, open the audio in the built-in player and listen to the beginning, middle, and end before editing.</p>
<h3 class="anchor anchorTargetStickyNavbar_Xe5F" id="5-trim-and-clean-the-extracted-audio">5. Trim and Clean the Extracted Audio<a href="https://hp60.com/blog/2mp3-video-to-mp3-converter/#5-trim-and-clean-the-extracted-audio" class="hash-link" aria-label="Direct link to 5. Trim and Clean the Extracted Audio" title="Direct link to 5. Trim and Clean the Extracted Audio" translate="no">​</a></h3>
<p>The soundtrack may contain an unwanted intro, silence, or material after the section you need. Use the waveform editor to set the start and end points visually. Zooming into the waveform helps avoid cutting the first or last syllable of speech.</p>
<p>A reliable cleanup order is:</p>
<ol>
<li class="">Listen once and locate the useful section.</li>
<li class="">Trim the beginning and end.</li>
<li class="">Remove remaining leading or trailing silence if necessary.</li>
<li class="">Add a fade when an abrupt edge sounds unnatural.</li>
<li class="">Apply volume normalization after the final trim if the level is inconsistent.</li>
</ol>
<p>Normalization can make everyday listening more comfortable, but it cannot fix clipping, heavy background noise, or a badly recorded source.</p>
<h3 class="anchor anchorTargetStickyNavbar_Xe5F" id="6-export-rename-and-verify">6. Export, Rename, and Verify<a href="https://hp60.com/blog/2mp3-video-to-mp3-converter/#6-export-rename-and-verify" class="hash-link" aria-label="Direct link to 6. Export, Rename, and Verify" title="Direct link to 6. Export, Rename, and Verify" translate="no">​</a></h3>
<p><img decoding="async" loading="lazy" alt="Listening to an exported MP3 after trimming and conversion" src="https://hp60.com/assets/images/2mp3-export-audio-12e82112c6695cb760346917a5f659b4.webp" width="1376" height="768" class="img_z23Z"></p>
<p>Preview the finished clip, then export or share it to Files or another app. Give it a useful name that includes the subject, speaker, or date instead of keeping a generic generated filename.</p>
<p>The conversion is complete only when the exported file:</p>
<ul>
<li class="">Opens in an app outside 2MP3</li>
<li class="">Has the expected format and duration</li>
<li class="">Starts and ends without clipped words</li>
<li class="">Plays at an acceptable volume</li>
<li class="">Reaches the intended folder, editor, messaging app, or player</li>
</ul>
<p>Keep the source video until those checks pass.</p>
<h2 class="anchor anchorTargetStickyNavbar_Xe5F" id="batch-conversion-without-creating-a-mess">Batch Conversion Without Creating a Mess<a href="https://hp60.com/blog/2mp3-video-to-mp3-converter/#batch-conversion-without-creating-a-mess" class="hash-link" aria-label="Direct link to Batch Conversion Without Creating a Mess" title="Direct link to Batch Conversion Without Creating a Mess" translate="no">​</a></h2>
<p>Batch mode works well for several clips that share the same destination format. For example, you can convert a group of interview segments to MP3 or prepare several recordings for an audio editor.</p>
<p>Use one sample to approve the format and playback quality first. Then process the batch and trim only the clips that need individual start and end points. Keep master exports separate from shorter edited versions, and delete source or converted files only after confirming that the intended destination received them.</p>
<h2 class="anchor anchorTargetStickyNavbar_Xe5F" id="troubleshooting-common-problems">Troubleshooting Common Problems<a href="https://hp60.com/blog/2mp3-video-to-mp3-converter/#troubleshooting-common-problems" class="hash-link" aria-label="Direct link to Troubleshooting Common Problems" title="Direct link to Troubleshooting Common Problems" translate="no">​</a></h2>
<table><thead><tr><th>Problem</th><th>Likely cause</th><th>What to try</th></tr></thead><tbody><tr><td>Video does not appear after import</td><td>File is cloud-only, permission is missing, or container is unsupported</td><td>Download it fully, check access, and confirm the format</td></tr><tr><td>Conversion seems slow</td><td>Long video or limited device resources</td><td>Keep the app active and test with a shorter clip</td></tr><tr><td>Export is much longer than needed</td><td>The full video track was extracted</td><td>Trim the waveform before exporting again</td></tr><tr><td>Speech is cut off</td><td>Trim handles are too close to the words</td><td>Zoom in and leave a small margin at each edge</td></tr><tr><td>Volume changes between sections</td><td>Source recording has inconsistent levels</td><td>Finish trimming, then try normalization</td></tr><tr><td>Another app rejects the file</td><td>Wrong output format for that app</td><td>Export as MP3, M4A, or WAV according to its requirement</td></tr><tr><td>Shared file cannot be found</td><td>It was sent to a different folder or app</td><td>Export again and note the selected destination</td></tr></tbody></table>
<p>Change one thing at a time while troubleshooting. Re-running the complete process with several new settings makes it difficult to identify the real cause.</p>
<h2 class="anchor anchorTargetStickyNavbar_Xe5F" id="privacy-local-conversion-versus-browser-uploads">Privacy: Local Conversion Versus Browser Uploads<a href="https://hp60.com/blog/2mp3-video-to-mp3-converter/#privacy-local-conversion-versus-browser-uploads" class="hash-link" aria-label="Direct link to Privacy: Local Conversion Versus Browser Uploads" title="Direct link to Privacy: Local Conversion Versus Browser Uploads" translate="no">​</a></h2>
<p>A browser converter must receive the video before it can process it. That may be acceptable for non-sensitive material, but interviews, classroom recordings, family videos, and client work can contain private information.</p>
<p>2MP3 is designed around on-device processing for its core conversion workflow. This also avoids waiting for a large video upload before conversion can begin. As with any mobile app, review the current store listing and system permissions before using it for particularly sensitive material.</p>
<h2 class="anchor anchorTargetStickyNavbar_Xe5F" id="a-repeatable-six-step-recipe">A Repeatable Six-Step Recipe<a href="https://hp60.com/blog/2mp3-video-to-mp3-converter/#a-repeatable-six-step-recipe" class="hash-link" aria-label="Direct link to A Repeatable Six-Step Recipe" title="Direct link to A Repeatable Six-Step Recipe" translate="no">​</a></h2>
<p>The next time you need audio from a saved video:</p>
<ol>
<li class="">Download the complete video to the device.</li>
<li class="">Import it into 2MP3.</li>
<li class="">Choose MP3 or the format required by the destination.</li>
<li class="">Convert and preview the audio.</li>
<li class="">Trim, remove edge silence, and normalize only if needed.</li>
<li class="">Export, rename, and test playback in another app.</li>
</ol>
<p>That final playback test is more important than the progress indicator. It confirms that you have a usable audio file, not merely a successful conversion message.</p>
<h2 class="anchor anchorTargetStickyNavbar_Xe5F" id="download-2mp3">Download 2MP3<a href="https://hp60.com/blog/2mp3-video-to-mp3-converter/#download-2mp3" class="hash-link" aria-label="Direct link to Download 2MP3" title="Direct link to Download 2MP3" translate="no">​</a></h2>
<p>2MP3 is available for iPhone and iPad through the App Store and for Android through Google Play.</p>
<ul>
<li class=""><a href="https://apps.apple.com/app/2mp3/id6737749090?pt=127310275&amp;ct=hp60_blog_2mp3_workflow&amp;mt=8" target="_blank" rel="noopener noreferrer" class="">Download 2MP3 on the App Store</a></li>
<li class=""><a href="https://play.google.com/store/apps/details?id=com.givebest.a2mp3" target="_blank" rel="noopener noreferrer" class="">Get 2MP3 on Google Play</a></li>
</ul>
<p>For a closer look at waveform editing, silence removal, and volume tools, read the <a href="https://hp60.com/blog/2mp3-trim-audio/" target="_blank" rel="noopener noreferrer" class="">2MP3 audio trimming guide</a>.</p><section class="margin-top--xl" aria-labelledby="content-responsibility"><h2 class="anchor anchorTargetStickyNavbar_Xe5F" id="content-responsibility">Content responsibility<a href="https://hp60.com/blog/2mp3-video-to-mp3-converter/#content-responsibility" class="hash-link" aria-label="Direct link to Content responsibility" title="Direct link to Content responsibility" translate="no">​</a></h2><p>The HP60 product team is responsible for this article. The publication date above identifies this content version; product behavior may change after release, so consult the linked product and support pages for current limits.</p></section>]]></content>
        <author>
            <name>2MP3</name>
            <uri>https://apps.apple.com/app/2mp3/id6737749090</uri>
        </author>
        <author>
            <name>HP60</name>
            <uri>https://hp60.com</uri>
        </author>
        <category label="2MP3" term="2MP3"/>
        <category label="Feature" term="Feature"/>
    </entry>
    <entry>
        <title type="html"><![CDATA[How to Convert Image Formats Without Losing Quality]]></title>
        <id>https://hp60.com/blog/image-converter-guide/</id>
        <link href="https://hp60.com/blog/image-converter-guide/"/>
        <updated>2026-08-12T16:30:00.000Z</updated>
        <summary type="html"><![CDATA[A practical image converter guide covering JPG, PNG, WebP, AVIF, and HEIC, with tips for quality, file size, privacy, and batch conversion.]]></summary>
        <content type="html"><![CDATA[<p>Image conversion should be simple: choose a picture, select a new format, and export it. In practice, the wrong format or compression setting can create a file that is blurry, unexpectedly large, missing transparency, or rejected by the app where you need it.</p>
<p>This guide explains how to choose between JPG, PNG, WebP, AVIF, and HEIC, then convert and check your images without risking the originals.</p>
<p><img decoding="async" loading="lazy" alt="Image conversion workflow from source file to verified output" src="https://hp60.com/assets/images/image-converter-workflow-afc1c539413658904443209a1560d18f.webp" width="1376" height="768" class="img_z23Z"></p>
<h2 class="anchor anchorTargetStickyNavbar_Xe5F" id="start-with-the-destination-not-the-converter">Start With the Destination, Not the Converter<a href="https://hp60.com/blog/image-converter-guide/#start-with-the-destination-not-the-converter" class="hash-link" aria-label="Direct link to Start With the Destination, Not the Converter" title="Direct link to Start With the Destination, Not the Converter" translate="no">​</a></h2>
<p>Before opening an image converter, find out what the finished file needs to do. A website, print shop, email service, and older desktop app may all expect different formats.</p>
<p>Answer these four questions first:</p>
<ol>
<li class="">Which format does the destination accept?</li>
<li class="">Is the image a photograph, a graphic, or a logo with transparency?</li>
<li class="">Is there a maximum file size or pixel dimension?</li>
<li class="">Is smaller size or maximum visual quality more important?</li>
</ol>
<p>This prevents a common mistake: converting successfully, only to discover that the result cannot be uploaded or no longer looks right.</p>
<h2 class="anchor anchorTargetStickyNavbar_Xe5F" id="which-image-format-should-you-choose">Which Image Format Should You Choose?<a href="https://hp60.com/blog/image-converter-guide/#which-image-format-should-you-choose" class="hash-link" aria-label="Direct link to Which Image Format Should You Choose?" title="Direct link to Which Image Format Should You Choose?" translate="no">​</a></h2>
<p>There is no single best format for every image. Choose according to the content and where it will be used.</p>
<table><thead><tr><th>Format</th><th>Best suited to</th><th>Important limitation</th></tr></thead><tbody><tr><td><strong>JPG</strong></td><td>Photos, email attachments, and broad compatibility</td><td>Does not preserve transparency</td></tr><tr><td><strong>PNG</strong></td><td>Logos, interface graphics, screenshots, and transparent images</td><td>Photographs can become unnecessarily large</td></tr><tr><td><strong>WebP</strong></td><td>Modern websites that need smaller images with good compatibility</td><td>Some older software may not open it</td></tr><tr><td><strong>AVIF</strong></td><td>Web delivery where efficient compression is the priority</td><td>Editing and legacy app support can be less consistent</td></tr><tr><td><strong>HEIC</strong></td><td>Space-efficient photos on Apple devices</td><td>Often needs conversion before sharing with older apps or systems</td></tr></tbody></table>
<p>For a website, WebP is a practical default when compatibility matters. AVIF is worth testing when file size is the main concern. Keep a JPG or PNG fallback if the receiving system is unknown.</p>
<h2 class="anchor anchorTargetStickyNavbar_Xe5F" id="a-reliable-image-conversion-workflow">A Reliable Image Conversion Workflow<a href="https://hp60.com/blog/image-converter-guide/#a-reliable-image-conversion-workflow" class="hash-link" aria-label="Direct link to A Reliable Image Conversion Workflow" title="Direct link to A Reliable Image Conversion Workflow" translate="no">​</a></h2>
<h3 class="anchor anchorTargetStickyNavbar_Xe5F" id="1-check-the-source-file">1. Check the Source File<a href="https://hp60.com/blog/image-converter-guide/#1-check-the-source-file" class="hash-link" aria-label="Direct link to 1. Check the Source File" title="Direct link to 1. Check the Source File" translate="no">​</a></h3>
<p>Open the original in Preview, Photos, a browser, or another trusted viewer. Confirm that it displays correctly and is not an empty, damaged, or incorrectly renamed file.</p>
<p>Changing a file extension does not convert its contents. Renaming <code>photo.heic</code> to <code>photo.jpg</code>, for example, still leaves HEIC data inside the file. A real converter must decode the source and export a new image in the selected format.</p>
<p>If the source will not open, return to the app or device that created it and export a fresh copy before continuing.</p>
<h3 class="anchor anchorTargetStickyNavbar_Xe5F" id="2-choose-between-online-and-local-conversion">2. Choose Between Online and Local Conversion<a href="https://hp60.com/blog/image-converter-guide/#2-choose-between-online-and-local-conversion" class="hash-link" aria-label="Direct link to 2. Choose Between Online and Local Conversion" title="Direct link to 2. Choose Between Online and Local Conversion" translate="no">​</a></h3>
<p>Browser-based converters are convenient for an occasional, non-sensitive file. They require an upload, however, and large batches can be slow or awkward to download and organize.</p>
<p>A local converter is a better fit when you are working with:</p>
<ul>
<li class="">Client or unreleased product images</li>
<li class="">Personal photos with location metadata</li>
<li class="">IDs, scans, or other private documents</li>
<li class="">Large folders that share the same output settings</li>
<li class="">Files you do not want to send to a third-party server</li>
</ul>
<p>On a Mac, <a href="https://hp60.com/image2webp/" target="_blank" rel="noopener noreferrer" class="">Image2WebP</a> processes supported images locally and can convert files or folders in batches. It exports common source formats—including JPEG, PNG, HEIC, TIFF, PSD, and RAW—to WebP or AVIF, and can convert WebP or AVIF back to JPG or PNG.</p>
<h3 class="anchor anchorTargetStickyNavbar_Xe5F" id="3-set-only-the-options-you-need">3. Set Only the Options You Need<a href="https://hp60.com/blog/image-converter-guide/#3-set-only-the-options-you-need" class="hash-link" aria-label="Direct link to 3. Set Only the Options You Need" title="Direct link to 3. Set Only the Options You Need" translate="no">​</a></h3>
<p>Most conversions depend on four settings:</p>
<p><strong>Output format.</strong> Match the actual requirement instead of choosing the newest format automatically.</p>
<p><strong>Quality.</strong> For a photo, begin with a moderately high quality setting and inspect the result. Maximum quality often increases file size more than it improves the visible image.</p>
<p><strong>Dimensions.</strong> Resize only when the destination sets a limit or the source is much larger than it will ever be displayed. Reducing dimensions can save substantial space, but enlarging a small source cannot restore missing detail.</p>
<p><strong>Transparency and metadata.</strong> JPG cannot store transparent areas, so use PNG or an alpha-capable WebP for logos and graphics that need them. Decide whether you need EXIF data such as capture time, camera details, copyright, or GPS coordinates. For public sharing, removing location data may be preferable; for photography and archiving, <a href="https://hp60.com/blog/image2webp-exif-gps-preservation/" target="_blank" rel="noopener noreferrer" class="">preserving metadata may matter</a>.</p>
<h3 class="anchor anchorTargetStickyNavbar_Xe5F" id="4-test-one-image-before-converting-a-folder">4. Test One Image Before Converting a Folder<a href="https://hp60.com/blog/image-converter-guide/#4-test-one-image-before-converting-a-folder" class="hash-link" aria-label="Direct link to 4. Test One Image Before Converting a Folder" title="Direct link to 4. Test One Image Before Converting a Folder" translate="no">​</a></h3>
<p>When a batch uses the same format and quality settings, first convert a representative sample. Choose an image with fine details, gradients, text, or transparency—whatever is most likely to reveal a problem.</p>
<p>Open the sample at 100% zoom and compare it with the original. If it looks good and meets the size requirement, reuse those settings for the complete folder. This small check can prevent an entire batch of over-compressed exports.</p>
<h3 class="anchor anchorTargetStickyNavbar_Xe5F" id="5-verify-the-export-in-its-real-destination">5. Verify the Export in Its Real Destination<a href="https://hp60.com/blog/image-converter-guide/#5-verify-the-export-in-its-real-destination" class="hash-link" aria-label="Direct link to 5. Verify the Export in Its Real Destination" title="Direct link to 5. Verify the Export in Its Real Destination" translate="no">​</a></h3>
<p>A finished progress bar only means the converter created a file. It does not guarantee that the result is ready to use.</p>
<p><img decoding="async" loading="lazy" alt="Reviewing an image conversion result on a Mac" src="https://hp60.com/assets/images/image-converter-formats-53436c0dcfb293b5350bf9a041b1e98b.webp" width="1376" height="768" class="img_z23Z"></p>
<p>Before deleting or archiving anything, check that the converted image:</p>
<ul>
<li class="">Opens in an app other than the converter</li>
<li class="">Has the expected extension, dimensions, and file size</li>
<li class="">Retains transparency where required</li>
<li class="">Shows natural colors without obvious banding or artifacts</li>
<li class="">Contains or removes metadata as intended</li>
<li class="">Uploads successfully to the actual website, CMS, email draft, or design tool</li>
</ul>
<p>Keep the original until the destination accepts the new file. The safest workflow creates a separate export rather than replacing the source.</p>
<h2 class="anchor anchorTargetStickyNavbar_Xe5F" id="how-to-fix-common-conversion-problems">How to Fix Common Conversion Problems<a href="https://hp60.com/blog/image-converter-guide/#how-to-fix-common-conversion-problems" class="hash-link" aria-label="Direct link to How to Fix Common Conversion Problems" title="Direct link to How to Fix Common Conversion Problems" translate="no">​</a></h2>
<table><thead><tr><th>Problem</th><th>Likely reason</th><th>Recommended fix</th></tr></thead><tbody><tr><td>The exported photo is larger than the original</td><td>It was saved as PNG or at unnecessarily high quality</td><td>Use JPG, WebP, or AVIF and lower quality slightly</td></tr><tr><td>A logo has a white or black rectangle behind it</td><td>The export format does not preserve transparency</td><td>Export as PNG or transparent WebP</td></tr><tr><td>The result looks blurry</td><td>Compression is too aggressive, or a small image was enlarged</td><td>Raise quality and export at the original or smaller dimensions</td></tr><tr><td>Colors look washed out</td><td>HDR or color-profile handling changed during export</td><td>Export in sRGB when available and compare on the same display</td></tr><tr><td>An app says the format is invalid</td><td>The app does not support the format, or the file was only renamed</td><td>Perform a real conversion to a supported format such as JPG or PNG</td></tr><tr><td>A batch stops on a few images</td><td>Those sources may be damaged or unsupported</td><td>Open failed files individually and convert them separately</td></tr><tr><td>An online converter stalls</td><td>The upload is too large or the connection is interrupted</td><td>Try fewer files or use an on-device converter</td></tr></tbody></table>
<p>Change one setting at a time while troubleshooting. If you change format, quality, size, and color options together, you will not know which adjustment solved the problem.</p>
<h2 class="anchor anchorTargetStickyNavbar_Xe5F" id="converting-images-locally-on-a-mac-with-image2webp">Converting Images Locally on a Mac With Image2WebP<a href="https://hp60.com/blog/image-converter-guide/#converting-images-locally-on-a-mac-with-image2webp" class="hash-link" aria-label="Direct link to Converting Images Locally on a Mac With Image2WebP" title="Direct link to Converting Images Locally on a Mac With Image2WebP" translate="no">​</a></h2>
<p>If your workflow centers on WebP and AVIF, <a href="https://hp60.com/image2webp/" target="_blank" rel="noopener noreferrer" class="">Image2WebP for Mac</a> provides a focused local option:</p>
<ol>
<li class="">Add individual images or drag in a folder.</li>
<li class="">Select WebP or AVIF as the output format. For reverse conversion, select JPG or PNG.</li>
<li class="">Choose the output folder and adjust quality as needed.</li>
<li class="">Convert a sample and review it.</li>
<li class="">Run the remaining batch with the approved settings.</li>
</ol>
<p>Conversion happens on your Mac rather than on an upload server. That makes the app useful for private images, recurring website exports, and large folders that would be inconvenient to process one file at a time.</p>
<p>For format-specific workflows, see <a href="https://hp60.com/image2webp/heic-to-webp-mac/" target="_blank" rel="noopener noreferrer" class="">how to convert HEIC to WebP on Mac</a>, <a href="https://hp60.com/image2webp/webp-to-jpg-mac/" target="_blank" rel="noopener noreferrer" class="">convert WebP to JPG or PNG</a>, or <a href="https://hp60.com/image2webp/avif-to-jpg-mac/" target="_blank" rel="noopener noreferrer" class="">convert AVIF to JPG or PNG</a>.</p>
<h2 class="anchor anchorTargetStickyNavbar_Xe5F" id="frequently-asked-questions">Frequently Asked Questions<a href="https://hp60.com/blog/image-converter-guide/#frequently-asked-questions" class="hash-link" aria-label="Direct link to Frequently Asked Questions" title="Direct link to Frequently Asked Questions" translate="no">​</a></h2>
<h3 class="anchor anchorTargetStickyNavbar_Xe5F" id="does-converting-an-image-always-reduce-its-file-size">Does converting an image always reduce its file size?<a href="https://hp60.com/blog/image-converter-guide/#does-converting-an-image-always-reduce-its-file-size" class="hash-link" aria-label="Direct link to Does converting an image always reduce its file size?" title="Direct link to Does converting an image always reduce its file size?" translate="no">​</a></h3>
<p>No. File size depends on the source, output format, dimensions, and compression settings. A compressed JPG converted to PNG will often become larger. WebP or AVIF can be useful for reducing photo size, but the result should always be measured rather than assumed.</p>
<h3 class="anchor anchorTargetStickyNavbar_Xe5F" id="is-png-better-quality-than-jpg">Is PNG better quality than JPG?<a href="https://hp60.com/blog/image-converter-guide/#is-png-better-quality-than-jpg" class="hash-link" aria-label="Direct link to Is PNG better quality than JPG?" title="Direct link to Is PNG better quality than JPG?" translate="no">​</a></h3>
<p>PNG uses lossless compression and is excellent for graphics, text, and transparency. That does not make it the best choice for every photo. JPG usually stores photographs more efficiently when some lossy compression is acceptable.</p>
<h3 class="anchor anchorTargetStickyNavbar_Xe5F" id="should-every-website-image-be-converted-to-avif">Should every website image be converted to AVIF?<a href="https://hp60.com/blog/image-converter-guide/#should-every-website-image-be-converted-to-avif" class="hash-link" aria-label="Direct link to Should every website image be converted to AVIF?" title="Direct link to Should every website image be converted to AVIF?" translate="no">​</a></h3>
<p>Not automatically. AVIF can produce compact files, but your publishing system, browser targets, and editing workflow still matter. WebP is often a straightforward choice for broad modern-web use, while JPG and PNG remain useful fallbacks.</p>
<h3 class="anchor anchorTargetStickyNavbar_Xe5F" id="why-can-i-open-heic-on-my-phone-but-not-on-another-computer">Why can I open HEIC on my phone but not on another computer?<a href="https://hp60.com/blog/image-converter-guide/#why-can-i-open-heic-on-my-phone-but-not-on-another-computer" class="hash-link" aria-label="Direct link to Why can I open HEIC on my phone but not on another computer?" title="Direct link to Why can I open HEIC on my phone but not on another computer?" translate="no">​</a></h3>
<p>HEIC support varies by operating system and app. Converting the image to JPG improves compatibility; use PNG instead when lossless pixels or transparency are important.</p>
<h3 class="anchor anchorTargetStickyNavbar_Xe5F" id="can-i-safely-delete-the-original-after-conversion">Can I safely delete the original after conversion?<a href="https://hp60.com/blog/image-converter-guide/#can-i-safely-delete-the-original-after-conversion" class="hash-link" aria-label="Direct link to Can I safely delete the original after conversion?" title="Direct link to Can I safely delete the original after conversion?" translate="no">​</a></h3>
<p>Only after you have opened the export, checked its quality and metadata, and tested it in the real destination. If the original is your only high-quality copy, keep it as a master file.</p>
<h2 class="anchor anchorTargetStickyNavbar_Xe5F" id="the-short-version">The Short Version<a href="https://hp60.com/blog/image-converter-guide/#the-short-version" class="hash-link" aria-label="Direct link to The Short Version" title="Direct link to The Short Version" translate="no">​</a></h2>
<p>Successful image conversion is less about pressing <strong>Convert</strong> and more about making three correct decisions: choose a format the destination supports, balance visual quality against file size, and verify the result where it will actually be used.</p>
<p>For repeatable WebP and AVIF conversion on macOS, <a href="https://apps.apple.com/app/image2webp/id6670599252?pt=127310275&amp;ct=hp60_blog_image_converter_guide&amp;mt=8" target="_blank" rel="noopener noreferrer" class="">download Image2WebP from the Mac App Store</a> and keep the entire workflow on your Mac.</p><section class="margin-top--xl" aria-labelledby="content-responsibility"><h2 class="anchor anchorTargetStickyNavbar_Xe5F" id="content-responsibility">Content responsibility<a href="https://hp60.com/blog/image-converter-guide/#content-responsibility" class="hash-link" aria-label="Direct link to Content responsibility" title="Direct link to Content responsibility" translate="no">​</a></h2><p>The HP60 product team is responsible for this article. The publication date above identifies this content version; product behavior may change after release, so consult the linked product and support pages for current limits.</p></section>]]></content>
        <author>
            <name>Image2WebP</name>
            <uri>https://hp60.com/image2webp/</uri>
        </author>
        <author>
            <name>HP60</name>
            <uri>https://hp60.com</uri>
        </author>
        <category label="Image2WebP" term="Image2WebP"/>
    </entry>
    <entry>
        <title type="html"><![CDATA[Mouse SR Product Guide: Scrolling, Finder Tools, and Setup]]></title>
        <id>https://hp60.com/blog/mouse-sr-smooth-scrolling-finder-tools-mac/</id>
        <link href="https://hp60.com/blog/mouse-sr-smooth-scrolling-finder-tools-mac/"/>
        <updated>2026-08-10T10:00:00.000Z</updated>
        <summary type="html"><![CDATA[A Mouse SR product guide covering smooth scrolling, Finder right-click tools, setup, permissions, privacy, and pricing.]]></summary>
        <content type="html"><![CDATA[<p>If you like your mouse but not the stiff, click-by-click way its wheel scrolls on a Mac, <strong>Mouse SR</strong> is made for that. It turns a third-party mouse wheel into smooth, continuous scrolling and gives you simple controls to make it feel right.</p>
<p>It also adds a few genuinely useful right-click actions to Finder, so common file tasks take fewer clicks.</p>
<p>For the focused Finder workflow, see
<a href="https://hp60.com/mouse-sr/finder-right-click-tools/" target="_blank" rel="noopener noreferrer" class="">Finder right-click tools for Mac</a>.</p>
<h2 class="anchor anchorTargetStickyNavbar_Xe5F" id="smooth-mouse-scrolling-on-mac">Smooth mouse scrolling on Mac<a href="https://hp60.com/blog/mouse-sr-smooth-scrolling-finder-tools-mac/#smooth-mouse-scrolling-on-mac" class="hash-link" aria-label="Direct link to Smooth mouse scrolling on Mac" title="Direct link to Smooth mouse scrolling on Mac" translate="no">​</a></h2>
<p>Mouse SR smooths out the notched movement from a regular mouse wheel. You can adjust:</p>
<ul>
<li class="">How far each wheel step scrolls</li>
<li class="">How soft or smooth the movement feels</li>
<li class="">How quickly scrolling accelerates</li>
<li class="">Which direction the wheel scrolls</li>
</ul>
<p>You can switch smooth scrolling on or off from the menu bar whenever you need it. Trackpads, Magic Mouse, drawing tablets, and other devices that already use continuous scrolling are left alone.</p>
<h2 class="anchor anchorTargetStickyNavbar_Xe5F" id="useful-finder-right-click-tools">Useful Finder right-click tools<a href="https://hp60.com/blog/mouse-sr-smooth-scrolling-finder-tools-mac/#useful-finder-right-click-tools" class="hash-link" aria-label="Direct link to Useful Finder right-click tools" title="Direct link to Useful Finder right-click tools" translate="no">​</a></h2>
<p>Turn on the Finder extension, choose the folders where it should appear, and Mouse SR adds three handy actions:</p>
<ul>
<li class=""><strong>Open in Terminal</strong> for the current or selected folder</li>
<li class=""><strong>Create a new TXT or Markdown file</strong> without opening another app</li>
<li class=""><strong>Copy Path</strong> for a file, folder, or the folder you are currently viewing</li>
</ul>
<p>They are small shortcuts, but they are especially useful if you work with code, notes, project folders, or files that need to be referenced elsewhere.</p>
<p>For mouse-button shortcuts and the latest feature overview, see the <a href="https://hp60.com/blog/mouse-sr-feature-tour/" target="_blank" rel="noopener noreferrer" class="">Mouse SR feature tour</a>.</p>
<h2 class="anchor anchorTargetStickyNavbar_Xe5F" id="buy-mouse-sr-pro">Buy Mouse SR Pro<a href="https://hp60.com/blog/mouse-sr-smooth-scrolling-finder-tools-mac/#buy-mouse-sr-pro" class="hash-link" aria-label="Direct link to Buy Mouse SR Pro" title="Direct link to Buy Mouse SR Pro" translate="no">​</a></h2>
<p>You can try every Mouse SR Pro feature free for seven days. If it fits your setup, a one-time lifetime purchase unlocks Pro on up to three Macs—there is no subscription or automatic renewal.</p>
<p><a href="https://hp60.com/mouse-sr/pricing/" target="_blank" rel="noopener noreferrer" class="">See Mouse SR Pro pricing and buy a lifetime license</a></p><section class="margin-top--xl" aria-labelledby="content-responsibility"><h2 class="anchor anchorTargetStickyNavbar_Xe5F" id="content-responsibility">Content responsibility<a href="https://hp60.com/blog/mouse-sr-smooth-scrolling-finder-tools-mac/#content-responsibility" class="hash-link" aria-label="Direct link to Content responsibility" title="Direct link to Content responsibility" translate="no">​</a></h2><p>The HP60 product team is responsible for this article. The publication date above identifies this content version; product behavior may change after release, so consult the linked product and support pages for current limits.</p></section>]]></content>
        <author>
            <name>Mouse SR</name>
            <uri>https://hp60.com/mouse-sr/</uri>
        </author>
        <author>
            <name>HP60</name>
            <uri>https://hp60.com</uri>
        </author>
        <category label="Mouse SR" term="Mouse SR"/>
        <category label="Feature" term="Feature"/>
    </entry>
    <entry>
        <title type="html"><![CDATA[MoFind 1.1.5 Improves Full-Screen Motion Event Preview]]></title>
        <id>https://hp60.com/blog/mofind-1-1-5-motion-video-review-updates/</id>
        <link href="https://hp60.com/blog/mofind-1-1-5-motion-video-review-updates/"/>
        <updated>2026-07-14T10:00:00.000Z</updated>
        <summary type="html"><![CDATA[MoFind 1.1.5 improves drag-to-dismiss full-screen previews and reduced-motion support, following recent time-range, dark mode, export, and playback updates.]]></summary>
        <content type="html"><![CDATA[<p>MoFind 1.1.5 makes full-screen motion event previews easier to close with an improved drag gesture. The update also supports reduced motion for a calmer preview experience.</p>
<p>These changes continue a series of focused improvements to MoFind, an app for finding motion events in long surveillance and monitoring videos on iPhone, iPad, and Mac.</p>
<h2 class="anchor anchorTargetStickyNavbar_Xe5F" id="what-is-new-in-mofind-115">What is new in MoFind 1.1.5?<a href="https://hp60.com/blog/mofind-1-1-5-motion-video-review-updates/#what-is-new-in-mofind-115" class="hash-link" aria-label="Direct link to What is new in MoFind 1.1.5?" title="Direct link to What is new in MoFind 1.1.5?" translate="no">​</a></h2>
<ul>
<li class="">Improved the drag-to-dismiss experience in full-screen preview.</li>
<li class="">Added support for reduced motion.</li>
</ul>
<p>The update makes it more comfortable to move between motion events and return to the event list during video review.</p>
<h2 class="anchor anchorTargetStickyNavbar_Xe5F" id="more-recent-mofind-improvements">More recent MoFind improvements<a href="https://hp60.com/blog/mofind-1-1-5-motion-video-review-updates/#more-recent-mofind-improvements" class="hash-link" aria-label="Direct link to More recent MoFind improvements" title="Direct link to More recent MoFind improvements" translate="no">​</a></h2>
<h3 class="anchor anchorTargetStickyNavbar_Xe5F" id="version-114">Version 1.1.4<a href="https://hp60.com/blog/mofind-1-1-5-motion-video-review-updates/#version-114" class="hash-link" aria-label="Direct link to Version 1.1.4" title="Direct link to Version 1.1.4" translate="no">​</a></h3>
<p>MoFind added a native-style time range picker, making it easier to select the start and end points before scanning a video.</p>
<h3 class="anchor anchorTargetStickyNavbar_Xe5F" id="version-113">Version 1.1.3<a href="https://hp60.com/blog/mofind-1-1-5-motion-video-review-updates/#version-113" class="hash-link" aria-label="Direct link to Version 1.1.3" title="Direct link to Version 1.1.3" translate="no">​</a></h3>
<p>This release fixed display issues in dark mode.</p>
<h3 class="anchor anchorTargetStickyNavbar_Xe5F" id="version-112">Version 1.1.2<a href="https://hp60.com/blog/mofind-1-1-5-motion-video-review-updates/#version-112" class="hash-link" aria-label="Direct link to Version 1.1.2" title="Direct link to Version 1.1.2" translate="no">​</a></h3>
<ul>
<li class="">Zero-second events are now skipped when saving clips.</li>
<li class="">Mac users can choose a custom export folder.</li>
</ul>
<h3 class="anchor anchorTargetStickyNavbar_Xe5F" id="version-111">Version 1.1.1<a href="https://hp60.com/blog/mofind-1-1-5-motion-video-review-updates/#version-111" class="hash-link" aria-label="Direct link to Version 1.1.1" title="Direct link to Version 1.1.1" translate="no">​</a></h3>
<ul>
<li class="">Mac users can choose a custom export folder.</li>
<li class="">Full-screen preview can automatically continue to the next event.</li>
<li class="">History scrolling is smoother when a scan contains many events.</li>
</ul>
<h2 class="anchor anchorTargetStickyNavbar_Xe5F" id="review-motion-events-faster">Review motion events faster<a href="https://hp60.com/blog/mofind-1-1-5-motion-video-review-updates/#review-motion-events-faster" class="hash-link" aria-label="Direct link to Review motion events faster" title="Direct link to Review motion events faster" translate="no">​</a></h2>
<p>Together, these updates refine <a href="https://hp60.com/blog/mofind-introduction/" target="_blank" rel="noopener noreferrer" class="">the everyday MoFind workflow</a>: choose a precise time range, scan for motion, preview events continuously, and export useful clips to a preferred folder on Mac.</p>
<p>MoFind processes selected videos on-device, so the surveillance or monitoring footage you review is not uploaded for motion detection.</p>
<h2 class="anchor anchorTargetStickyNavbar_Xe5F" id="get-mofind">Get MoFind<a href="https://hp60.com/blog/mofind-1-1-5-motion-video-review-updates/#get-mofind" class="hash-link" aria-label="Direct link to Get MoFind" title="Direct link to Get MoFind" translate="no">​</a></h2>
<p><a href="https://hp60.com/mofind/" target="_blank" rel="noopener noreferrer" class="">MoFind</a> is available for iPhone, iPad, and Mac.</p>
<p><a href="https://apps.apple.com/app/mofind-motion-scan/id6771765502?pt=127310275&amp;ct=hp60_blog_mofind_update&amp;mt=8" target="_blank" rel="noopener noreferrer" class="">Download MoFind on the App Store</a></p><section class="margin-top--xl" aria-labelledby="content-responsibility"><h2 class="anchor anchorTargetStickyNavbar_Xe5F" id="content-responsibility">Content responsibility<a href="https://hp60.com/blog/mofind-1-1-5-motion-video-review-updates/#content-responsibility" class="hash-link" aria-label="Direct link to Content responsibility" title="Direct link to Content responsibility" translate="no">​</a></h2><p>The HP60 product team is responsible for this article. The publication date above identifies this content version; product behavior may change after release, so consult the linked product and support pages for current limits.</p></section>]]></content>
        <author>
            <name>MoFind</name>
            <uri>https://hp60.com/mofind/</uri>
        </author>
        <author>
            <name>HP60</name>
            <uri>https://hp60.com</uri>
        </author>
        <category label="MoFind" term="MoFind"/>
    </entry>
    <entry>
        <title type="html"><![CDATA[2MP3 Audio Trimmer and Converter App]]></title>
        <id>https://hp60.com/blog/2mp3-trim-audio/</id>
        <link href="https://hp60.com/blog/2mp3-trim-audio/"/>
        <updated>2026-06-29T10:00:00.000Z</updated>
        <summary type="html"><![CDATA[Use 2MP3 to trim audio with a waveform editor, convert video or audio files, remove silence, and normalize volume on your device.]]></summary>
        <content type="html"><![CDATA[<p>2MP3 is a mobile app for turning video files into audio, trimming clips with a visual waveform editor, converting between common audio formats, and managing exported audio files on your device.</p>
<p>It is built for practical video-to-audio workflows on iPhone, iPad, and Android. Processing runs on-device, so your files are not uploaded for conversion.</p>
<p><img decoding="async" loading="lazy" alt="2MP3 audio trimming waveform" src="https://hp60.com/assets/images/trim-audio-4e64e23d58e934eb6df765c7000d96d8.webp" width="1350" height="2760" class="img_z23Z"></p>
<h2 class="anchor anchorTargetStickyNavbar_Xe5F" id="what-2mp3-does">What 2MP3 Does<a href="https://hp60.com/blog/2mp3-trim-audio/#what-2mp3-does" class="hash-link" aria-label="Direct link to What 2MP3 Does" title="Direct link to What 2MP3 Does" translate="no">​</a></h2>
<p>2MP3 focuses on a few common audio tasks:</p>
<ul>
<li class="">Extract audio from video files.</li>
<li class="">Convert video to MP3, AAC, M4A, FLAC, or WAV.</li>
<li class="">Convert between supported audio formats.</li>
<li class="">Remove leading and trailing silence.</li>
<li class="">Trim audio with a visual waveform editor.</li>
<li class="">Normalize volume to a consistent level with Pro.</li>
<li class="">Export, share, search, and manage converted files.</li>
<li class="">Play exported audio inside the app.</li>
</ul>
<p>The app is not an online upload tool or a cloud converter. It is designed for local conversion on the device you are using.</p>
<h2 class="anchor anchorTargetStickyNavbar_Xe5F" id="video-to-audio-conversion">Video to Audio Conversion<a href="https://hp60.com/blog/2mp3-trim-audio/#video-to-audio-conversion" class="hash-link" aria-label="Direct link to Video to Audio Conversion" title="Direct link to Video to Audio Conversion" translate="no">​</a></h2>
<p>The main 2MP3 workflow is simple: choose a video, select an audio output format, and convert it into an audio file.</p>
<p>Supported video input listed on the App Store includes:</p>
<ul>
<li class="">MP4</li>
<li class="">MOV</li>
<li class="">AVI</li>
<li class="">MKV</li>
<li class="">M4V</li>
</ul>
<p>Supported audio output includes:</p>
<ul>
<li class="">MP3</li>
<li class="">AAC</li>
<li class="">M4A</li>
<li class="">FLAC</li>
<li class="">WAV</li>
</ul>
<p>This makes 2MP3 useful when you have a recorded video but only need the sound, such as a voice recording captured as video, a screen recording with useful narration, a lecture clip, or a personal video where the audio track is the part you want to save.</p>
<p>For the complete import-to-export process, follow the guide to <a href="https://hp60.com/blog/2mp3-video-to-mp3-converter/" target="_blank" rel="noopener noreferrer" class="">converting video to MP3 on iPhone and Android</a>.</p>
<h2 class="anchor anchorTargetStickyNavbar_Xe5F" id="audio-trimming">Audio Trimming<a href="https://hp60.com/blog/2mp3-trim-audio/#audio-trimming" class="hash-link" aria-label="Direct link to Audio Trimming" title="Direct link to Audio Trimming" translate="no">​</a></h2>
<p>After conversion, you may not need the entire audio file. 2MP3 includes a waveform editor for trimming audio inside the app.</p>
<p>You can use the waveform and zoom controls to find the part you want to keep, then adjust the trim handles before exporting. This is useful for removing empty sections, shortening a recording, or keeping only the segment you need from a longer video.</p>
<p>Common trimming scenarios include:</p>
<ul>
<li class="">Cutting silence before or after speech.</li>
<li class="">Keeping a short quote from a longer recording.</li>
<li class="">Turning a long screen recording into a compact audio note.</li>
<li class="">Preparing a cleaner clip before sharing it.</li>
</ul>
<p>2MP3 also supports removing leading and trailing silence, which helps with files that start or end with dead air.</p>
<h2 class="anchor anchorTargetStickyNavbar_Xe5F" id="audio-format-conversion">Audio Format Conversion<a href="https://hp60.com/blog/2mp3-trim-audio/#audio-format-conversion" class="hash-link" aria-label="Direct link to Audio Format Conversion" title="Direct link to Audio Format Conversion" translate="no">​</a></h2>
<p>2MP3 can also convert between supported audio formats. That is useful when an app, device, or workflow expects a specific format.</p>
<p>For example:</p>
<ul>
<li class="">Use MP3 for broad compatibility.</li>
<li class="">Use M4A or AAC for common mobile workflows.</li>
<li class="">Use WAV or FLAC when you prefer an uncompressed or lossless-friendly format.</li>
</ul>
<p>The best format depends on where the file will be used. 2MP3 provides the output choices; you still control which one fits the destination.</p>
<h2 class="anchor anchorTargetStickyNavbar_Xe5F" id="volume-normalization">Volume Normalization<a href="https://hp60.com/blog/2mp3-trim-audio/#volume-normalization" class="hash-link" aria-label="Direct link to Volume Normalization" title="Direct link to Volume Normalization" translate="no">​</a></h2>
<p>2MP3 includes volume normalization as a Pro feature. This can help make audio levels more consistent when clips come from different videos, recordings, or sources.</p>
<p>It is useful for:</p>
<ul>
<li class="">Voice clips recorded at different volumes.</li>
<li class="">Extracted audio from multiple videos.</li>
<li class="">Personal listening files where one clip is much quieter or louder than another.</li>
<li class="">Preparing audio before sharing it with someone else.</li>
</ul>
<p>Normalization is not the same as manual audio mixing, but it can make everyday exported files easier to listen to.</p>
<h2 class="anchor anchorTargetStickyNavbar_Xe5F" id="file-management-and-playback">File Management and Playback<a href="https://hp60.com/blog/2mp3-trim-audio/#file-management-and-playback" class="hash-link" aria-label="Direct link to File Management and Playback" title="Direct link to File Management and Playback" translate="no">​</a></h2>
<p>After conversion, 2MP3 lets you export and share audio files, search converted files, and delete multiple items in batches. The app also includes a built-in player, so you can check exported files without switching to another app.</p>
<p>This is helpful when you are processing several clips and want to confirm the result before sharing or saving it elsewhere.</p>
<h2 class="anchor anchorTargetStickyNavbar_Xe5F" id="who-2mp3-is-for">Who 2MP3 Is For<a href="https://hp60.com/blog/2mp3-trim-audio/#who-2mp3-is-for" class="hash-link" aria-label="Direct link to Who 2MP3 Is For" title="Direct link to Who 2MP3 Is For" translate="no">​</a></h2>
<p>2MP3 is useful for people who regularly receive or create videos but only need the audio:</p>
<ul>
<li class="">Content creators extracting voice tracks from recorded videos.</li>
<li class="">Students saving audio from lecture or class recordings.</li>
<li class="">Podcasters and interviewers working from video recordings.</li>
<li class="">Musicians or audio hobbyists converting personal clips into common formats.</li>
<li class="">Anyone who wants a local mobile tool for trimming and exporting audio without uploading files.</li>
</ul>
<p>The app is intentionally focused: convert video to audio, trim the result, normalize volume when needed, and manage the files afterward.</p>
<h2 class="anchor anchorTargetStickyNavbar_Xe5F" id="get-2mp3">Get 2MP3<a href="https://hp60.com/blog/2mp3-trim-audio/#get-2mp3" class="hash-link" aria-label="Direct link to Get 2MP3" title="Direct link to Get 2MP3" translate="no">​</a></h2>
<p>2MP3 is available on the App Store and Google Play.</p>
<ul>
<li class=""><a href="https://apps.apple.com/us/app/2mp3-video-to-mp3-converter/id6737749090?pt=127310275&amp;ct=hp60_blog_2mp3_trim&amp;mt=8" target="_blank" rel="noopener noreferrer" class="">Download 2MP3 on the App Store</a></li>
<li class=""><a href="https://play.google.com/store/apps/details?id=com.givebest.a2mp3" target="_blank" rel="noopener noreferrer" class="">Get 2MP3 on Google Play</a></li>
</ul><section class="margin-top--xl" aria-labelledby="content-responsibility"><h2 class="anchor anchorTargetStickyNavbar_Xe5F" id="content-responsibility">Content responsibility<a href="https://hp60.com/blog/2mp3-trim-audio/#content-responsibility" class="hash-link" aria-label="Direct link to Content responsibility" title="Direct link to Content responsibility" translate="no">​</a></h2><p>The HP60 product team is responsible for this article. The publication date above identifies this content version; product behavior may change after release, so consult the linked product and support pages for current limits.</p></section>]]></content>
        <author>
            <name>2MP3</name>
            <uri>https://apps.apple.com/app/2mp3/id6737749090</uri>
        </author>
        <author>
            <name>HP60</name>
            <uri>https://hp60.com</uri>
        </author>
        <category label="2MP3" term="2MP3"/>
        <category label="Feature" term="Feature"/>
    </entry>
    <entry>
        <title type="html"><![CDATA[Image2JXL Lossless JPEG Test: A Reversible JXL Workflow]]></title>
        <id>https://hp60.com/blog/image2jxl-introduction/</id>
        <link href="https://hp60.com/blog/image2jxl-introduction/"/>
        <updated>2026-06-27T10:00:00.000Z</updated>
        <summary type="html"><![CDATA[Read a hands-on Image2JXL test covering reversible JPEG-to-JPEG XL conversion, exact JPG restoration for supported files, local batch workflows, metadata handling, export formats, and what the lossless claims mean on Mac.]]></summary>
        <content type="html"><![CDATA[<p>Image2JXL is a native macOS app for local JPEG XL conversion, with a focus on JPG to JXL workflows. For JPEG input, it supports reversible JPEG transcoding, so a supported JPG can be stored as a JXL file and restored back to JPG later.</p>
<p>It is useful if you want a local tool for batch organization, archive workflows, and testing JPEG XL without uploading files or relying on a cloud converter.</p>
<p>For the complete workflow and its limitations, see
<a href="https://hp60.com/image2jxl/jpeg-to-jxl-lossless/" target="_blank" rel="noopener noreferrer" class="">Lossless JPEG to JPEG XL on Mac</a>.</p>
<p><img decoding="async" loading="lazy" alt="Image2JXL app icon" src="https://hp60.com/assets/images/image2jxl-bb56b7dd4baae14b7092d034f842ae21.webp" width="1024" height="1024" class="img_z23Z"></p>
<h2 class="anchor anchorTargetStickyNavbar_Xe5F" id="jpg-to-jpeg-xl-with-reversible-jpeg-transcoding">JPG to JPEG XL, With Reversible JPEG Transcoding<a href="https://hp60.com/blog/image2jxl-introduction/#jpg-to-jpeg-xl-with-reversible-jpeg-transcoding" class="hash-link" aria-label="Direct link to JPG to JPEG XL, With Reversible JPEG Transcoding" title="Direct link to JPG to JPEG XL, With Reversible JPEG Transcoding" translate="no">​</a></h2>
<p>JPG remains one of the most common image formats. Image2JXL is built for people who want to try a JPEG XL workflow on Mac without sending files through an online converter.</p>
<p>For JPEG input, Image2JXL can use JPEG XL's reversible JPEG transcoding path. That means a supported JPG can be stored as a JXL file while keeping a workflow that can restore it back to JPG later.</p>
<p>This is different from simply decoding the JPG pixels and saving them again. Reversible JPEG transcoding is intended for JPEG files specifically. Other supported image inputs may use pixel-based JPEG XL encoding, but that does not promise byte-for-byte restoration of the original file container.</p>
<h2 class="anchor anchorTargetStickyNavbar_Xe5F" id="a-small-lossless-jpeg-test">A Small Lossless JPEG Test<a href="https://hp60.com/blog/image2jxl-introduction/#a-small-lossless-jpeg-test" class="hash-link" aria-label="Direct link to A Small Lossless JPEG Test" title="Direct link to A Small Lossless JPEG Test" translate="no">​</a></h2>
<p>Here is one concrete test with Image2JXL:</p>
<ul>
<li class="">Original file: <code>DSCN0010.jpg</code>, 162 KB</li>
<li class="">After lossless JPEG-to-JXL conversion: <code>DSCN0010.jxl</code>, 131 KB</li>
<li class="">After restoring the JXL back to JPG, the restored JPG had the same SHA-256 hash as the original file:</li>
</ul>
<div class="language-text codeBlockContainer_mPxw theme-code-block" style="--prism-color:#393A34;--prism-background-color:#f6f8fa"><div class="codeBlockContent_XiAf"><pre tabindex="0" class="prism-code language-text codeBlock_wya3 thin-scrollbar" style="color:#393A34;background-color:#f6f8fa"><code class="codeBlockLines_vBsX"><div class="token-line" style="color:#393A34"><span class="token plain">17307b1207eb6487d7908e9d154890b46e3d2e0192369cfd3f4c33d5a5af4035</span><br></div></code></pre></div></div>
<p>In this case, JPEG XL reduced the storage size while still allowing the original JPG codestream to be reconstructed exactly when needed. This is an example of the reversible JPEG path, not a promise that every image or every source format will produce the same size reduction.</p>
<p>To repeat the check with your own files, follow the <a href="https://hp60.com/blog/jpeg-to-jxl-lossless-mac/" target="_blank" rel="noopener noreferrer" class="">JPEG-to-JXL conversion and lossless verification steps</a>.</p>
<h2 class="anchor anchorTargetStickyNavbar_Xe5F" id="what-image2jxl-does">What Image2JXL Does<a href="https://hp60.com/blog/image2jxl-introduction/#what-image2jxl-does" class="hash-link" aria-label="Direct link to What Image2JXL Does" title="Direct link to What Image2JXL Does" translate="no">​</a></h2>
<p>Image2JXL focuses on JPEG XL workflows on macOS. The core tasks are straightforward:</p>
<ul>
<li class="">Convert supported image formats to JPEG XL.</li>
<li class="">Export JPEG XL files to JPEG, PNG, or GIF.</li>
<li class="">Convert files and folders in batches.</li>
<li class="">Review per-file conversion status.</li>
<li class="">Choose output behavior, including saving beside the source or choosing another destination.</li>
<li class="">Preserve supported EXIF and XMP metadata when the selected conversion path supports it.</li>
</ul>
<p>The app is designed for local file conversion rather than a browser-based or cloud conversion flow.</p>
<h2 class="anchor anchorTargetStickyNavbar_Xe5F" id="convert-images-to-jpeg-xl">Convert Images to JPEG XL<a href="https://hp60.com/blog/image2jxl-introduction/#convert-images-to-jpeg-xl" class="hash-link" aria-label="Direct link to Convert Images to JPEG XL" title="Direct link to Convert Images to JPEG XL" translate="no">​</a></h2>
<p>Image2JXL can convert JPEG, PNG/APNG, GIF, TIFF, BMP, EXR, NetPBM, and PFM inputs to JPEG XL through its current conversion pipeline.</p>
<p>For JPEG input, the app can use lossless JPEG transcoding. This is useful when you want to store JPG images in JPEG XL while keeping a reversible JPEG workflow where supported.</p>
<p>For other supported inputs, Image2JXL can create JPEG XL output using the app's available quality, distance, and effort controls. These settings are useful when preparing image collections for storage, testing JPEG XL output, or keeping a consistent conversion setup across many files.</p>
<h2 class="anchor anchorTargetStickyNavbar_Xe5F" id="export-jpeg-xl-files">Export JPEG XL Files<a href="https://hp60.com/blog/image2jxl-introduction/#export-jpeg-xl-files" class="hash-link" aria-label="Direct link to Export JPEG XL Files" title="Direct link to Export JPEG XL Files" translate="no">​</a></h2>
<p>Image2JXL can also export JXL files back to JPEG, PNG, or GIF. This helps when you need to share or reuse files in software that does not accept JPEG XL.</p>
<p>Common export scenarios include:</p>
<ul>
<li class="">Turning a JXL file into JPEG for broad compatibility.</li>
<li class="">Exporting to PNG when a lossless raster format is preferred.</li>
<li class="">Exporting animation-oriented JXL content to GIF when that target fits the workflow.</li>
</ul>
<p>The app also includes fallback behavior for JXL-to-JPEG export when lossless JPEG reconstruction is unavailable, so the conversion result can still be saved as a normal JPEG with a clear note.</p>
<h2 class="anchor anchorTargetStickyNavbar_Xe5F" id="batch-and-folder-workflows">Batch and Folder Workflows<a href="https://hp60.com/blog/image2jxl-introduction/#batch-and-folder-workflows" class="hash-link" aria-label="Direct link to Batch and Folder Workflows" title="Direct link to Batch and Folder Workflows" translate="no">​</a></h2>
<p>Image2JXL supports importing individual files and folders. You can drag files or folders into the app, run a batch conversion, and check the status of each item.</p>
<p>This is helpful for:</p>
<ul>
<li class="">Importing a folder of JPG files and converting them locally.</li>
<li class="">Converting a folder of website or app assets to JPEG XL.</li>
<li class="">Preparing a set of reference images for storage.</li>
<li class="">Testing JPEG XL output across multiple source formats.</li>
<li class="">Exporting a collection of JXL files back to compatibility formats.</li>
</ul>
<p>Pro workflow helpers include preserving folder structure and moving originals to Trash after successful conversion.</p>
<h2 class="anchor anchorTargetStickyNavbar_Xe5F" id="metadata-and-output-controls">Metadata and Output Controls<a href="https://hp60.com/blog/image2jxl-introduction/#metadata-and-output-controls" class="hash-link" aria-label="Direct link to Metadata and Output Controls" title="Direct link to Metadata and Output Controls" translate="no">​</a></h2>
<p>Image2JXL can preserve supported EXIF and XMP metadata when the target workflow supports it. This applies to supported paths such as image-to-JPEG XL, JPEG XL-to-JPEG, and JPEG XL-to-PNG. GIF export does not promise metadata preservation.</p>
<p>The app also provides output controls for different working styles:</p>
<ul>
<li class="">Save converted files beside the source.</li>
<li class="">Choose an output folder.</li>
<li class="">Ask before saving.</li>
<li class="">Preserve folder structure with Pro.</li>
</ul>
<p>These options are especially useful when converting folders because they reduce manual file organization after the conversion finishes.</p>
<h2 class="anchor anchorTargetStickyNavbar_Xe5F" id="when-image2jxl-is-useful">When Image2JXL Is Useful<a href="https://hp60.com/blog/image2jxl-introduction/#when-image2jxl-is-useful" class="hash-link" aria-label="Direct link to When Image2JXL Is Useful" title="Direct link to When Image2JXL Is Useful" translate="no">​</a></h2>
<p>Image2JXL is a good fit when you specifically need a Mac app for JPEG XL conversion and want the files processed locally.</p>
<p>Typical use cases include:</p>
<ul>
<li class="">Archiving JPEG collections into JPEG XL with a reversible JPEG workflow where supported.</li>
<li class="">Organizing batches of JPG images into JXL files while keeping a restore-to-JPG path where supported.</li>
<li class="">Trying JPEG XL on a native macOS app before changing a larger image workflow.</li>
<li class="">Converting image folders to JXL for storage or testing.</li>
<li class="">Exporting JXL files to JPEG, PNG, or GIF for compatibility with other apps.</li>
<li class="">Running repeatable batch conversions without uploading source files.</li>
<li class="">Keeping source folders and converted output organized during a larger image workflow.</li>
</ul>
<p>Image2JXL is not intended to be a general converter for every image format. The current import pipeline does not accept WebP, AVIF, HEIC/HEIF, TGA, PSD, RAW, SVG, PDF, or ICO as image-to-JPEG XL inputs.</p>
<h2 class="anchor anchorTargetStickyNavbar_Xe5F" id="get-image2jxl">Get Image2JXL<a href="https://hp60.com/blog/image2jxl-introduction/#get-image2jxl" class="hash-link" aria-label="Direct link to Get Image2JXL" title="Direct link to Get Image2JXL" translate="no">​</a></h2>
<p>Image2JXL is available on the Mac App Store for macOS.</p>
<p><a href="https://apps.apple.com/us/app/image2jxl-jpeg-xl-converter/id6780512229?pt=127310275&amp;ct=hp60_blog_i2j_intro&amp;mt=8" target="_blank" rel="noopener noreferrer" class="">Download Image2JXL on the Mac App Store</a></p><section class="margin-top--xl" aria-labelledby="content-responsibility"><h2 class="anchor anchorTargetStickyNavbar_Xe5F" id="content-responsibility">Content responsibility<a href="https://hp60.com/blog/image2jxl-introduction/#content-responsibility" class="hash-link" aria-label="Direct link to Content responsibility" title="Direct link to Content responsibility" translate="no">​</a></h2><p>The HP60 product team is responsible for this article. The publication date above identifies this content version; product behavior may change after release, so consult the linked product and support pages for current limits.</p></section>]]></content>
        <author>
            <name>Image2JXL</name>
            <uri>https://hp60.com/image2jxl/</uri>
        </author>
        <author>
            <name>HP60</name>
            <uri>https://hp60.com</uri>
        </author>
        <category label="Image2JXL" term="Image2JXL"/>
        <category label="Feature" term="Feature"/>
    </entry>
    <entry>
        <title type="html"><![CDATA[MoFind Product Guide: Reviewing Saved Motion Footage]]></title>
        <id>https://hp60.com/blog/mofind-introduction/</id>
        <link href="https://hp60.com/blog/mofind-introduction/"/>
        <updated>2026-06-07T10:00:00.000Z</updated>
        <summary type="html"><![CDATA[A MoFind product guide for scanning saved security-camera, doorbell, dashcam, and trail-camera videos on-device.]]></summary>
        <content type="html"><![CDATA[<p>MoFind is built for long-video review. It is designed for long, mostly static recordings such as security-camera, doorbell, and trail-cam footage, so you can avoid manually scrubbing frame by frame.</p>
<p>MoFind scans videos on-device offline and turns motion moments into a browsable event list with start time, duration, motion score, and thumbnails.</p>
<p>For a focused workflow, see how to
<a href="https://hp60.com/mofind/security-camera-footage-motion/" target="_blank" rel="noopener noreferrer" class="">find motion in saved security-camera footage</a>
or <a href="https://hp60.com/mofind/trail-camera-video-motion/" target="_blank" rel="noopener noreferrer" class="">review trail-camera video for motion</a>.</p>
<p>If long recordings often slow you down—surveillance overnight footage, doorbells repeatedly capturing empty scenes, or overnight trail-camera captures—MoFind helps you jump straight to moments where movement actually happens.</p>
<hr>
<h2 class="anchor anchorTargetStickyNavbar_Xe5F" id="core-mofind-experience">Core MoFind Experience<a href="https://hp60.com/blog/mofind-introduction/#core-mofind-experience" class="hash-link" aria-label="Direct link to Core MoFind Experience" title="Direct link to Core MoFind Experience" translate="no">​</a></h2>
<h3 class="anchor anchorTargetStickyNavbar_Xe5F" id="1-one-scan-skip-dead-segments">1. One scan, skip dead segments<a href="https://hp60.com/blog/mofind-introduction/#1-one-scan-skip-dead-segments" class="hash-link" aria-label="Direct link to 1. One scan, skip dead segments" title="Direct link to 1. One scan, skip dead segments" translate="no">​</a></h3>
<p>You do not need to scrub every frame. MoFind gives you a complete motion-event list so you can jump straight from quiet segments to action moments.</p>
<p>Each event includes:</p>
<ul>
<li class="">Start time</li>
<li class="">Duration</li>
<li class="">Motion score</li>
<li class="">Keyframe thumbnails</li>
</ul>
<p>This is useful for fast re-checks of night footage, front-door activity detection, and field monitoring.</p>
<hr>
<h3 class="anchor anchorTargetStickyNavbar_Xe5F" id="2-define-what-counts-as-motion-more-precisely">2. Define what counts as motion more precisely<a href="https://hp60.com/blog/mofind-introduction/#2-define-what-counts-as-motion-more-precisely" class="hash-link" aria-label="Direct link to 2. Define what counts as motion more precisely" title="Direct link to 2. Define what counts as motion more precisely" translate="no">​</a></h3>
<ul>
<li class=""><strong>Detection region</strong>: Draw a focus area in the frame to reduce unrelated movement.</li>
<li class=""><strong>Sensitivity</strong>: Choose low, medium, high, or a custom threshold.</li>
<li class=""><strong>Time range</strong>: Scan only the portion you care about instead of the entire file.</li>
</ul>
<p>Combined, these options significantly reduce false positives caused by light changes, shadow shifts, and similar noise.</p>
<hr>
<h3 class="anchor anchorTargetStickyNavbar_Xe5F" id="3-structured-export-for-review-and-follow-up">3. Structured export for review and follow-up<a href="https://hp60.com/blog/mofind-introduction/#3-structured-export-for-review-and-follow-up" class="hash-link" aria-label="Direct link to 3. Structured export for review and follow-up" title="Direct link to 3. Structured export for review and follow-up" translate="no">​</a></h3>
<p>MoFind supports annotated exports with:</p>
<ul>
<li class="">Motion boxes</li>
<li class="">Timecodes</li>
<li class="">Motion scores</li>
</ul>
<p>You can also export detected events as separate clips (a Pro feature), useful for evidence organization, handoff, and follow-up review.</p>
<hr>
<h3 class="anchor anchorTargetStickyNavbar_Xe5F" id="4-cross-device-on-device-processing">4. Cross-device, on-device processing<a href="https://hp60.com/blog/mofind-introduction/#4-cross-device-on-device-processing" class="hash-link" aria-label="Direct link to 4. Cross-device, on-device processing" title="Direct link to 4. Cross-device, on-device processing" translate="no">​</a></h3>
<p>MoFind works on iPhone, iPad, and Mac.</p>
<ul>
<li class=""><strong>iPhone</strong>: Review key moments on the go.</li>
<li class=""><strong>iPad</strong>: Review details more efficiently on a larger screen.</li>
<li class=""><strong>Mac</strong>: Process long, high-resolution videos with more room to work.</li>
</ul>
<p>Most importantly:</p>
<ul>
<li class="">Videos are <strong>not uploaded to the cloud</strong>.</li>
<li class="">All processing is done on your device.</li>
</ul>
<p>That keeps privacy more predictable and speeds up review.</p>
<hr>
<h2 class="anchor anchorTargetStickyNavbar_Xe5F" id="supported-formats-and-use-cases">Supported formats and use cases<a href="https://hp60.com/blog/mofind-introduction/#supported-formats-and-use-cases" class="hash-link" aria-label="Direct link to Supported formats and use cases" title="Direct link to Supported formats and use cases" translate="no">​</a></h2>
<p>MoFind supports MP4, M4V, and MOV encoded with H.264/H.265 by default.</p>
<p>On macOS, it can also handle more common formats with compatibility processing.</p>
<p>Common use cases include:</p>
<ul>
<li class="">Quick inspection of home or neighborhood security video</li>
<li class="">Detecting visitors or unusual events from doorbell footage</li>
<li class="">Filtering target activity from overnight trail-cam recordings</li>
<li class="">Monitoring pets, front-entrance activity, and passing vehicles</li>
</ul>
<hr>
<h2 class="anchor anchorTargetStickyNavbar_Xe5F" id="free-and-pro">Free and Pro<a href="https://hp60.com/blog/mofind-introduction/#free-and-pro" class="hash-link" aria-label="Direct link to Free and Pro" title="Direct link to Free and Pro" translate="no">​</a></h2>
<ul>
<li class="">Free: Supports one video, up to 30 minutes, one detection region</li>
<li class="">Pro: Supports longer videos, multi-video queue, multiple detection regions, and event clip export/sharing</li>
</ul>
<p>This tiering works for most users: start with Free, then upgrade to Pro when your workflow needs more.</p>
<p>Check the <a href="https://hp60.com/mofind/" target="_blank" rel="noopener noreferrer" class="">MoFind product page</a> for current features and platform requirements.</p>
<hr>
<h2 class="anchor anchorTargetStickyNavbar_Xe5F" id="who-is-this-for">Who is this for?<a href="https://hp60.com/blog/mofind-introduction/#who-is-this-for" class="hash-link" aria-label="Direct link to Who is this for?" title="Direct link to Who is this for?" translate="no">​</a></h2>
<ul>
<li class="">Security and surveillance reviewers who need faster location of relevant segments.</li>
<li class="">Workflows that need compact motion summaries for efficient second-stage processing.</li>
<li class="">Privacy-conscious users who want all review and export to stay on-device.</li>
<li class="">Anyone handling long videos who wants results instead of watching everything.</li>
</ul>
<p>MoFind’s positioning is straightforward: move you away from long quiet footage and keep only moments worth paying attention to.</p>
<hr>
<h2 class="anchor anchorTargetStickyNavbar_Xe5F" id="get-mofind">Get MoFind<a href="https://hp60.com/blog/mofind-introduction/#get-mofind" class="hash-link" aria-label="Direct link to Get MoFind" title="Direct link to Get MoFind" translate="no">​</a></h2>
<ul>
<li class="">Available on the App Store for iPhone, iPad, and Mac</li>
</ul>
<p><a href="https://apps.apple.com/app/mofind-motion-scan/id6771765502?pt=127310275&amp;ct=hp60_blog_mofind_intro&amp;mt=8" target="_blank" rel="noopener noreferrer" class="">Download on the App Store</a></p><section class="margin-top--xl" aria-labelledby="content-responsibility"><h2 class="anchor anchorTargetStickyNavbar_Xe5F" id="content-responsibility">Content responsibility<a href="https://hp60.com/blog/mofind-introduction/#content-responsibility" class="hash-link" aria-label="Direct link to Content responsibility" title="Direct link to Content responsibility" translate="no">​</a></h2><p>The HP60 product team is responsible for this article. The publication date above identifies this content version; product behavior may change after release, so consult the linked product and support pages for current limits.</p></section>]]></content>
        <author>
            <name>MoFind</name>
            <uri>https://hp60.com/mofind/</uri>
        </author>
        <author>
            <name>HP60</name>
            <uri>https://hp60.com</uri>
        </author>
        <category label="MoFind" term="MoFind"/>
    </entry>
</feed>