How to Convert JPEG to JPEG XL Losslessly on Mac
Want to convert JPEG to JPEG XL losslessly on Mac? Image2JXL gives you a native, local workflow for importing JPEG files or folders, converting them to JPEG XL, and exporting JXL files back to JPEG, PNG, or GIF when compatibility matters.
The important detail is that “lossless” can describe two different JPEG XL workflows. Reversible JPEG recompression can preserve a supported JPEG well enough to reconstruct the original file. Pixel-lossless encoding preserves the decoded pixels, but not necessarily the original JPEG bytes. This guide explains the difference, shows how to use Image2JXL, and includes a command-line method for checking the result.
For product details and supported formats, see the Image2JXL JPEG XL converter for Mac.
What Does Lossless JPEG-to-JXL Conversion Mean?
JPEG XL is an image format standardized by the JPEG committee. It supports both lossy and lossless compression, so a .jxl file can either preserve an image exactly or intentionally reduce visual information.
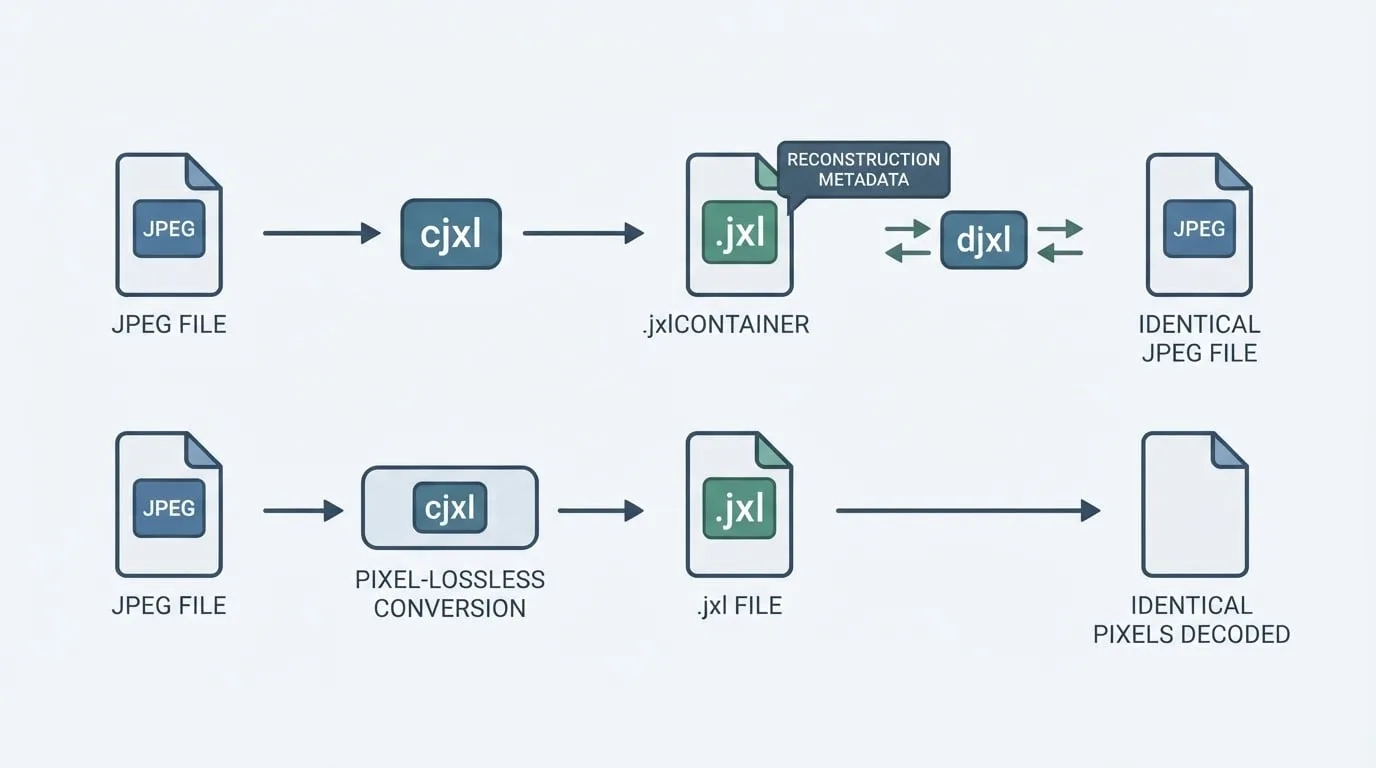
For a JPEG source, there are two useful meanings of lossless:
| Workflow | What stays identical? | Can the original JPEG be restored? |
|---|---|---|
| Reversible JPEG recompression | The JPEG codestream and decoded pixels | Yes, when the JPEG XL file keeps reconstruction metadata and the source is supported |
| Pixel-lossless JPEG XL encoding | The decoded image pixels | No byte-for-byte restoration of the original JPEG container |
Reversible JPEG recompression
JPEG XL can reuse the discrete cosine transform coefficients already stored in a JPEG file and encode them more efficiently. The resulting JXL file is often smaller while retaining the information required to reconstruct the original JPEG.
This is the right path for an archive when you may need the exact JPEG again. “Exact” here means that a later reconstruction can produce the same JPEG file bytes, not just an image that looks similar.
Pixel-lossless encoding
The other path decodes the JPEG into pixels and stores those pixels losslessly in JPEG XL’s modular mode. The picture remains pixel-identical after decoding, but the original JPEG container and its exact byte sequence are not preserved.
That distinction matters for photographers, developers, and archivists. If you only need the image to look and decode the same, pixel-lossless output may be enough. If you need to recover the original JPEG file, use reversible JPEG recompression and verify the round trip.
Convert JPEG to JPEG XL on Mac with Image2JXL
Image2JXL is designed for local JPEG XL conversion on macOS. Files are processed on your Mac rather than uploaded to a cloud converter, which is useful for private photo libraries, client assets, website images, and offline archive work.
1. Import JPEG files or a folder
Open Image2JXL and drag in one or more .jpg or .jpeg files. You can also import a folder for a batch conversion and review the status of each item as it is processed.
2. Choose the JPEG XL conversion path
For JPEG input, choose the reversible JPEG recompression path when you need the option to restore the original JPEG later. If the selected path decodes the source to pixels first, the output can still be pixel-lossless, but it should not be treated as a byte-for-byte JPEG backup.
3. Select where the JXL files should go
Save the converted files beside the originals or choose another local output folder. A separate destination is useful for a first test because it leaves the source JPEGs untouched while you compare file sizes and verify the result.
4. Review the batch result
After conversion, check the per-file status and open a few JXL files. Image2JXL supports local batch import and output review, so you can find a failed or unsupported input before changing the original folder.
5. Keep the originals until verification is complete
Do not delete the JPEGs immediately. First restore a sample JXL file to JPEG and compare hashes, or compare decoded pixels when you used a pixel-lossless path. Once the archive has passed that check, decide whether the original JPEGs should remain beside the JXL files or move to a backup location.
What Image2JXL Supports
Image2JXL focuses on JPEG XL rather than trying to be a universal image converter.
| Direction | Supported formats and workflow |
|---|---|
| Encode to JPEG XL | JPEG, PNG/APNG, GIF, TIFF, BMP, EXR, NetPBM, and PFM |
| Export from JPEG XL | JPEG, PNG, or GIF for apps and websites that do not accept JXL |
| Local workflow | Individual files, folders, drag and drop, batch status, and local output |
| Metadata | Supported EXIF and XMP can be preserved when the selected conversion path allows it |
The current import pipeline does not accept WebP, AVIF, HEIC/HEIF, TGA, PSD, RAW, SVG, PDF, or ICO as image-to-JXL inputs. If your source library is primarily WebP or AVIF, use a converter designed for those formats first, then bring a supported output into Image2JXL.
Convert a Single JPEG with cjxl
Image2JXL is the easier choice when you want a visual workflow. The reference JPEG XL tools are useful when you need a repeatable command-line process or want to inspect the exact encoder settings.
Install the libjxl command-line tools, then confirm that both commands are available:
cjxl --version
djxl --version
For an explicit lossless JPEG conversion, use distance 0:
cjxl -d 0 photo.jpg photo.jxl
The -d 0 setting tells the encoder not to discard image information. For a supported JPEG input, keep JPEG reconstruction enabled if you want the option to rebuild the original JPEG:
cjxl -d 0 -e 8 --allow_jpeg_reconstruction=1 photo.jpg photo.jxl
Here, -e 8 increases encoder effort. It may produce a smaller file, but it can take longer to finish. It does not make the output more visually lossless; distance 0 already defines the lossless target.
To reconstruct the JPEG later, use a .jpg or .jpeg output name:
djxl photo.jxl photo-recovered.jpeg
The reconstruction only works when the JXL file contains the required JPEG reconstruction data and the source JPEG is supported by that path. A JXL file made from pixels can still produce an identical-looking JPEG, but it cannot recreate the original JPEG codestream byte for byte.
Batch Convert a JPEG Folder Locally
For a simple folder conversion, write the JXL files to a separate directory so the source files remain untouched:
mkdir -p jxl-out
for f in *.jpg *.jpeg; do
  [ -e "$f" ] || continue
  cjxl -d 0 "$f" "jxl-out/${f%.*}.jxl"
done
Image2JXL provides the same kind of local batch workflow through a native Mac interface. Import a folder, choose the output location, review the per-file result, and keep the source folder until a sample round trip has passed.
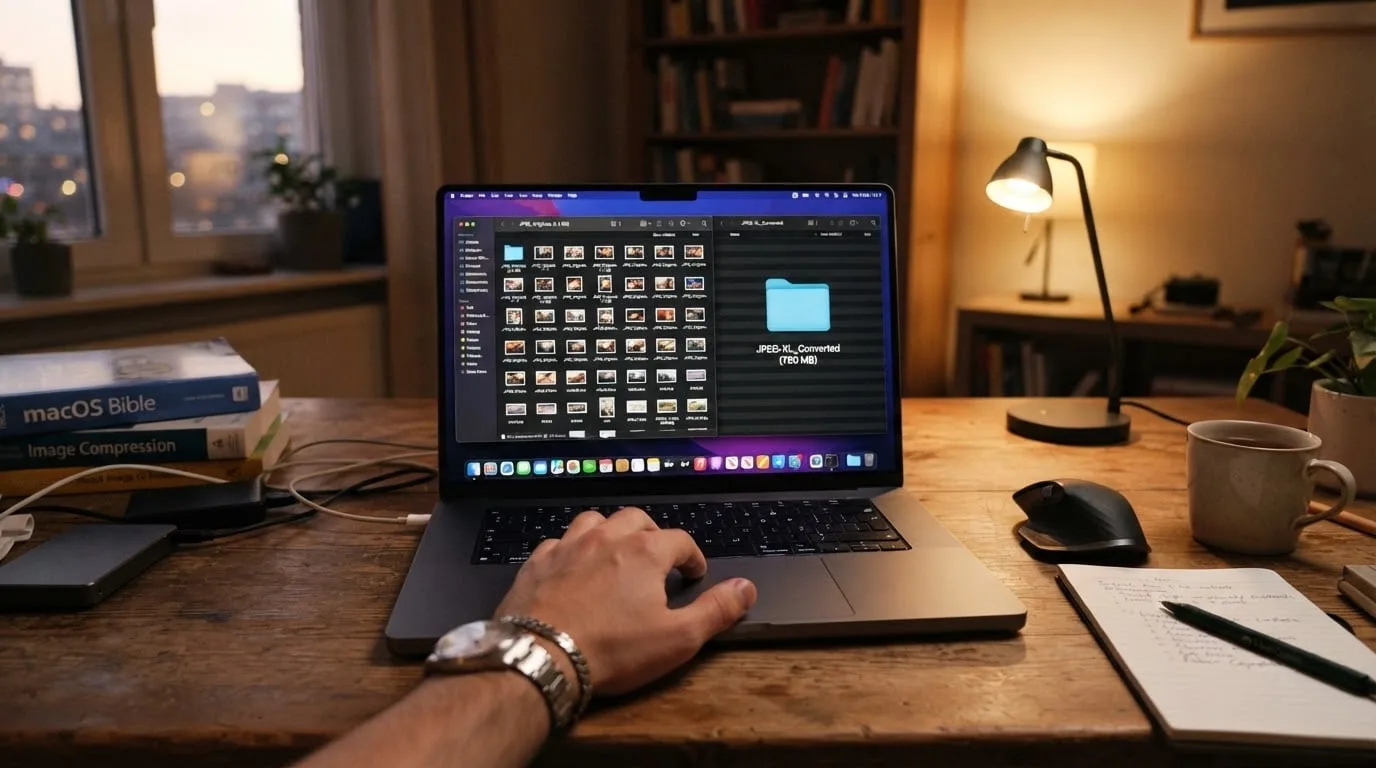
Batch conversion is useful for:
- Archiving a large JPEG photo library.
- Preparing website or app assets in a JXL test folder.
- Comparing JPEG XL sizes across a group of similar images.
- Keeping a repeatable local conversion process without uploading source files.
- Exporting selected JXL files back to JPEG or PNG for broader compatibility.
Verify That the JPEG-to-JXL Conversion Is Lossless
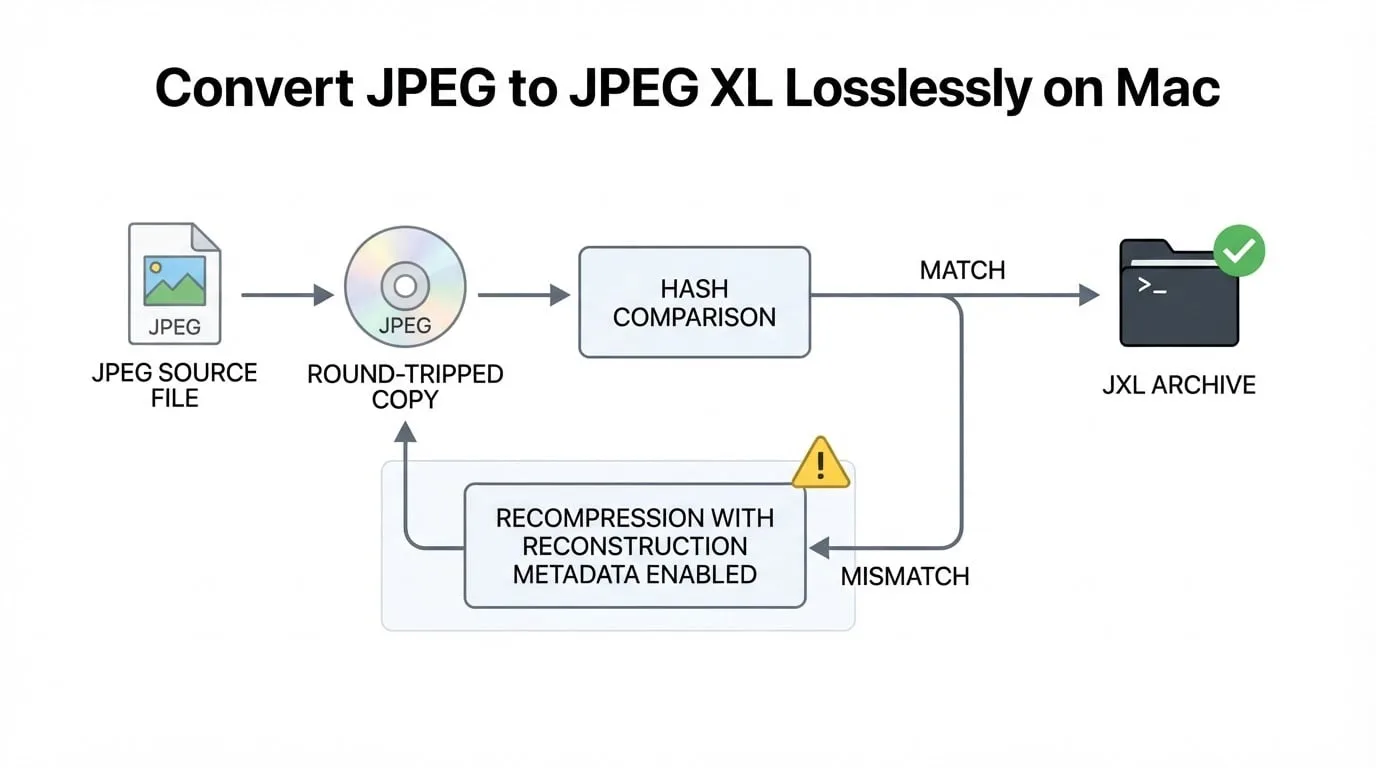
The strongest test for reversible JPEG recompression is a SHA-256 comparison. Restore one JXL file, hash both JPEG files, and compare the results:
djxl jxl-out/photo.jxl photo-recovered.jpeg
shasum -a 256 photo.jpg photo-recovered.jpeg
Matching hashes show that the recovered JPEG is byte-for-byte identical to the source JPEG. A mismatch does not automatically mean the image is visibly different; it may mean that the JXL file used pixel-lossless encoding or that reconstruction metadata was not retained.
For pixel-lossless output, compare decoded images instead of JPEG file hashes. Decode both the source JPEG and the JXL file to a lossless raster format such as PNG, then use an image comparison tool. Matching pixels confirm that the picture survived even though the original JPEG container cannot be rebuilt.
After a batch conversion, check three things:
- Every JXL file decodes without an error.
- A representative sample restores to matching JPEG hashes when reversible recompression was selected.
- EXIF and XMP metadata are present when the selected Image2JXL or
cjxlpath is expected to preserve them.
Settings That Can Change the Result
Several options can quietly change a lossless archive into a lossy or non-reversible workflow.
Distance above zero
A distance such as -d 1 can look excellent, but it is not mathematically lossless. Use -d 0 when identical pixels are required.
JPEG reconstruction disabled
If reconstruction metadata is disabled or removed, the original JPEG cannot be rebuilt from the JXL file even if the decoded pixels remain identical. Keep reconstruction enabled for a reversible JPEG archive.
Metadata stripping
Stripping EXIF may conflict with JPEG reconstruction. If the source JPEG may need to be restored exactly, keep the reconstruction metadata and avoid a metadata-cleaning step that removes it.
Exporting with djxl -j
The -j or --pixels_to_jpeg option creates a new JPEG from decoded pixels. That is useful for compatibility, but it is not the same as reconstructing the original JPEG file. Use it for a new delivery JPEG, not for an archival round-trip check.
When Should You Use Image2JXL?
Image2JXL is a good fit when you want a JPEG XL converter for Mac with a native interface and local batch processing. It is especially useful when you need to:
- Convert JPG files to JXL without uploading them.
- Keep a reversible JPEG workflow for supported JPEG sources.
- Convert folders instead of repeating a one-file command.
- Review per-file conversion status before touching the originals.
- Preserve supported EXIF and XMP metadata where the selected path allows it.
- Export JXL files to JPEG, PNG, or GIF for software that does not support JPEG XL.
It is less suitable when your starting files are mostly WebP, AVIF, HEIC, RAW, PSD, or PDF, because those formats are outside the current Image2JXL import pipeline.
Should You Keep the Original JPEG Files?
Keep the original JPEGs until the JXL archive has been verified and backed up. After a matching hash confirms reversible reconstruction, the JXL file can serve as a smaller archival copy. Whether you remove the JPEG afterward depends on your compatibility needs:
- Keep JPEG copies for sharing with any app, browser, or service.
- Keep JXL as the archive when storage size matters and your tools can export it when needed.
- Keep both when the images are irreplaceable or you need a simple recovery path.
JPEG XL makes the decision reversible only when the conversion path and verification prove that the original JPEG can be reconstructed. A smaller file is not enough evidence by itself.
Frequently Asked Questions
Is JPEG XL lossless?
Yes, JPEG XL supports lossless compression. For JPEG input, distinguish reversible JPEG recompression from pixel-lossless encoding: both can preserve the picture, but only the reversible path can restore the original JPEG bytes when reconstruction data is retained.
Can I convert JXL back to JPEG on a Mac?
Yes. Image2JXL can export JPEG XL files to JPEG, PNG, or GIF. For an exact JPEG archive, use the reversible reconstruction path where supported; otherwise, the app can still create a new compatible JPEG from decoded pixels.
Does Image2JXL upload my images?
No. Image2JXL is built for local conversion on Mac, so the selected files are processed on your device rather than uploaded to an online converter.
Can Image2JXL batch-convert JPEG files?
Yes. Import individual files or a folder, run the conversion locally, and review the status of each item before organizing the output.
Does Image2JXL convert WebP or AVIF to JPEG XL?
Not in the current import pipeline. WebP and AVIF are intentionally unsupported image-to-JXL inputs, along with HEIC/HEIF, RAW, PSD, SVG, PDF, and ICO.
Download Image2JXL for Mac
For a visual, local workflow, download Image2JXL from the Mac App Store. Use the app to import a JPEG or folder, choose the appropriate JPEG XL path, review the output, and verify a sample before archiving the originals.
For a shorter introduction to the app, read the Image2JXL product guide. The HP60 product team is responsible for this article. The publication date above identifies this content version; product behavior may change after release, so consult the linked product and support pages for current limits.Content responsibility