Turn Document Photos into Print-Ready PDFs Offline with Imgs2PDF
Paper documents are often easiest to capture as images. A worksheet, handwritten draft, receipt, form, or class handout can be photographed in seconds, but the result may still need a cleaner crop, better contrast, and a PDF layout that is comfortable to print.
Imgs2PDF provides a simple local workflow for that job. You can crop the page, choose a document filter, and export the result as a PDF without uploading the original image to a server or sending it to an AI service.
What this workflow does—and what it does not do
This workflow processes the image itself:
- It runs on the device and does not require an internet connection for the image-editing and PDF-export steps.
- It uses predictable image adjustments for cropping, contrast, brightness, and document presentation.
- It creates a PDF whose pages are based on the processed images.
This specific crop, filter, and PDF-export workflow does not add an OCR text layer or translate the page. The words remain part of the page image, which is often exactly what you want when the goal is to print, archive, or share a faithful copy of the original document. Imgs2PDF offers OCR as a separate workflow when you need recognized text.
The three-step workflow
1. Crop the page to its real edges
Open the image in Imgs2PDF and choose Crop. Use Freeform when the paper was photographed at an angle, then move the four corner handles to the actual page boundary.
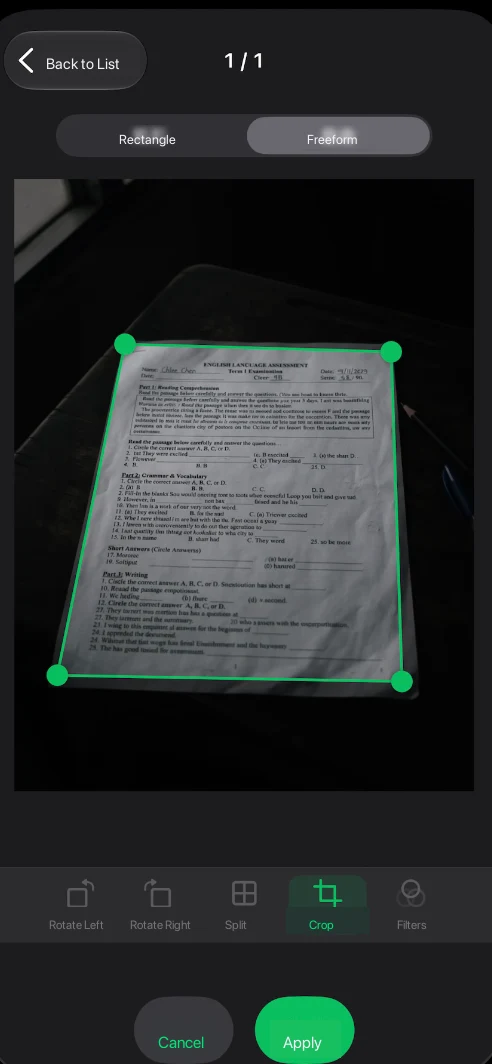
Cropping first removes desk edges and dark background areas before the document filter is applied. Keep every corner of the paper inside the crop. If a seal, handwritten note, or margin is important, leave a small amount of space around it rather than cutting tightly into the content.
2. Compare the document filters
After confirming the crop, open Filters. Imgs2PDF shows a live preview with four choices:
- Original keeps the captured appearance.
- Enhance improves readability while retaining more of the original tone and color.
- Print is a document-focused option for pages that will be printed or read as a PDF.
- B&W pushes the page further toward black and white.
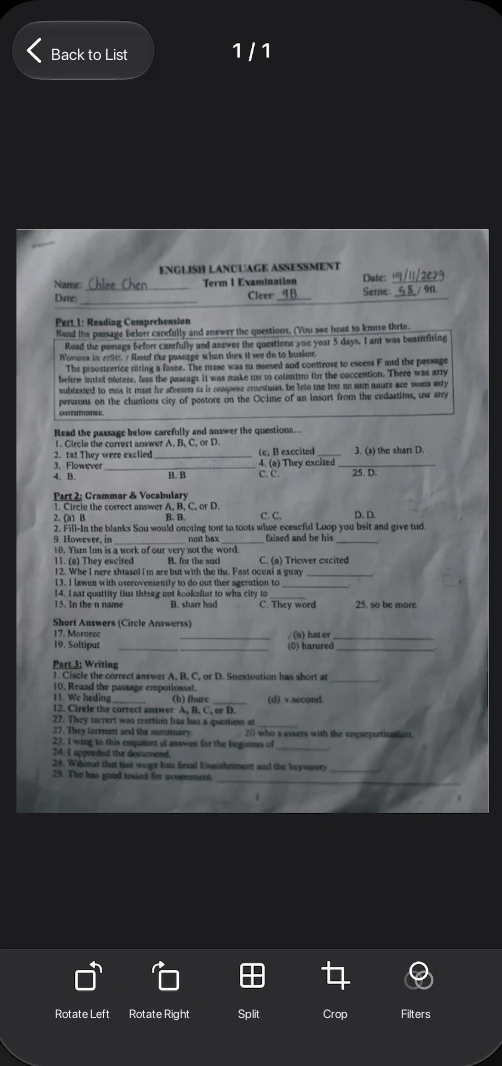
For a page with dark characters on light paper, start with Print. Compare it with Enhance when the page contains colored stamps, pencil marks, or annotations. Use B&W only when removing most color produces a clearer result.
3. Apply the result and export a PDF
Choose Print and inspect the preview. When the text, margins, and important marks look right, tap Apply and continue to the PDF export flow.
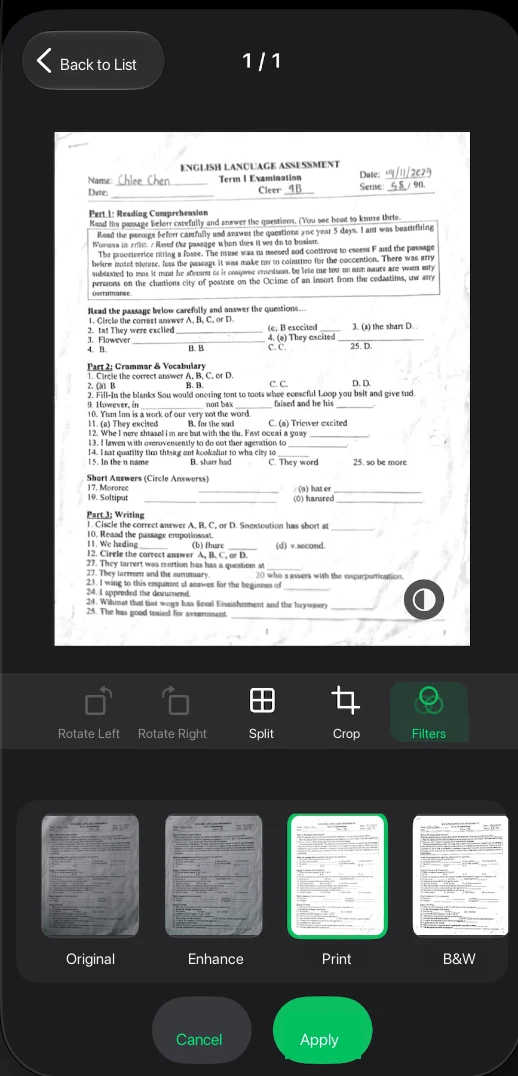
The Print preset changes the presentation of the image; it does not control a physical printer or select a paper size by itself. Choose the PDF page size, orientation, and other export settings separately. The final PDF remains an image-based document, so the printed page preserves the appearance of the source photo rather than reflowing its text.
If the exported file exceeds an upload limit, you can compress the PDF and check the text and important marks again before sharing.
Why process it locally without AI?
For personal papers, schoolwork, contracts, and unpublished drafts, keeping the original image on the device can be more important than using a cloud service. A local workflow means you can prepare the page while offline and decide for yourself when—or whether—the finished PDF should be shared.
Avoiding AI also makes the result easier to predict. This workflow is not rewriting, translating, summarizing, or guessing what a character means. It adjusts the page image you selected. That is useful when the exact shape of characters, handwriting, stamps, diagrams, or margins must remain unchanged.
Choosing the right preset
| Preset | Best starting point | Trade-off |
|---|---|---|
| Original | You need the closest copy of the captured image | Shadows and uneven lighting remain visible |
| Enhance | The page has faded text but important color | Some paper texture and background may remain |
| The page is mainly text and will be printed or shared | Some color and photographic detail may be reduced | |
| B&W | The page is mostly monochrome and needs stronger separation | Colored stamps and annotations may disappear |
Preview the result before applying it. A stronger filter cannot recover text that is out of focus, hidden by glare, or outside the crop.
Practical tips for document photos
- Photograph the entire page before cropping so that no characters near the edge are lost.
- Use Freeform crop for perspective correction, but do not treat it as OCR or automatic text reconstruction. Use Imgs2PDF's separate OCR workflow when you need recognized text.
- Compare Enhance and Print when the page includes red seals, blue handwriting, or colored highlights.
- Keep Original until you have checked the exported PDF.
- For a multi-page set, review every thumbnail before applying the same preset to all pages; lighting can change from one page to the next.
- If the paper is badly blurred, wrinkled, or reflected, recapture it in better light instead of expecting a filter to recreate missing detail.
Frequently asked questions
Does Imgs2PDF recognize text?
Not in this image-to-PDF workflow. The text remains part of the page image. Use this workflow when you need a faithful printable copy, and use Imgs2PDF's separate OCR workflow when you need editable text.
Do I need an internet connection?
The crop, filter, and PDF-export workflow is designed to run locally on the device. You can prepare the PDF offline; sharing it later is a separate choice.
Is the PDF searchable?
The output described here is image-based. It preserves the visual page, but it does not automatically add an OCR text layer.
Should I choose Print or Black & White?
Choose Print first for most text pages. Compare B&W when the document is almost entirely monochrome and stronger contrast is more useful than preserving color.
A private path from photo to paper
The workflow is intentionally straightforward: crop the photographed page, compare the document filters, apply the one that fits the content, and export a PDF. No upload and no AI interpretation are required for these steps.
For more image-to-PDF workflows, visit the Imgs2PDF product page or read the guide to scanning documents and using document filters on iPhone and iPad. The HP60 product team is responsible for this article. The publication date above identifies this content version; product behavior may change after release, so consult the linked product and support pages for current limits.Content responsibility